Updated on 4/22/5015
Note: Only the front-side alignment can be carried out in the present configuration.
1 Start
1.1 UV Lamp Start UP
1.2 Main Power Start Up
2 Set Up Photo Mask
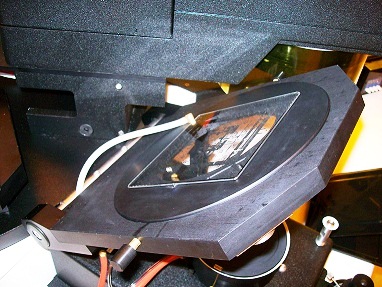
2.1 Replace Photo Mask Holder
2.2 Load Photo Mask
3 Set Up Sample
3.1 Replace Sample Chuck
3.2 Load Sample
4 Non-Alignment Procedure
4.1 Contact
4.2 Exposure
5 Alignment Procedure
5.1 Contact
5.2 Alignment
5.3 Exposure
6 Unload Mask and Sample
7 Stand by
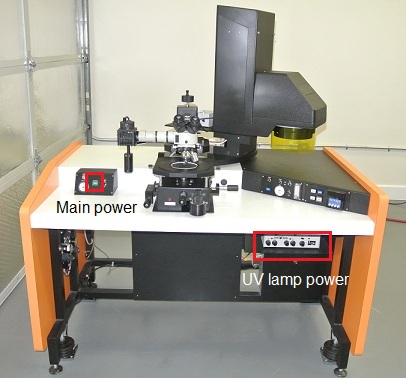
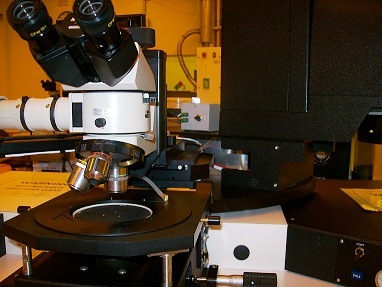
1. Locate the UV lamp power supply underneath the right side of the tool.
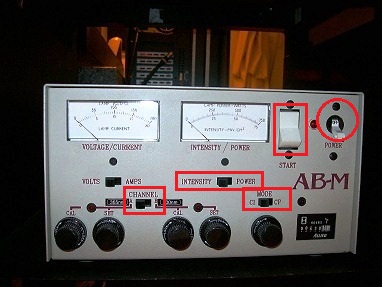
2. Turn on the UV lamp power supply.
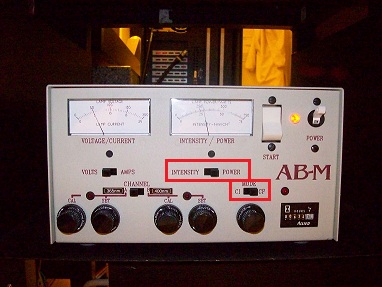
3. Set the "INTENSITY/POWER" switch to "POWER".
4. Ensure that the power supply "MODE" is CP (Constant Power).
5. Press the "START" button.
6. The UV lamp power will increase slowly. Ensure that the UV lamp power reading is 275 W.
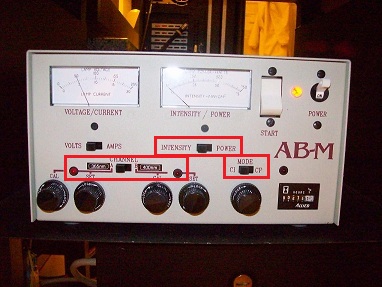
7. Flip the Set the "INTENSITY/POWER" switch to "INTENSITY".
8. Ensure that the power supply "MODE" is set to CI (Constant Intensity).
9. Choose the UV wavelength "CHANNEL", A 365 nm or B 400 nm, depending on the resist.
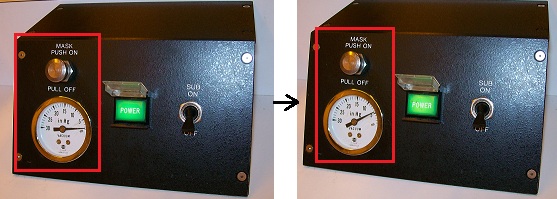
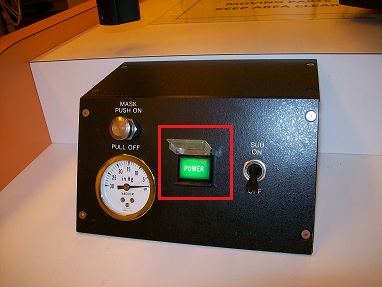
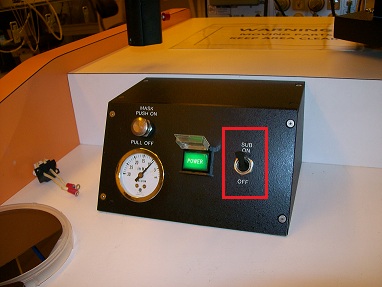
1. Turn on the main power of ABM3000HR.
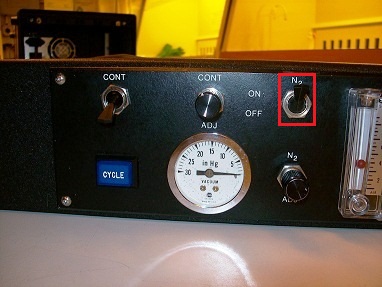
2. Turn on N2 gas flow.
3. Ensure that N2 glow is 3-5 psi.
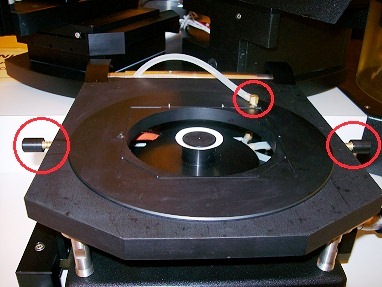
1. Loosen the set screws on the both sides of the mounted mask holder.
2. Remove the vacuum tubing from the mask holder.
3. Replace one mask holder by the other.
4. Tighten the set screws on the both sides.
5. Connect the vacuum tubing to the mask holder.
1. Before loading the mask, ensure that the sample chuck is positioned lower than the mask holder opening.
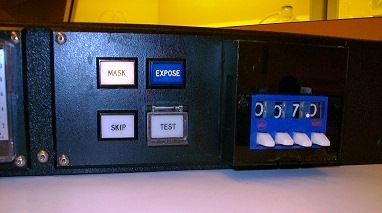
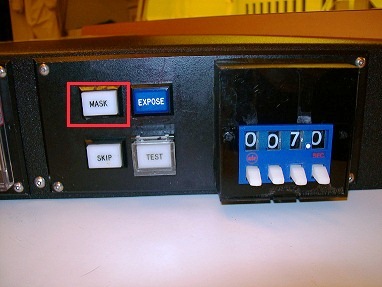
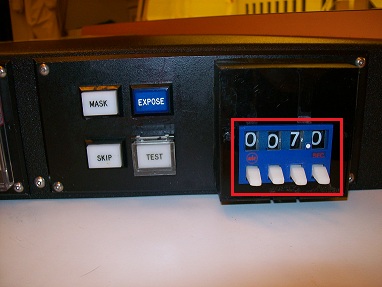
2. Press the "MASK" button on the right side of the tool. The button will be highlighted, and the mask holder will be tilted upward.
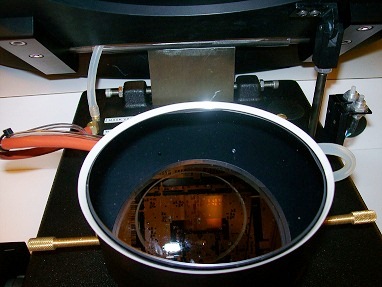
3. Place the mask at the proper location on the holder, using the three guide pins.
4. Press the mask vacuum button, and you will see the vacuum reading of ~ 20 inHg.
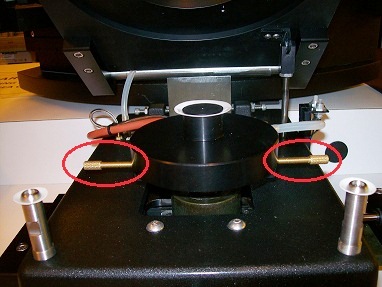
1. Loosen the set screws on the both sides of the sample chuck.
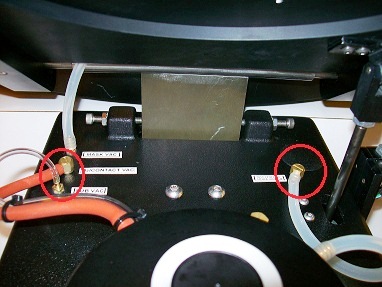
2. Remove the three vacuum tubes (chuck vacuum, sub vacuum, and N2/contact vacuum) from the sample stage assembly.
3. Replace one sample chuck by the other.
4. Tighten the set screws on both sides.
5. Connect the three vacuum tubes on the sample chuck to the sample stage assembly.
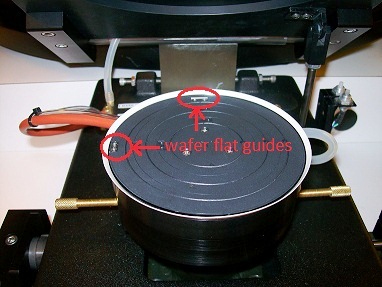
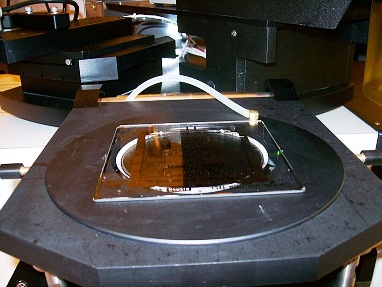
1. Place your wafer (or a small piece of the sample if using another sample chuck) at the proper location on the sample chuck, using the wafer flat guides.
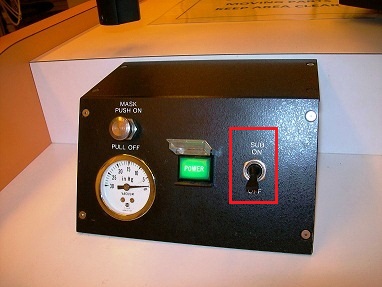
2. Turn on the sample vacuum (SUB) switch.
3. Press the "MASK" button on the right side of the tool. The highlight will be turned off, and the mask holder will return to the home position.
1. Ensure that there is some space between the mask and the sample.
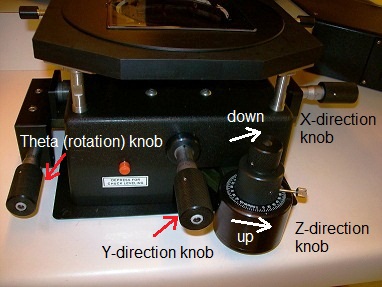
2. Raise the sample chuck by rotating the top Z-direction micrometer knob counter-clockwise until it slips.
3. Press and hold the red "Chuck Leveling" button to release the chuck holding, located on the front left of the stage assembly.
4. Rotate the bottom Z-micrometer knob counter-clockwise while pressing the "Chuck Leveling" button, to evenly contact the sample with the mask.
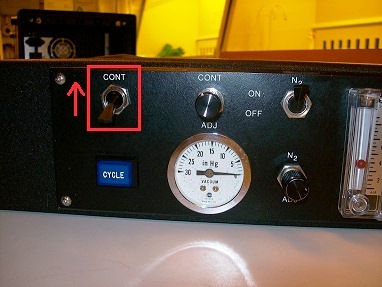
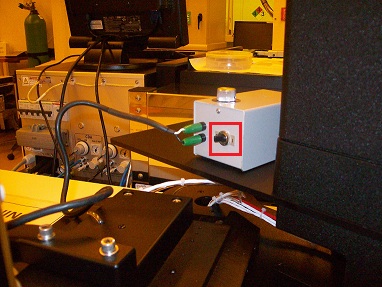
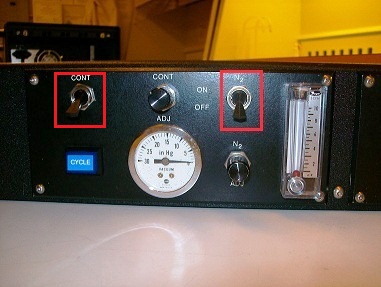
5. Turn on the contact vacuum switch, located on the right side of the tool (labeled "CONT").
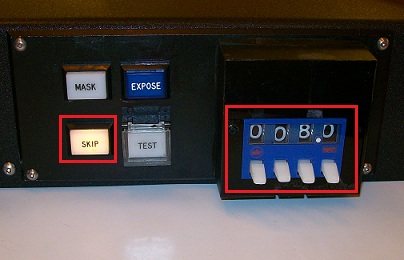
1. Set the exposure time.
2. Press the "SKIP" button.
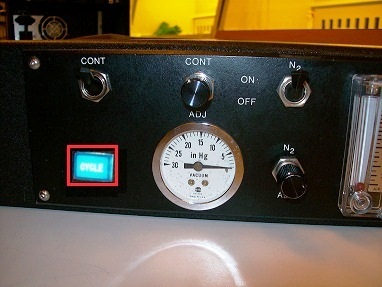
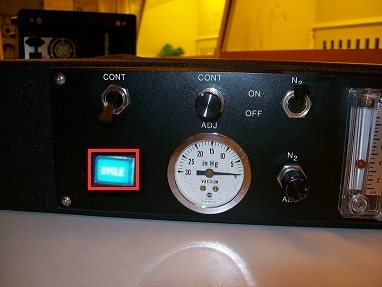
3. Press the "CYCLE" button, and the microscope module will start moving.
4. Once the microscope module moves away from the stage assembly, release the "SKIP" button.
5. The UV lamp module will stop over the mask stage assembly, and the exposure will start automatically.
6. Press the “CYCLE” button once again to return the UV lamp module to the home position.
1. Ensure that there is some space between the mask and the sample.
2. Raise the sample chuck by rotating the top Z-direction micrometer knob counter-clockwise until it slips.
3. Press and hold the red "Chuck Leveling" button to release the chuck holding, located on the front left of the stage assembly.
4. Rotate the bottom Z-micrometer knob counter-clockwise while pressing the "Chuck Leveling" button, to evenly contact the sample with the mask.
5. Make a mark at the position, using the screw on the bottom knob, if necessary.
6. Lower the sample chuck a little for the alignment, using the bottom knob.
1. Press the "CYCLE" button to move the microscope module to the mask stage assembly automatically.
2. Turn on the lamp for the microscope.
3. After focusing on the sample, make an alignment between the mask and the sample, using X-, Y-, and theta-direction micrometers.
4. After the alignment, turn on the contact vacuum switch on the right side of the tool ("CONT").
1. Set the exposure time.
2. Press the "CYCLE" button to move the UV lamp module to the mask stage assembly.
3. The exposure starts automatically.
4. Press the “CYCLE” button once again to return the UV lamp module to the home position.
1. Turn off N2 gas flow and the contact vacuum ("CONT") switch.
2. Press the "MASK" button on the right side of the tool to raise the mask holder.
3. Turn off the mask vacuum button (pull the button out) .
4. Remove the mask from the mask holder.
5. Turn off the sample vacuum (SUB) switch.
6. Remove the sample from the sample chuck.
1. Press the "MASK" button on the right side of the tool, to return the mask holder to the home position.
2. Turn off the lamp for the microscope.
3. Ensure that the sample chuck is positioned below the mask chuck.
4. Ensure that X-, Y-, and theta-micrometer knobs are set back to be ~5.0.
5. Turn off the main power switch of ABM3000HR.


