
Updated on 5/1/2017
Notes
Safety
Please read the Safety instructions located in Section 1 of the tool manual.
This system uses vacuum, high temperatures, and toxic, flammable, and pyrophoric (igniting in air spontaneously) materials.
1 Check-in
2 Loading Samples
3 Performing a Deposition
4 Unloading Samples
5 Placing the Tool in Standby Mode
6 Check-out
7 Creating a new Recipe
8 Supplemental Document
9 Troubleshooting
1. Log-in on the ISIS scheduler.
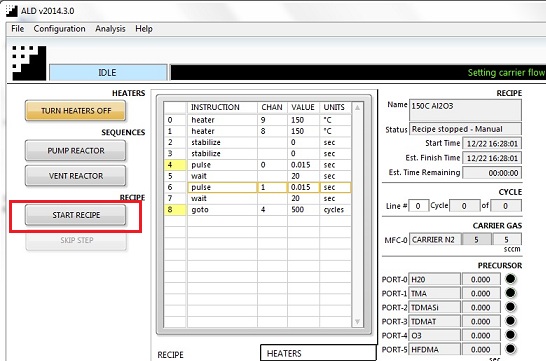
1. Ensure that no recipe is being run (“START RECIPE” must be read on the RECIPE button).
2. Ensure that the measured temperatures on heaters 6, 7, 8, 9 and 10 are set up at 150 °C.
3. Set up the N2 flow at 100 sccm.
4. Click the “VENT REACTOR” button.
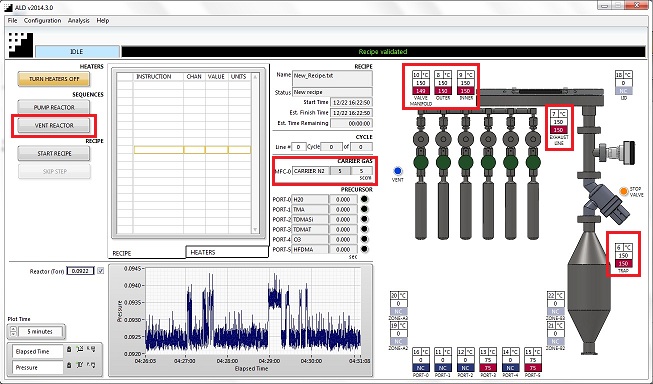
5. Wait for the pressure to stabilize at 760 Torr.
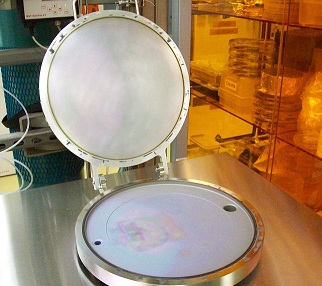
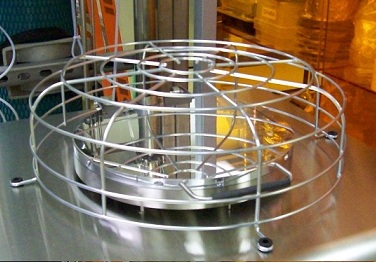
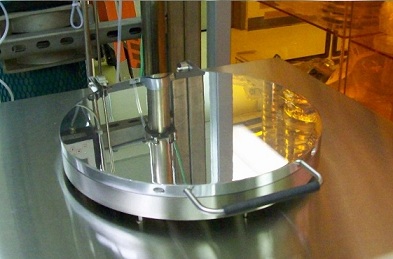
6. Remove the large wire “basket” covering the process chamber.
7. Open the lid and quickly load your samples.
8. Close the lid and click the “PUMP REACTOR” button.
9. Place the basket on top of the tool.
10. Wait a few minutes with the flow at 100 sccm.
11. Set up the N2 flow at 20 sccm.
12. Wait for the base pressure to stabilize.
1. Right click on the Process Sequence Table on the right side of the “Process” tab, so that a list of commands pops up.
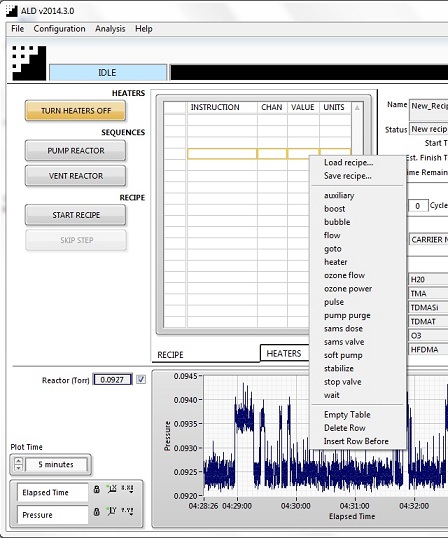
2. Select “Load recipe” to open a list of recipe files.
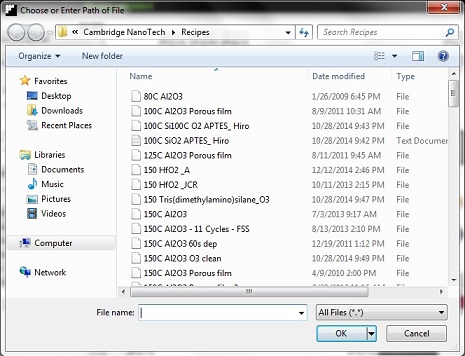
3. Choose a recipe file.
4. Click the “START RECIPE” button.
Tip:
1. If the warning dialog box on "pressure too high error" shows up during run, click "OK".
2. Choose "System" from the drop down menu of Configuration in the menu.
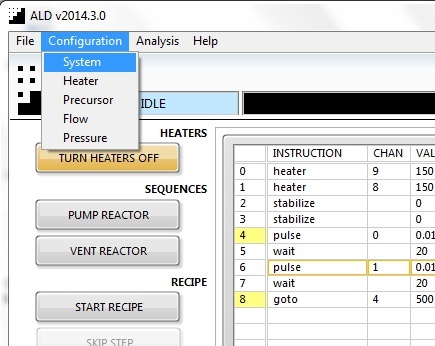
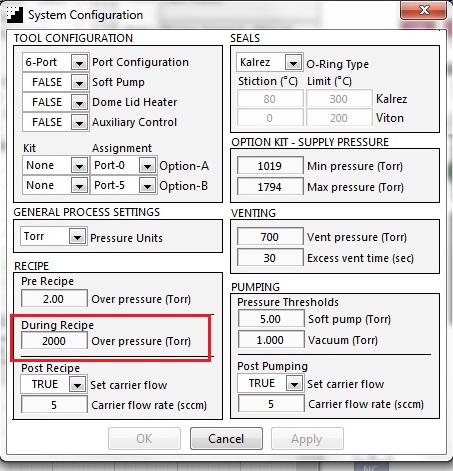
3. The following dialog box appears.
4. Change the overpressure pressure threshold (Torr).
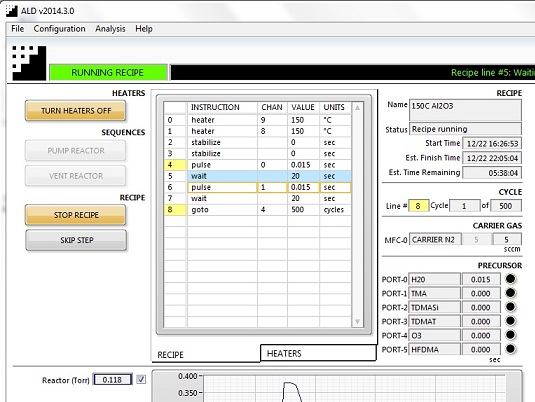
1. Ensure that the process has completed (“START RECIPE” must be read on the RECIPE button).
2. Set up the N2 flow at 100 sccm.
3. Click the “VENT REACTOR” button.
4. Wait for the pressure to stabilize at 760 Torr.
5. Remove the large wire “basket” covering the process chamber.
6. Open the lid and quickly unload your samples.
7. Close the lid and push the “PUMP REACTOR” button.
8. Place the basket on top of the tool.
9. Wait a few minutes with the N2 flow at 100 sccm.
10. Set up the N2 flow at 20 sccm.
11. Wait for the base pressure to stabilize.
1. Ensure that no recipe is running (“START RECIPE” must be read on the RECIPE button).
2. Set heaters 6 through 10 at 150 °C.
3. Set heaters 11, 12, 14, and 16 at 0 °C.
4. Set heater 13 at 75 °C.
5. Set heater 15 at 75 °C.
6. Set up the N2 flow at 5 sccm.
1. Log-out on the ISIS scheduler.
a) The pressure profile does not show the precursor pulse.
-> The precursor in the small tank may be run out. Consult the staff.
b) The sample piece moves around when the precursor and/or N2 gases are introduced.
-> Place the sample in a washer in the chamber.
c) The vacuum in the chamber is not good.
-> An O-ring might be deteriorated. Consult the staff.
-> A vacuum pump may be malfunctioning. Consult the staff.
d) Pressure sensor fails.
-> Reset the pressure sensor. Consult the satff.
Revisions
5/1/2017, by Hiro, added Troubleshooting