Updated on 7/26/2019
Note:
1. "Allowed" and "Not Allowed" materials to be etched
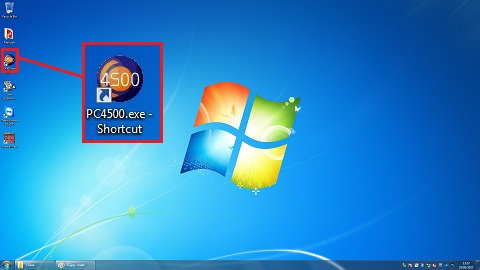
1 Ensure Oxford Software interface is running
2 Log in
3 Conditioning the main chamber
3.1 Dammy wafer
3.2 Load a conditioning recipe
3.2 Edit/review a recipe
3.3 Run
4 Vent the load lock
5 Load the sample
6 Pump-down the loadlock
7 Process the sample
7.1 Load a recipe
7.2 Edit/review a recipe
7.3 Run
8 Unload sample from loadlock
9 Cleaning the main chamber
9.1 Load a cleaning recipe
9.2 Edit/review a recipe
9.3 Run
10 Log out
11 Supplemental Documents
1. Click the left logo on the top of the screen.
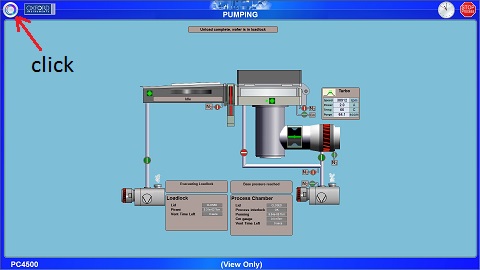
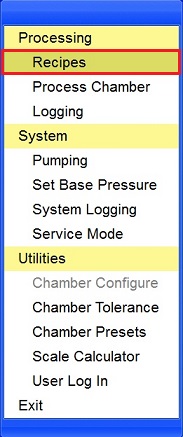
2. The following drop-down menu appears.
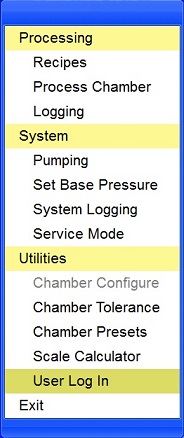
3. Select "User Log In" from the drop-down menu.
4. The following dialog box appears.
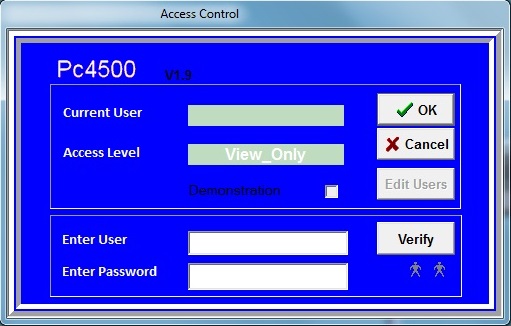
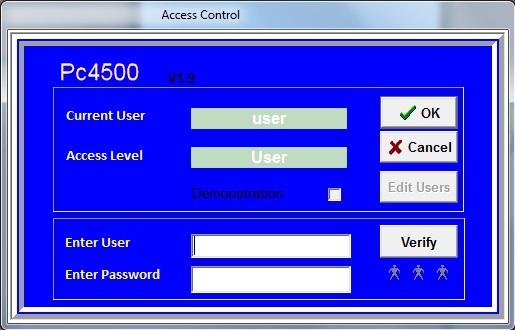
5. Enter "user" into both "User" and "Password" fields in the lower box of the access control window, then click "verify".
6. Ensure that Current User and Access Level show "user" and "user", respectively, on the bottom of the screen. Then, click "OK".
Note:
1. The dammy wafer for protecting the sample chuck during conditioning depends on the material etched.
2. You should consult the staff about the conditioning time for the sacrificial film.
1. Make sure that either of a dammy wafer, a Si wafer, or a sacrificial film on Si wafer is in the load loak pumped down.
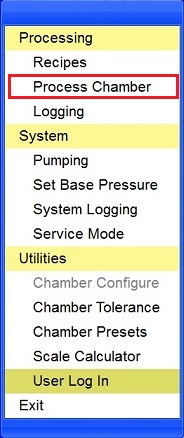
1. Select "Recipes" from the drop-down menu.
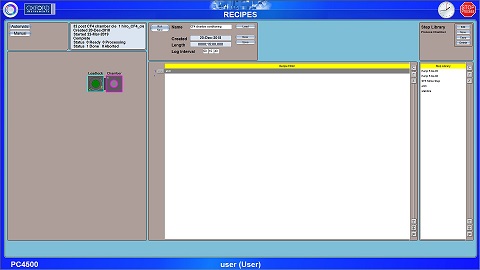
2. The following RECIPES window appears.
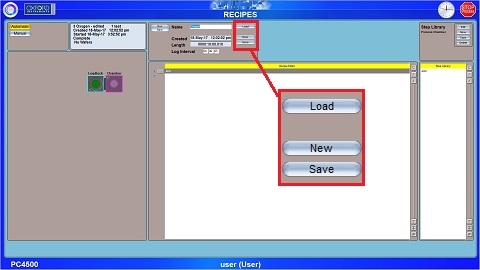
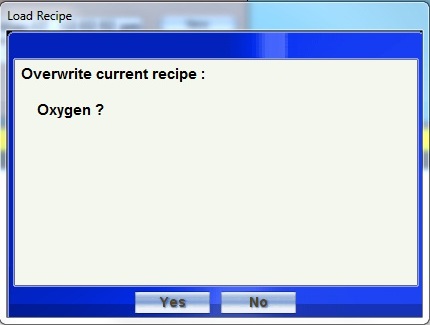
3. On the recipe screen, click "load", and the following window appears, and ask "overwrite current recipe (name)?"
4. Click "Yes".
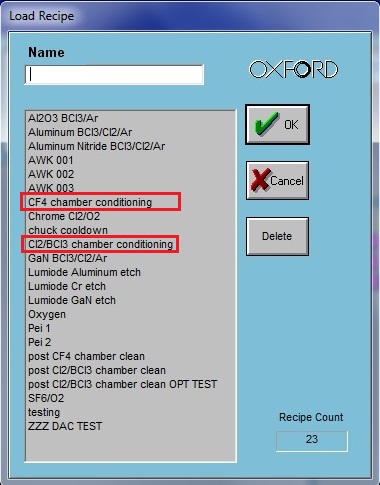
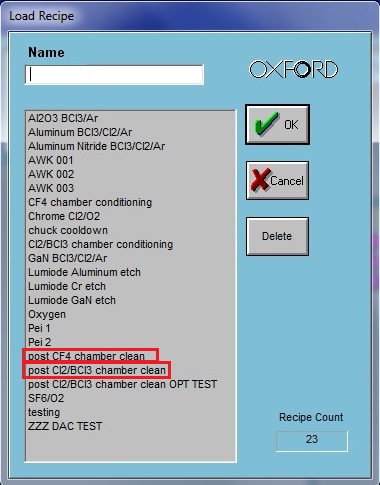
1. The following window appears.
2. Choose a conditioning recipe, and click the "OK" button.
3. The following RECIPE window appears.
4. If you want to change the conditioning time, move a cursor on the recipe line.
Note: If you do not change the conditioning time, go to "Run".
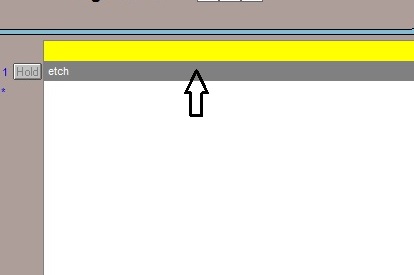
5. Click the recipe line, and the following drop-down menu appears.
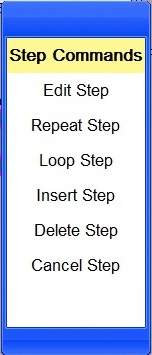
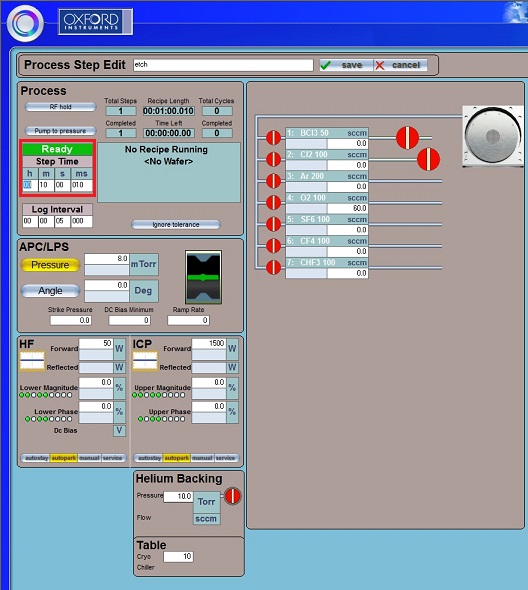
4. To edit/review the given step in the recipe, select "Edit Step" from the drop-down menu.
5. The following window appears.
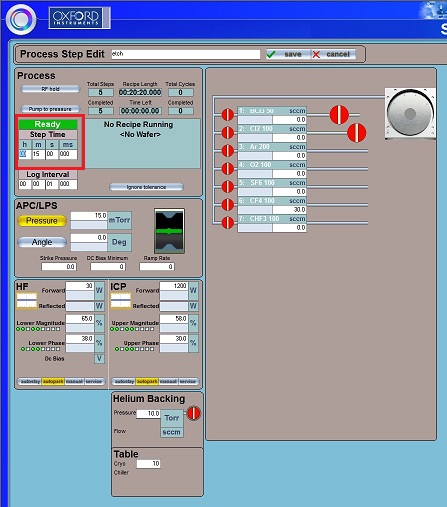
6. Enter the desired step time (HH:MM:SS) in the window.
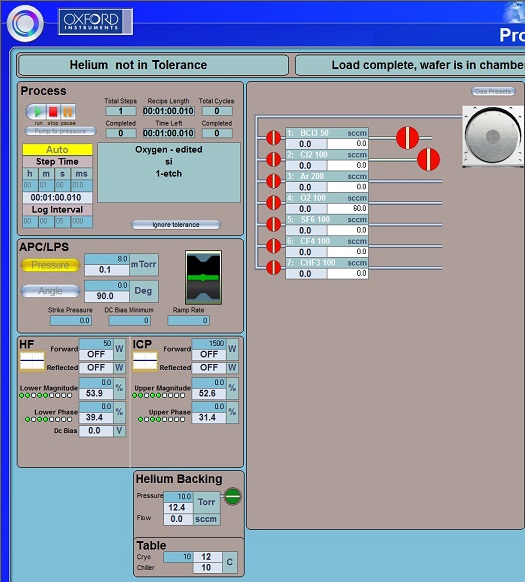
Note: Pressure, gas flow, HF (high frequency) power, ICP (Inductively coupled plasma) power, and Hellium backing pressure should be set up already.
7. Click the "save" button on the top of the screen.
Note: Even if the edited condition is saved for your present process, the default condition will not be changed.
1. The RECIPE window appears again.
2. Click the "Run Now" button to start the current recipe.
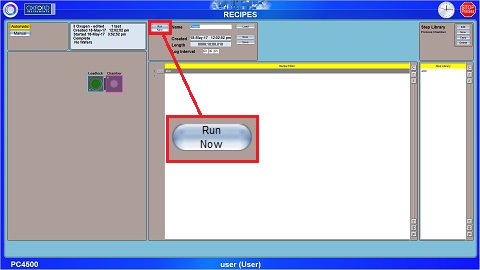
3. The transfer arm in the load lock will be extended and retracted to transfer the Saphia dammy wafer to the main chamber. Then, the recipe will be carried out.
Note:
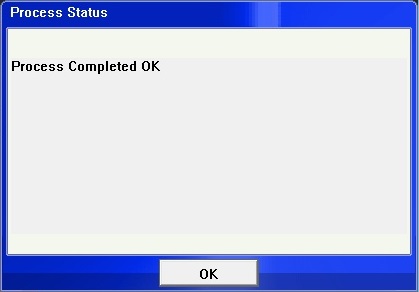
4. When the conditioning process completes, the transfer arm will be extended and retracted again, and the following window appears.
5. Click the "OK" button.
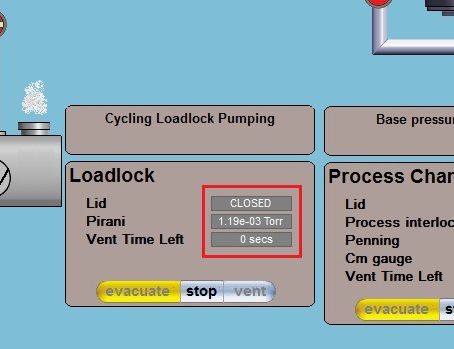
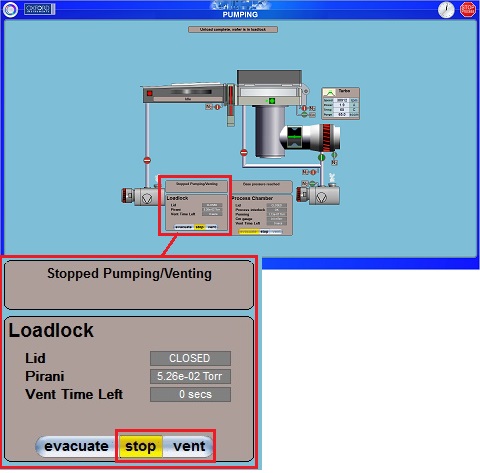
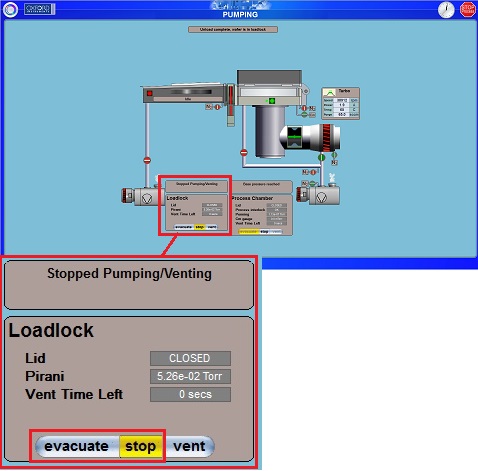
1. Click "stop", and then "vent" in the loadlock pump display on the lower left of the pump control screen (the default screen).
2. Wait until the loadlock display shows "Loadlock Finished Venting"
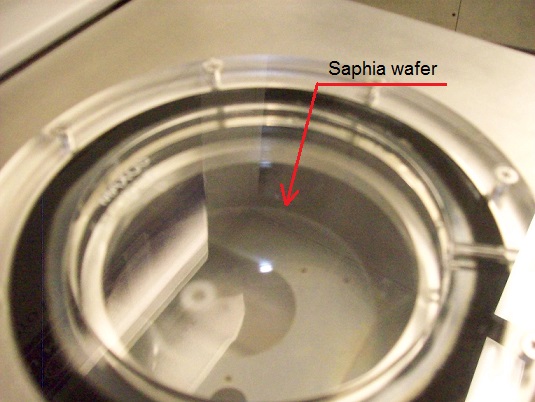
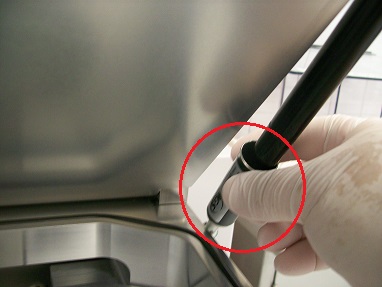
1. Open the loadlock lid, lifting it by its black knob.
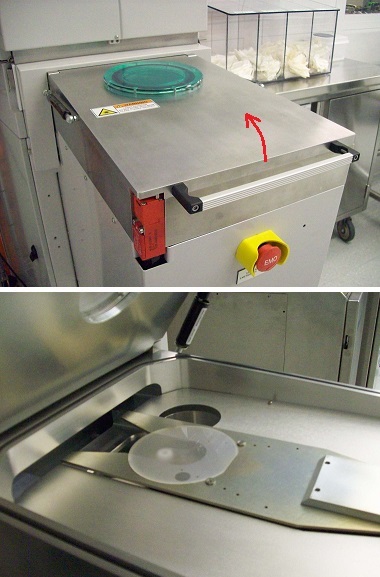
2. Remove the Saphia wafer from the load lock.
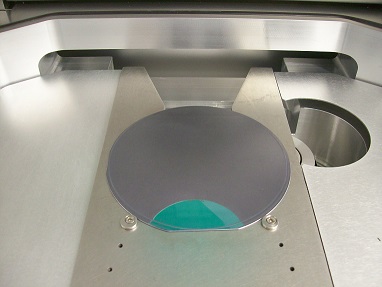
3. Place your wafer against the two wafer stopper on the transfer arm.
3. Close the loadlock lid.
Note:

1. Click "stop", and then "evacuate" in the loadlock pump display.
2. The "Load Wafer or pump loadlock" window appears.
Note: IF YOU CLICK "CANCEL", THE TOOL WILL ASSUME THE LOADLOCK IS EMPTY AND WILL NOT RUN RECIPES (it will only evacuate the loadlock).
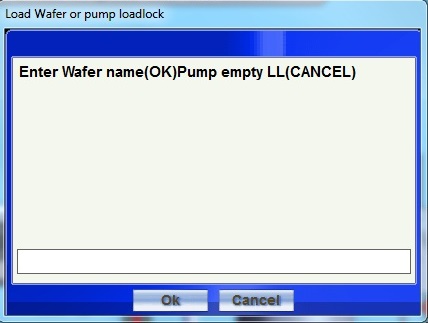
3. Enter the following into the box.
"PennKey" – "Process name" "time"
NOTE: Your PennKey is the name you use when logging into IRIS, not your PENN ID#. The purpose is to have your name appear in the process log file not just a number.
For example,
PennKey – Cr etch process 1 min
OR
PennKey – Post Cl/BCl3 etch cleaning 10 min
4. Click "OK".
1. Load the recipe from a list of recipes in the "Load Recipe" window, as shown in 3.1.
Note:
1. Edit or review the recipe loaded, as shown in 3.2.
2. Enter the desired step time (HH:MM:SS) in the window.
Note: Pressure, gas flow, HF (high frequency) power, ICP (Inductively coupled plasma) power, and Hellium backing pressure should be set up already.
3. Click the "save" button on the top of the screen.
Note:
1. The RECIPE window appears again.
2. Click the "Run Now" button to start the current recipe.
3. The wafer (or carrier wafer) will be loaded into the process chamber & processed, then unloaded to the loadlock.
Note:
4. When the process completes and the wafer is returned to the load lock, the following window appears.
5. Click the "OK" button.
1. Click the left logo on the top of the screen.
2. The following drop-down menu appears.
3. Choose "Pumping" in the menu.
4. Vent the loadlock, as shown above.
5. Once the loadlock pump display shows "Loadlock finished venting", you may open the loadlock to remove your wafer/carrier wafer with sample piece(s).
6. To process another sample, repeat steps 4-8.
7. If the process is done, place the Saphia wafer back in the load lock, and close the loadlock lid and go to the next step.
1. Load the cleaning recipe from a list of recipes in the "Load Recipe" window, as shown in 3.1.
2. Choose a cleaning recipe, and click the "OK" button.
1. The RECIPE window appears again.
2. Click the "Run Now" button to start the current recipe.
3. The transfer arm in the load lock will be extended and retracted to transfer the Saphia wafer to the main chamber. Then, the recipe will be carried out.
Note:
4. When the cleaning process completes, the transfer arm will be extended and retracted again to transfer the Saphia dammy wafer back to the load lock, and the following window appears.
5. Click the "OK" button.
IMPORTANT: Do not log out of the tool through IRIS before the cleaning recipe has finished running. Logging out prematurely will engage the tool interlock and stop the process gas flow, causing a RED ALERT on the tool. This will leave the tool in an unusable state for the next researcher, until the alert can be addressed by Staff, and the next user will need to perform a chamber clean before they can process their samples.
1. Select "User Log In" from the drop-down menu.
2. Leave empty in both "User" and "Password" fields in the lower box.
3. Click the "Verify" button.
Revisions:
7/26/19, by Hiro: added dammy wafers for conditioning
3/25/19, by Hiro: Revice the conditioning and cleaning procedures.
3/26/18, by Keenan: added note regarding premature log-out through IRIS