1 Start up
2 Install Ink Cartridge and Cleaning Pad
3 Pattern to Print
3.1 Load Pattern
3.2 Create your own pattern
3.3 Bitmap File Printing
4 Load Substrate
5 Print Pattern on Substrate
6 Unload Substrate
7 Shut Down
8 Optimization of Ink Jetting
8.1 Saber Angle Check
8.2 Drop Offset Adjustment
8.3 Re-adjustment of Nozzle Velocities
8.4 Maximum Jetting Frequency
9 Supplemental Document
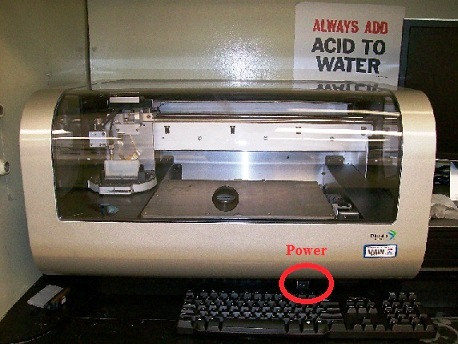
1. Turn on the power of Dimatix injet printer.
2. Click the DMP 2800 icon on the computer screen.
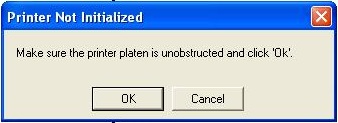
3. The following dialog box shows up. If the printer platen is unobstructed, click "OK".
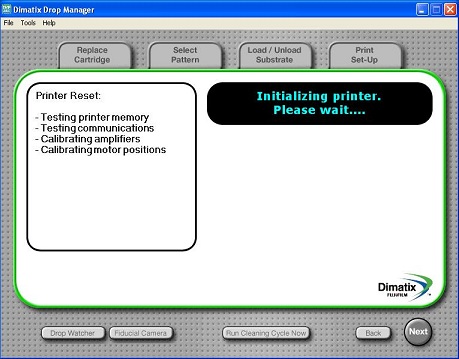
4. Wait until the initialization of the printer is done.
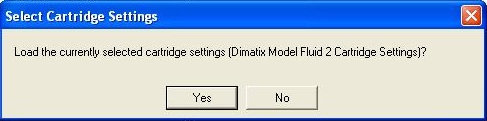
5. The "Select Cartridge Settings" dialog box shows up after the initialization. Click "Yes".
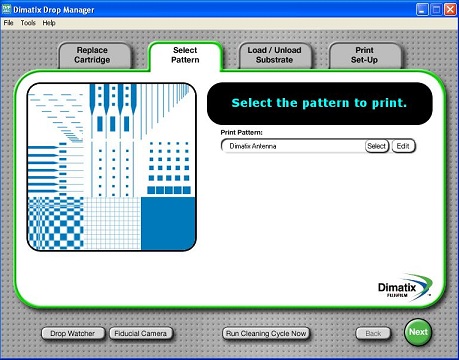
6. The "Select Pattern" tab shows up.
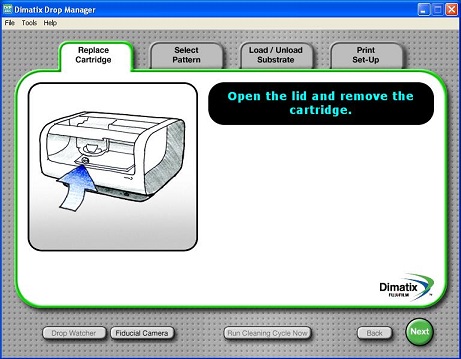
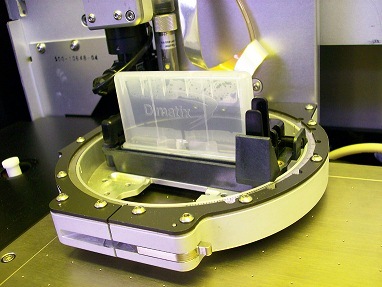
1. Open the "Replace Cartridge" tab.
2. Lift up the lid until it is fully open.
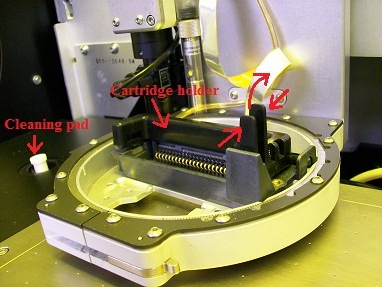
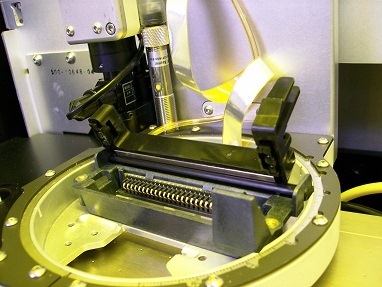
3. Release the cartridge holder latch by squeezing clamps on the right side of the holder.
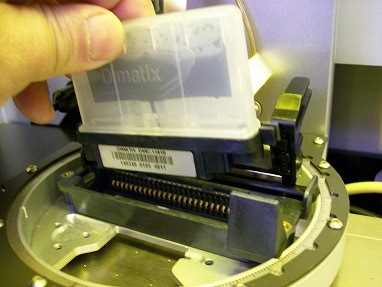
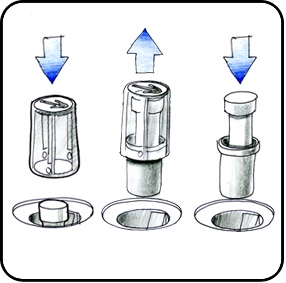
4. Insert an ink cartridge into the cartridge holder (There is only one way for it to fit).
5. Pull the cartridge holder latch forward and down until you hear it click and locks into place.
6. Replace the cleaning pad if necessary.
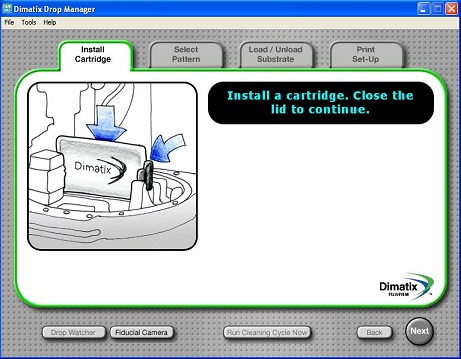
7. Close the lid of the printer.
8. The "Select Cartridge Settings" dialog box shows up again.
1. The "Select Pattern" tab shows up.
2. Click the "Select" button in the "Print Pattern" box in the tab.
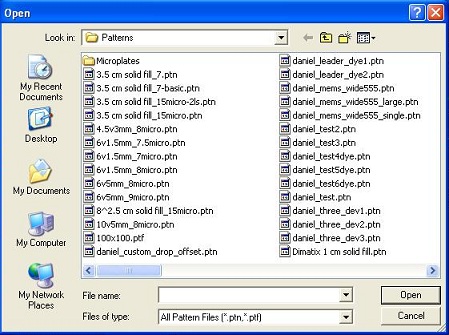
3. Patterns file is opened. Choose the pattern you want to use.
4. Depending on the pattern, the dialog box pops up, and requires the head angle adjustment.
5. Open the lid, and adjust the head angle as the dialog box says.
6. Close the lid.
7. Click the green "Next" button on the bottom of screen to go to the "Load/Unload Substrate" tab.
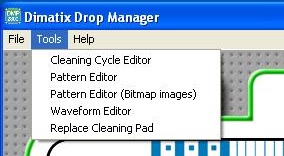
1. Click "Tools" in the menu bar.
2. Choose the "Pattern Editor" from the drop-down menu.
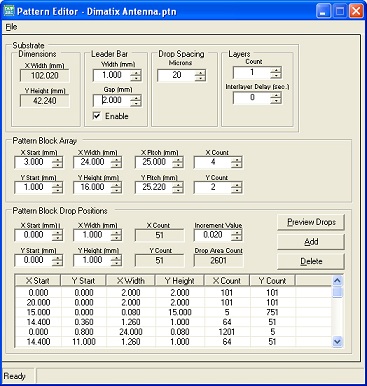
3. Pattern Editor window shows up (See the detail of "Pattern Editor" in Dimatix Recipes).
4. Click the "Preview Drops" button in the middle of the "Pattern Editor" window.
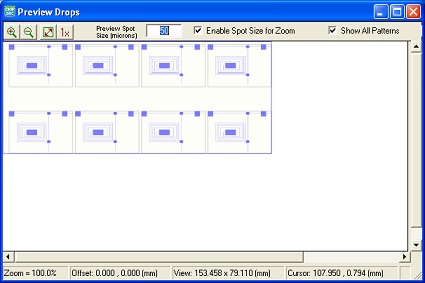
5. Preview Drops window shows up, so that you can monitor the pattern you design.
6. Create a feature in the pattern block by placing the cursor on the Preview Drops window.
7. Save your created file.
8. To print your pattern, select your file in the "Print Pattern" box in the main screen.
1. Click "Tools" in the menu bar.
2. Choose the "Pattern Editor (Bitmap images)" from the drop-down menu.
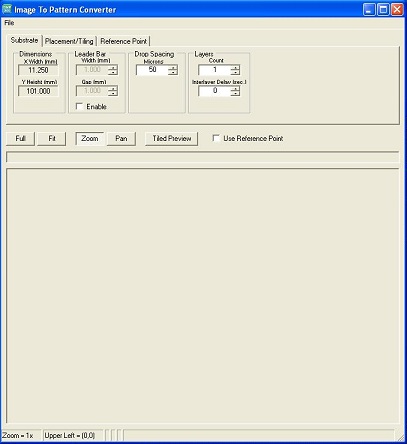
3. The "Image to Pattern Converter" window shows up .
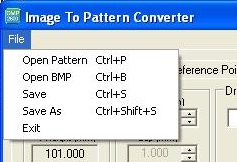
4. Click "File" on top of the window.
5. Choose the "Open BMP" from the drop-down menu.
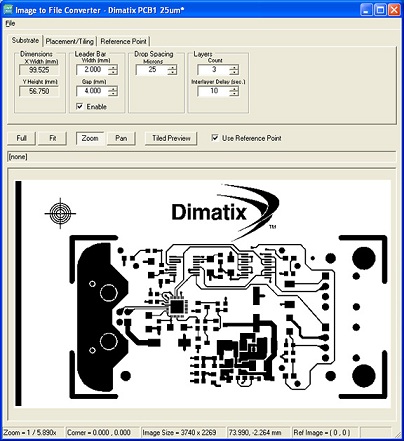
6. Load your BMP file from the file directory.
7. Your BMP pattern shows up in the screen.
8. You can edit the parameters (See the detail of "Bitmap File Printing" screen in Dimatix Recipes).
9. When all of the parameters are correct, save your file as a ptf pattern file.
10. To print your pattern, select your file in the "Print Pattern" box in the main screen.
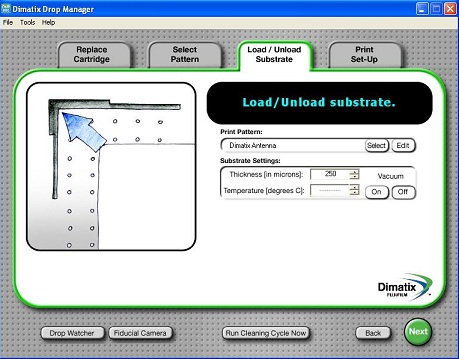
1. The "Load/Unload Substrate" tab is opened.
2. Open the lid.
3. Place the substrate on the printer platen.
4. You can change or edit the print pattern by clicking the "Select" or "Edit" button, if necessary.
5. Input the thickness of the substrate.
6. Set the temperature of the print platen, if you want to heat the platen up.
7. Turn on the "Vacuum" button in the tab.
8. Click the green "Next" button on the bottom of screen to go to the "Print Set-Up" tab.
Note:
9. If you use a new ink cartridge or replace an ink cartridge, it is necessary to perform optimization of the ink jetting posted on the bottom of this page before printing procedure.
10. Otherwise, go to the next step.
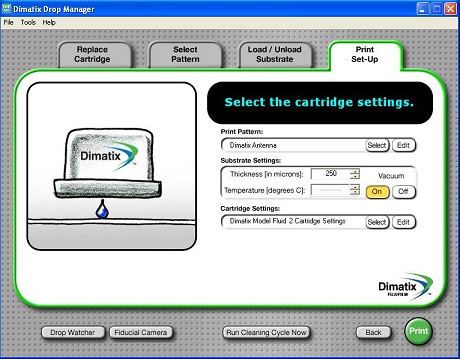
1. The "Print Set-Up" tab is opened.
2. Make sure that Print Pattern, Substrate Settings, and Cartridge Settings are OK.
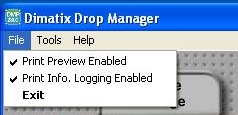
3. Click "File" in the menu bar.
4. Make sure that "Printer Preview Enabled" is checked, so that the Print Preview screen can be seen before printing.
5. Click the green "Print" button on the right bottom of the window.
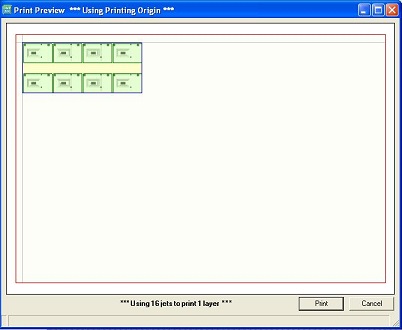
6. The print preview screen shows up.
7. If the preview is OK, then click the "Print" button on the bottom of screen.
8. The Dimatix ink jet printer starts printing.
1. Turn off the "Vacuum" button after printing.
2. Lift up the lid until it is fully open.
3. Take out the substrate.
4. Close the lid.
1. Exit DMP 2800 program.
2. Shut down the computer.
3. Turn off the power of Dimatix injet printer.
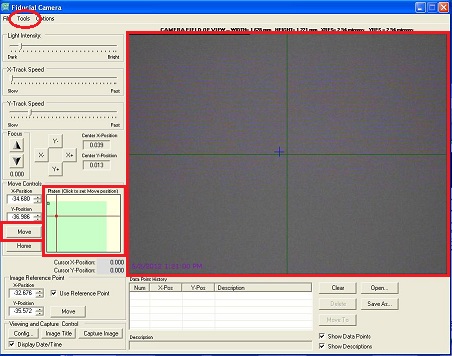
1. Click the "Fiducial Camera" button on the bottom left of the main screen.
2. Fiducial Camera screen shows up.
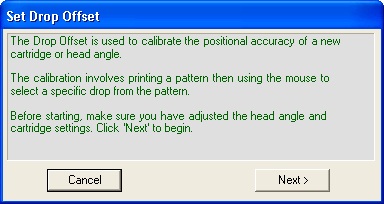
2. Choose "Set Drop Offset" from the drop-down menu in the Tools
3. The following window pops up.
4. To start, you must have the cartridge set to the angle required by your pattern.
5. Click Next.
6. The following dialog box shows up.
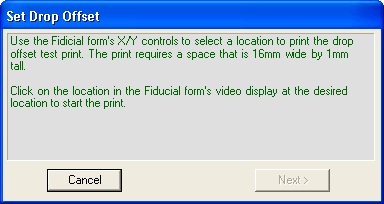
7. Move to the position where you can print the test pattern.
7. Place the cursor on the large Fiducial camera display.
8. Click in the Fiducial camera display to select the print location.
9. The following dialog box shows up.
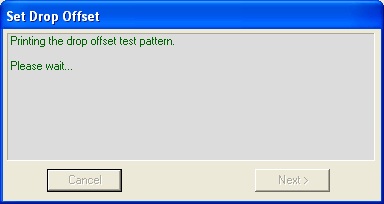
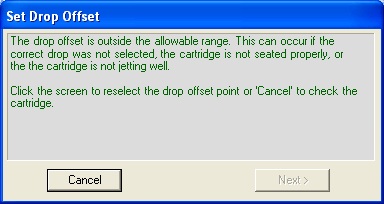
10. After the test pattern has been printed, the following dialog box shows up.
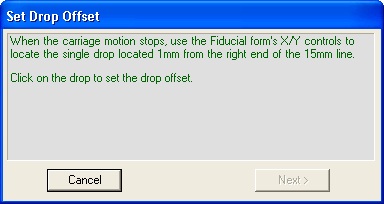
11. To show the printed test pattern in the display, move the image of the Fiducial camera display by clicking and holding on the X+, X-, Y+, or Y- button in the "Move Controls" box.
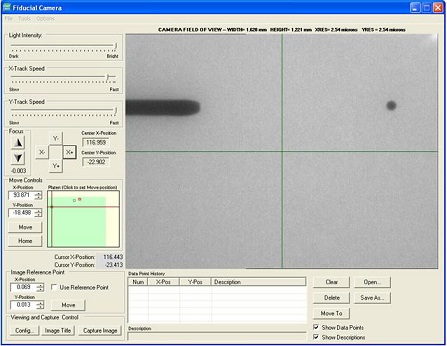
12. The Fiducial camera display ends up with showing the following image.
12. Click on the center of the single spot.
Note: The fiducial camera usually comes to a point somewhere below the line so you only have to move in negative y direction to find the line.
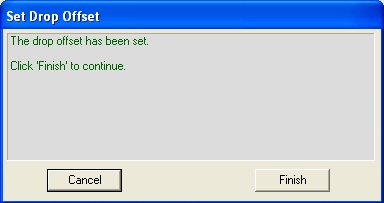
13. This routine is now completed. Click the Finish button.
14. This has now adjusted any positional offset from the newly installed cartridge to fiducial camera which you set the origins and reference points with.
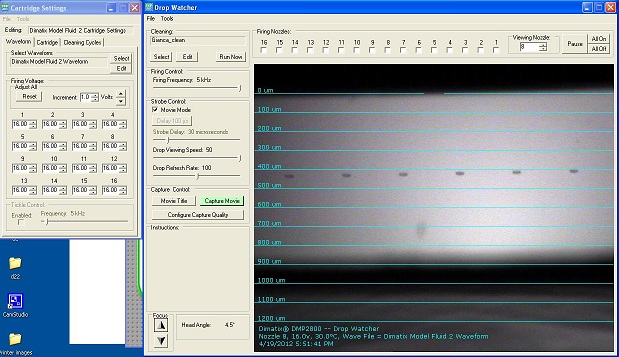
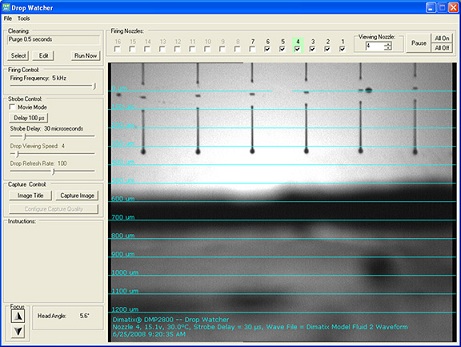
1. Click the "Drop Watcher" button on the bottom left of the main screen.
2. The "Drop Watcher" screen shows up with the "Cartridge Settings" window.
3. Make sure that the cartridge temperature on the bottom of the CCD display indicates the set-temperature which is shown in the "Cartridge" tab in the "Cartridge Settings" window.
4. To automatically control the stage motion to keep the nozzles in line when drop watching, perform the "Calibrate Nozzle View" procedure (also see Dimatix Recipes), if necessary.
5. Click on the "Run Now" button in the "Cleaning" box on the top left of the screen to clean the cartridge.
6. After cleaning the cartridge, click on the "All On" button on the top right of the screen to start ink jetting from all nozzles.
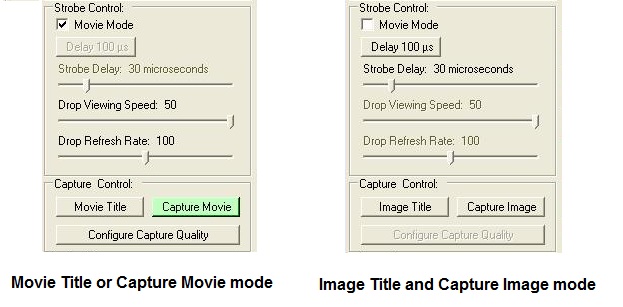
7. You can change viewing mode and capture control.
8. For example, the following picture shows ink jetting from nozzle 1 to 6, using "Image Title and Capture Image" mode. As you can see in the picture, the drops from the nozzles appear to be frozen and the positions are aligned, meaning that the nozzle velocities of the drops are almost the same.
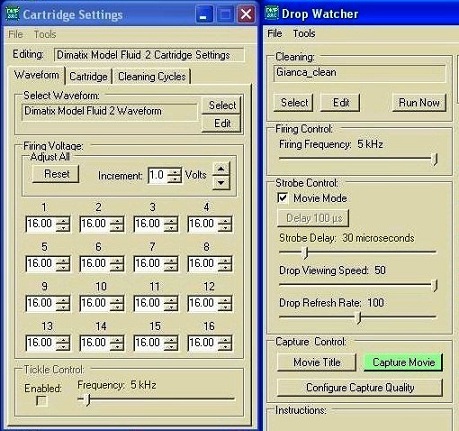
9. If the positions of the drops are different, you have to adjust the Firing voltage in the "Waveform" tab or the cartridge temperature in the "Cartridge" tab in the "Cartridge Settings" window, next to the "Drop Watcher" screen.
10. When you align all of the drop positions, then save the cartridge setting.
11. Re-adjustment of the drop velocities is finished.
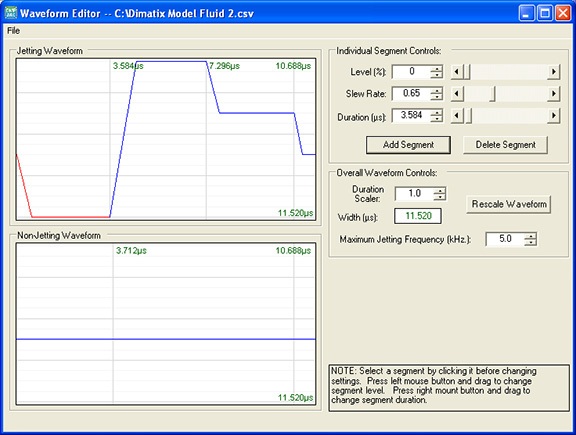
1. Keep opening the "Drop Watcher" and the "Cartridge Settings" windows.
2. Go to the main screen, and choose "Waveform Editor" from the drop-down menu of the Tools in the main screen.
3. The "Waveform Editor" window shows up.
4. Start ink jetting from one of nozzles, using the "Drop Watcher" window.
5. Input 80 kHz in the "Maximum Jetting Frequency" box in the middle right of the window.
6. Save the waveform as your own file.
7. Click the "Select" button in the "Select Waveform" box of the "Waveform" tab in the "Cartridge Settings" window.
8. Load your waveform file.
9. The scale of "Firing Frequency" in the "Firing Control" box in the "Drop Watcher" window expands to 80 kHz.
10. Adjust the "Firing Frequency" in the "Drop Watcher" window to establish the maximum sustainable jetting frequency in the drop watcher.
11. Edit and save the waveform by using the "Edit" button of the "Waveform" tab in the "Cartridge Settings" window.


