Updated on 10/2/2014
The basic steps for any F40 measurement are:
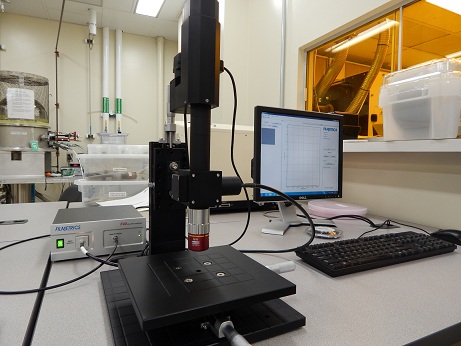
1 Start-up
2 Baseline and reference check
2.1 Baseline setting
2.1.1 Measure Tab
2.1.2 Focus the camera/optics
2.2 Measurement on the standard SiO2 sample
2.2.1 Step 1
2.2.2 Step 2
2.2.3 Step 3
2.2.4 Measurement
3 Measurement on Sample
3.1 Step 1
3.2 Step 2
3.3 Step 3
3.4 Creating/editing measurement recipes
3.5 Measuring your sample and reviewing data
4 Leaving the tool in an “idle” state
5 Supplemental Documents
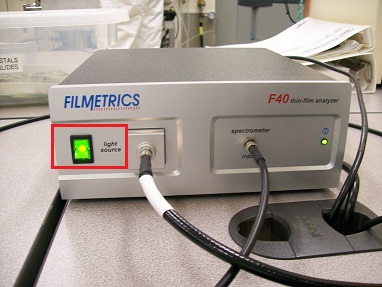
1. Turn on light source on front panel of main F40 unit
2. Wait at least 5 minutes for proper lamp warm-up
3. Ensure “FILMeasure” software program is open
To obtain accurate measurements, baseline and reference check the F40 at the beginning of each tool reservation and/or when switching between thin film types (e.g.: Oxide, then photoresist)
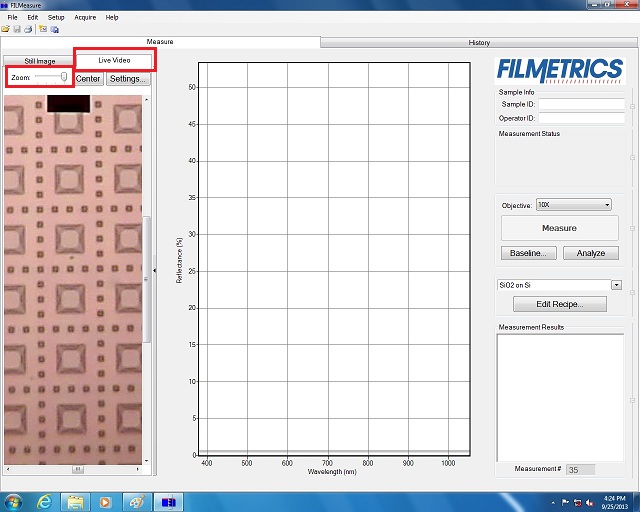
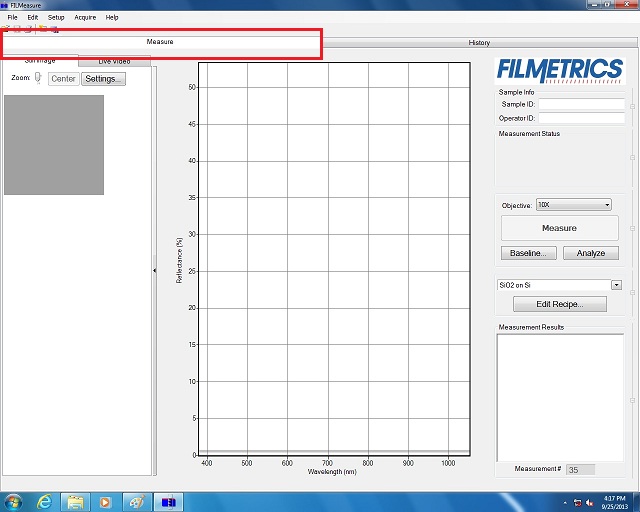
1. Verify that the “Measure” tab at the top of the screen is selected.
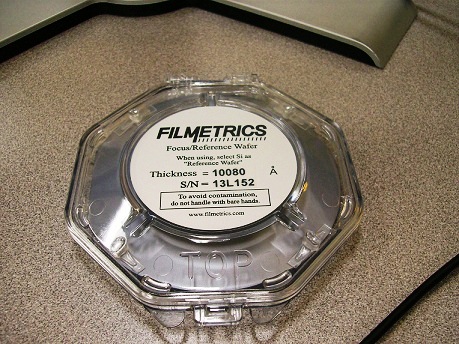
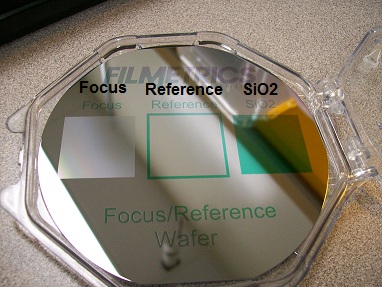
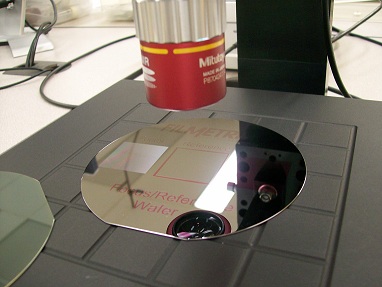
2. Locate the 4” Filmetrics wafer labeled “Focus/Reference Wafer”
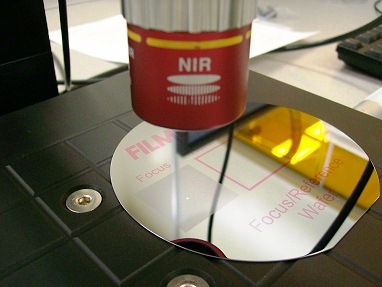
1. Place “Focus” field on the “Focus/Reference Wafer” beneath the objective lens.
2. Open the "Live Video" tab, so that the CCD camera will be active.
3. Zoom to highest camera magnification.
4. Adjust camera focus with the z-micrometer.
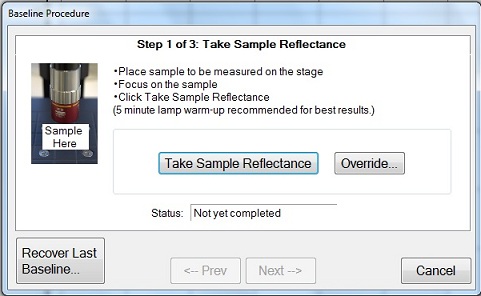
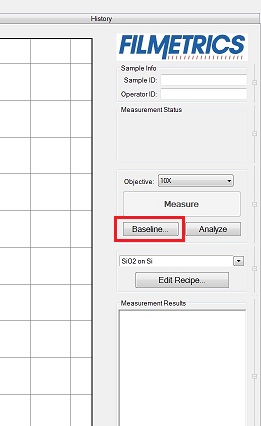
1. Click “baseline” and follow on-screen instructions
2. The following dialog box appears.
3. Place “SiO2” field on the “Focus/Reference Wafer” beneath the objective lens, as the standard SiO2 sample.
4. Focus on the sample using the CCD image in the "Live Video" tab, if necessary.
5. Click the "Take Sample Reflectance" button.
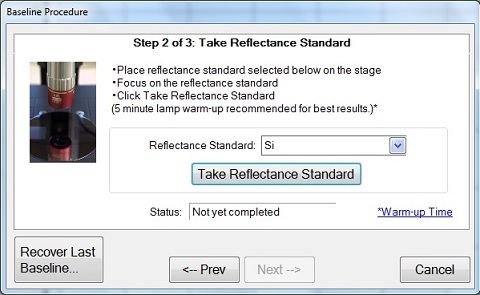
1. The dialog box for step 2 is opened when step 1 is completed.
2. Place the “Reference” field on the “Focus/Reference Wafer” beneath the objective lens.
3. Focus on the “Reference” field using the CCD image in the "Live Video" tab, if necessary.
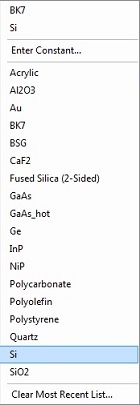
4. Choose "Si" from the pull-down menu of the "Reflectance Standard" box.
5. Click the "Take Reflectance Standard" button.
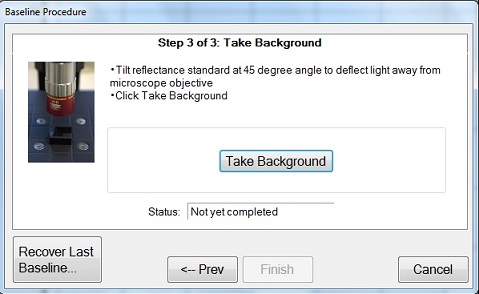
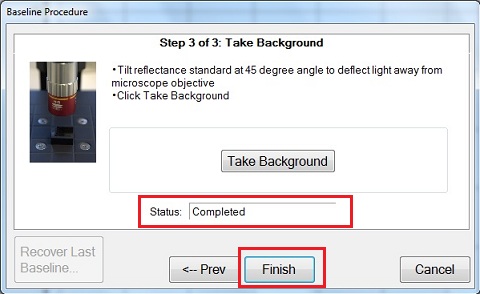
1. The dialog box for step 3 is opened when step 2 is completed.
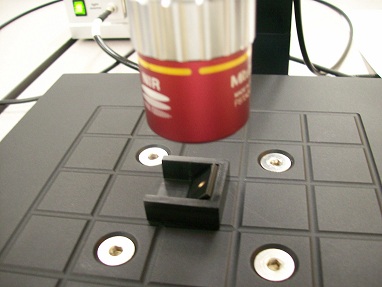
2. Place the black block containing the 45° angled reflectance substrate beneath the objective lens.
3. Click the "Take Background" button.
4. Click “finish” when done
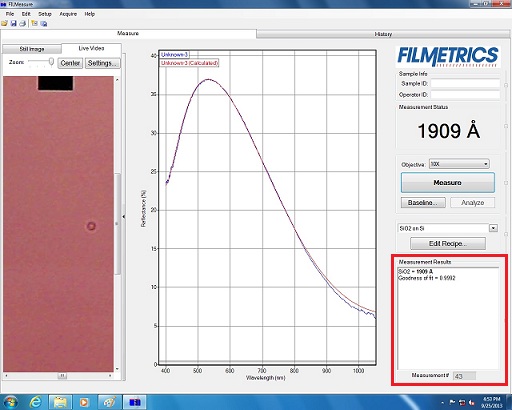
1. Place “SiO2” field on the “Focus/Reference Wafer” beneath the objective lens.
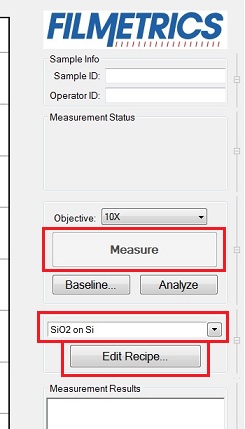
2. Click the down arrow in the box above the “Edit Recipe” button.
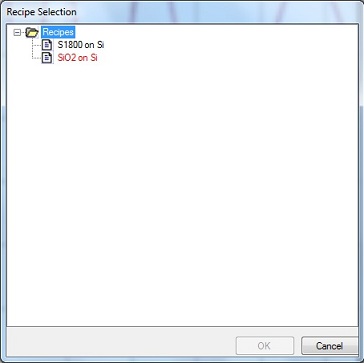
3. The following dialog box appears.
4. Select “SiO2 on Si” from the dialog box, and click “OK”.
5. Click “Measure” to obtain SiO2 thickness (standard = 10080Å)
6. If measurement is ≥ +/- 42 Å of expected thickness, contact lab staff
7. Remove the Focus/Reference Wafer.
* Note: If the substrate of your sample is still a Si wafer after the above process, then skip 3.1 to 3.3, and go to 3.4 for measurement.
1. Click “baseline” and follow on-screen instructions
2. The following dialog box appears.
3. Place your sample beneath the objective lens.
4. Focus on the sample using the CCD image in the "Live Video" tab, if necessary.
5. Click the "Take Sample Reflectance" button.
1. The dialog box for step 2 is opened when step 1 is completed.
2. Place the blank substrate beneath the objective lens.
3. Focus on the “Reference” field using the CCD image in the "Live Video" tab, if necessary.
4. Choose the substrate material from the pull-down menu of the "Reflectance Standard" box.
5. Click the "Take Reflectance Standard" button.
1. The dialog box for step 3 is opened when step 2 is completed.
2. Place the black block containing the 45° angled reflectance substrate beneath the objective lens.
3. Click the "Take Background" button.
4. Click “finish” when done
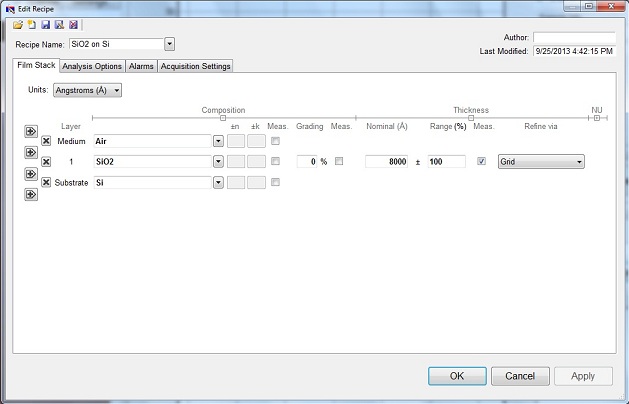
1. Select desired recipe from pull-down menu above the “Edit Recipe” button and click “OK”.
2. Click “Edit Recipe” to open the "Edit Recipe" dialog box.
3. Click “film stack” to add, remove, or change film types in the stack to be measured
4. When done with edits, click “apply” then “OK” to apply changes temporarily
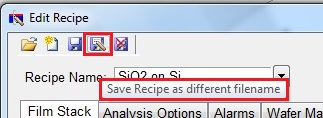
5. To save an edited recipe as a new recipe, click “apply”, then “save recipe as different filename” (represented by the “disk with pencil” icon), rename, then click “OK”
1. Place your sample beneath the objective lens.
2. Focus on your sample.
3. Select the desired measurement recipe, edit and/or “save as”, if desired
4. Use live video feed and X & Y micrometers to locate area to be measured
5. Click “Measure” and view results in the lower right hand corner of the screen
1. When done using the F40, turn off the light source only, unless another will be using the tool immediately after you
2. Leave the FILMeasure software open
3. Leave main unit power on


