
Updated on 10/7/2014
CAUTION! FAILURE TO PLACE WAFER STAGES IN THEIR INITIAL POSITIONS MIGHT RESULT IN DAMAGE TO YOUR MACHINE OR SAMPLES
1 Substrate and imprint mask alignment in Alignment Module
1.1 Log in
1.2 Load the wafer
1.3 Load the imprint mask (mold)
1.4 Mask alignment and pre-molding
1.5 Unload the imprint mask with the wafer
1.6 Shut down the Alignment Module
2 Mold and cure the resist in Nanoimprint Module
1. Click on the NX2600 icon on the PC.
2. Enter user name and password in the login menu.
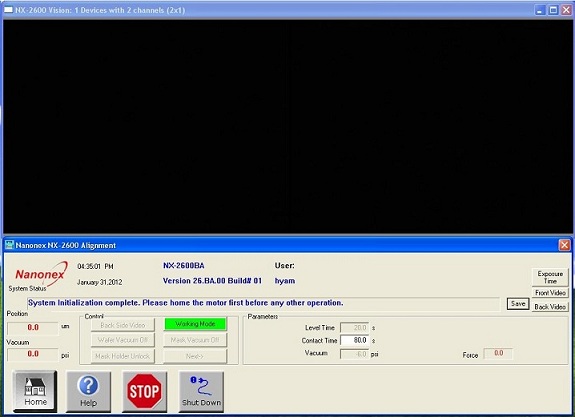
3. Nanonex NX2600 alignment window shows up with the viewing window of the microscope images.
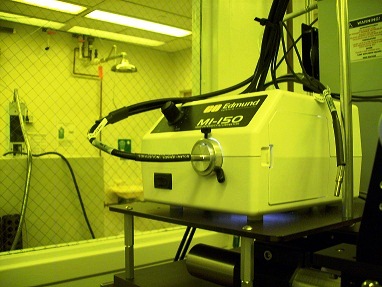
4. Turn on the light power for the microscope.
5. Click "Home" on the lower left of the alignment window.
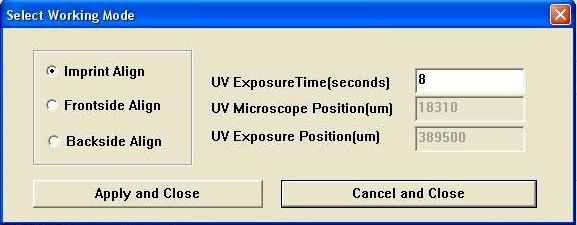
6. Working Mode dialog box pops up.
9. Check "Imprint Align".
10. Click "Apply and Close" button.
11. Wait until the system is ready.
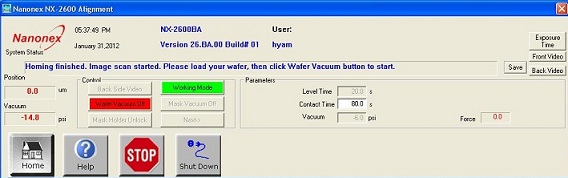
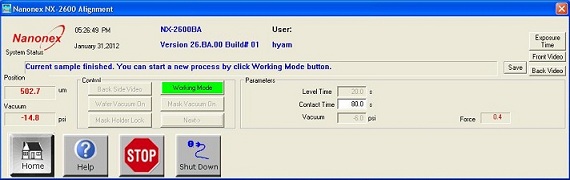
1. When the system is ready, the following alignment window is shown.
2. Set your desired contact time.
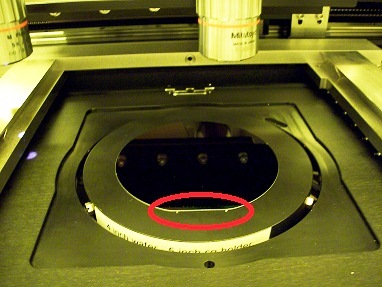
3. Place your 4" wafer substrate on the wafer chuck. Make sure that the flat pushes against the two stoppers.
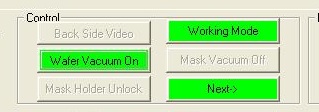
3. Click "Wafer Vacuum off" button to turn on the wafer vacuum. Control buttons display the following.
4. Click "Next->".
1. The dialog box pops up, asking for loading the imprint mask (mold).
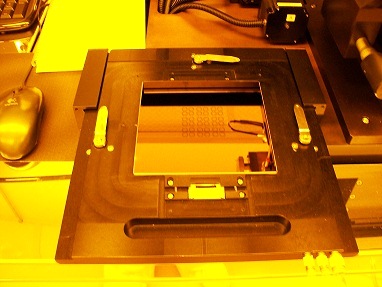
2. Place the imprint mask on the mask holder (face up), and lock the mask using the spring lock located on the mask holder if you are using a square shaped mask.
3. Click "OK" in the "Load mask" dialog box.
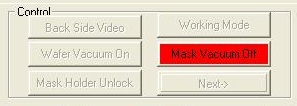
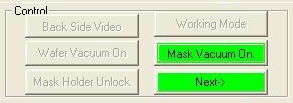
4. Control buttons display the following:
5. Click "Mask Vacuum off" to turn on the mask vacuum.
10. Control buttons display the following:
6. Click "Next->".
7. The dialog box pops up, asking for inserting the mask to the mask holder.
8. Flip mask holder and slide onto the aligner.
9. Click "OK" in the "insert mask holder" dialog box.
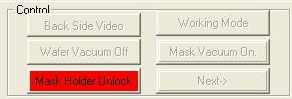
10. Control buttons display the following:
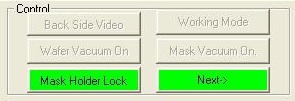
11. Click "Mask Holder Unlock". Control button shows the following:
12. Click "Next->".
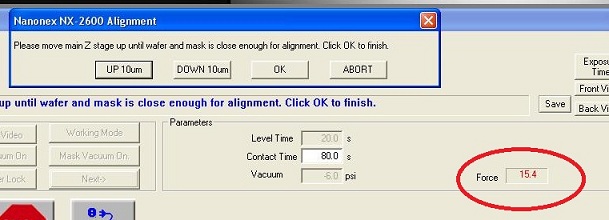
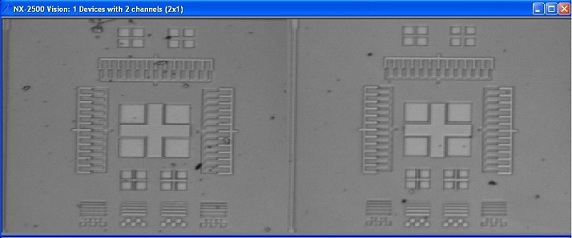
1. The computer will level the wafer to the mask automatically, and then bring the wafer close to the mask. Adjust microscopes to focus on the mask.
2. When the leveling of the wafer is done, the dialog box shows up for adjustment of z position of the wafer.
3. Now you are allowed to manually move wafer up or down using Z stage through the dialog box.
4. Keep clicking "DOWN 10um" until Force indicates ~2.
5. Align the wafer with the mask, using the x-, y- and Theta (rotation) knobs and the microscope image on the PC.
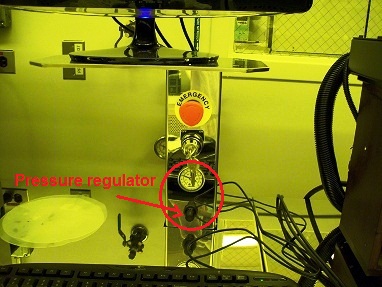
6. After the alignment, move the wafer chuck up by increasing the force until ~40 psi, using the N2 gas pressure regulator under the PC monitor.
7. Click "OK".
1. The process will finish automatically. Then the mask holder will be unlocked.
2. Decrease N2 pressure on the pressure regulator to ~10 psi.
3. A pop up menu will remind you to remove the mask holder and insert it into the seating facing up.
4. After place the mask holder in a right position, click "OK".
5. A pop up menu will ask you if you want to turn off the mask vacuum.
6. Click "OK" to unload the imprint mask holding the wafer, and put them into Nanoimprint Module (see below).
1. The system status shows the end of the process.
2. Click "Shut Down". A pop up menu will ask you if you want to shut down.
3. Click "Yes".
4. Turn off the light power of the microscope.
5. Remember to manually adjust the X, Y and Theta stages to their initial positions.


