1 Choose Recipe
2 Set Scan Parameters
3 View The Surface
4 Start Scan
5 Save the measured result
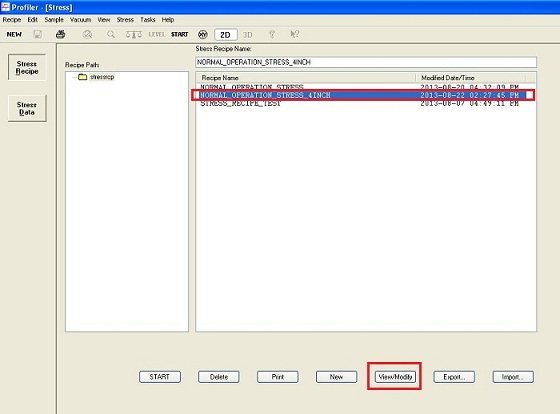
1. Choose "NORMAL OPERATION STRESS 4INCH".
2. Click the "View/Modify" button.
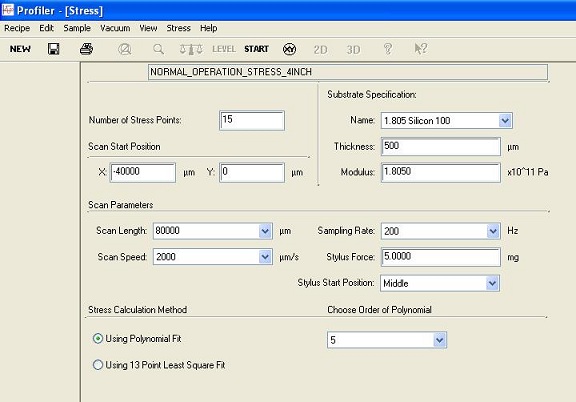
1. The "Stress" window shows up.
2. If. If you change the parameters, ensure that the recipe is saved with the different name.
1.
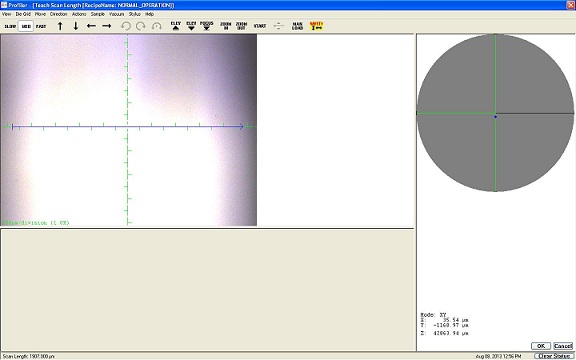
Click the ![]() icon.
icon.
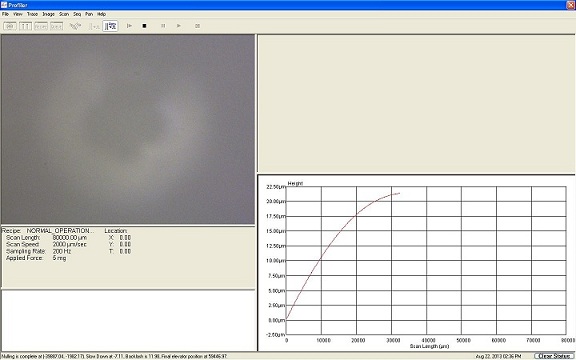
2. The CCD image window ("Teach Scan Length") appears.
2. Click the "FOCUS" icon.
3. The stylus is moved down automatically to focus the image on the surface.
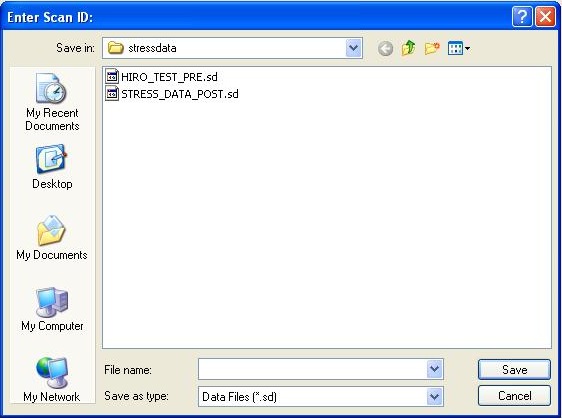
1. Start a scan by clicking the "START" button.
2. The "Enter Scan ID" dialog box appears.
3. Save the name of pre-measurement data.
4. The tip of the stylus is not shown on the CCD image during the scanning.
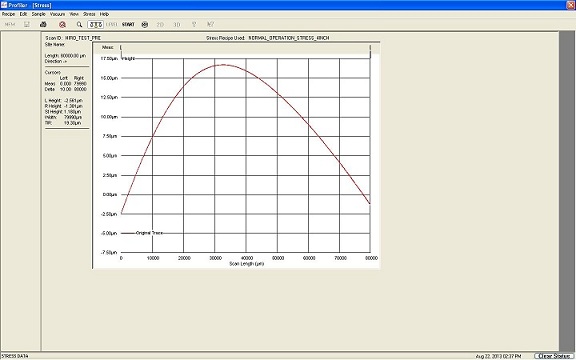
5. The following window appears when the scanning ends.
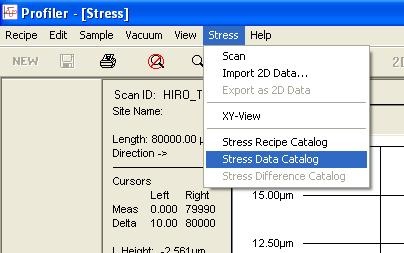
1. Click "Stress" in the menu, and choose "Stress Data Catalog" from the drop-down menu.
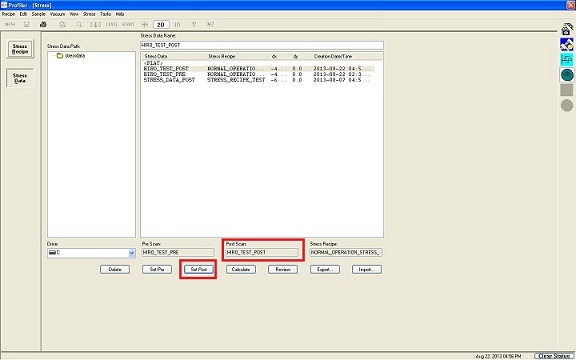
2. The "Stress Data" screen of the Catalog window appears.
3. Click the "Set Post" button, so that the data is saved as post-scan data on the Stress Data, and the Post Scan box shows the data name of the post-measurement.
