Updated on 8/9/2019
Note:
1 Check-in
2 Vent Load Lock
3 Load Sample
4 Pump Down Load Lock and Transfer Chuck from Load Lock to Chamber
5 Conditions of The Substrate
5.1 Substrate Temperature
5.2 Rotation Speed
6 Plasma Cleaning on Sample
7 Evaporation
7.1 Manual Operation
7.1.1 Start Ar Gas Flow
7.1.2 Turn on RF/DC Power
7.1.3 Start Deposition
7.1.4 Stop Deposition
7.2 Automatic Operation
8 Transfer Chuck From Chamber To LL
9 Unload Sample
10 Stand by
11 Check-out
12 Troubleshooting
13 Supplemental Documents
1. Log-in on the ISIS scheduler
1. Touch/Click the "LL Vent" button on the right side of the screen, if necessary.
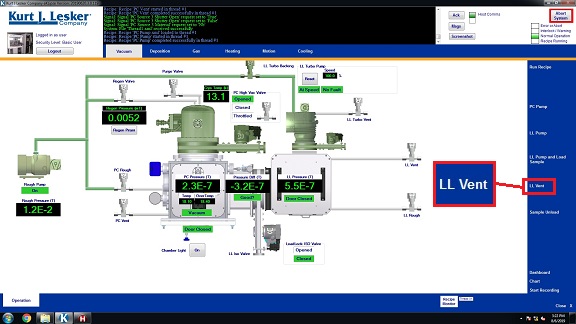
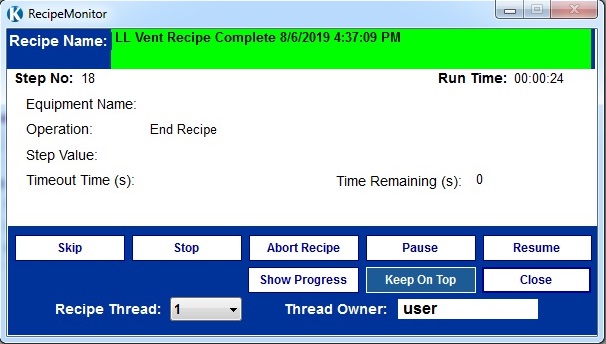
2. When the venting procedure is done, the pop-up dialog box indicates "Recipe Complete".
3. Touch/Click the "Close" button.
1. Open the right door.
2. Open the lid.
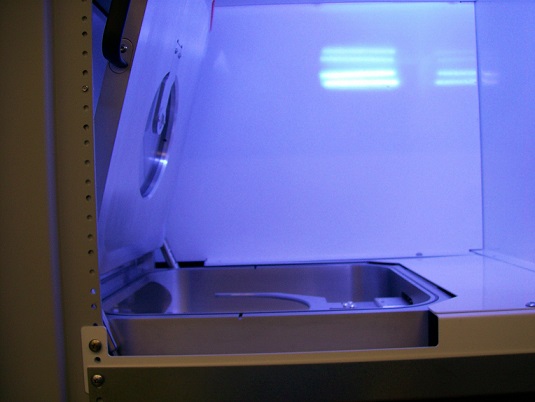
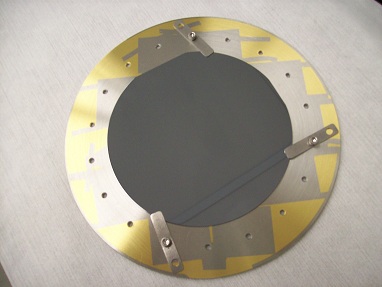
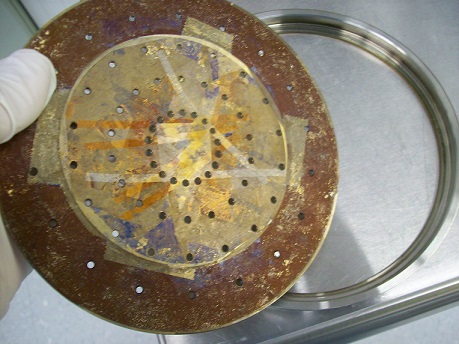
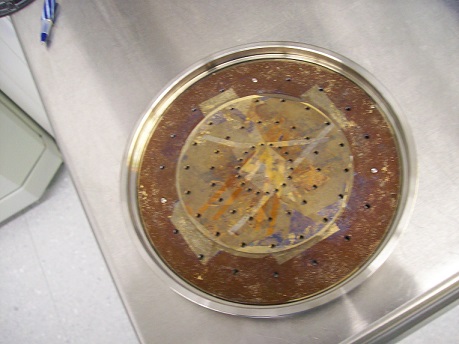
3. Using clips or Kapton tape, hold your sample(s) onto the chuck.
Warning!!: The screw tips MUST NOT stick out on the back-side of the chuck. Otherwise, the chuck will be stuck in the chamber.
4. Flip over the chuck. Put it on the ring.
5. Insert the ring into the arm.
Note: Make sure the ring is inserted properly.
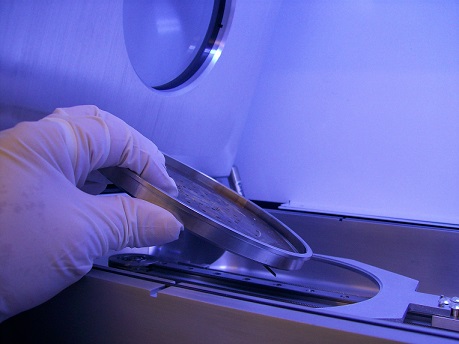
6. Close the lid.
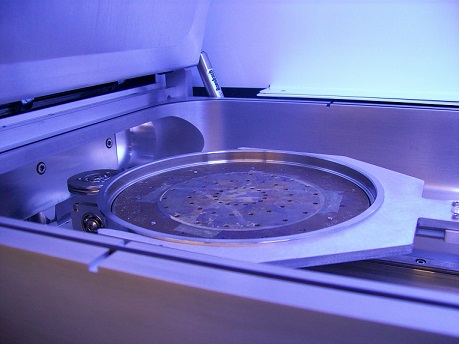
1. Open the "Motion" tab.
2. Touch/Click the "LL Pump and Load Sample" button.
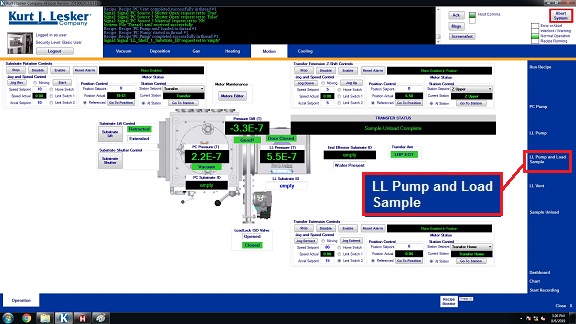
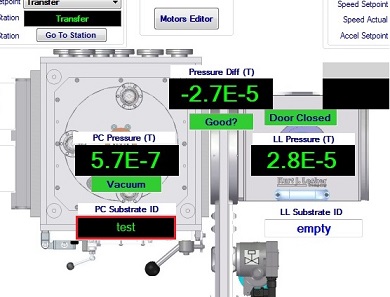
3. Recipe Monitor shows up, and you will see "LL Pump and Load" recipe pause for entering the substrate ID into the "LL Sbstrate ID".
Note: If the sample holder is not in place (i.e., "wafer present" on the motion screen is white, not green), the recipe will pump down the load lock then abort, informing you that no substrate is present.
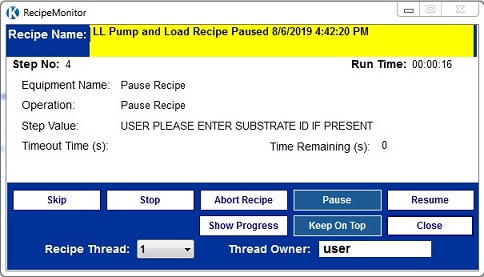
4. Enter the substrate ID on the screen.
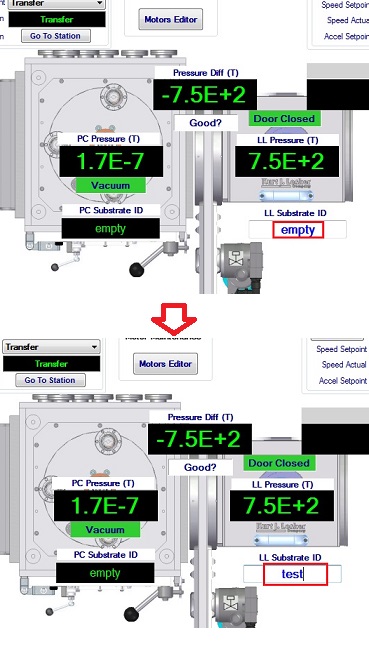
5. Touch/Click the "Resume" button in the Recipe Monitor.
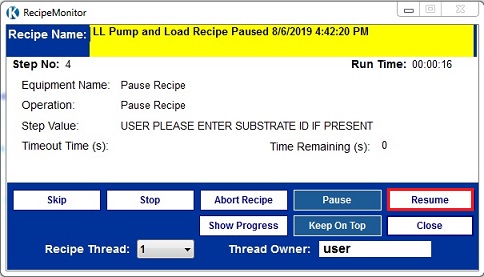
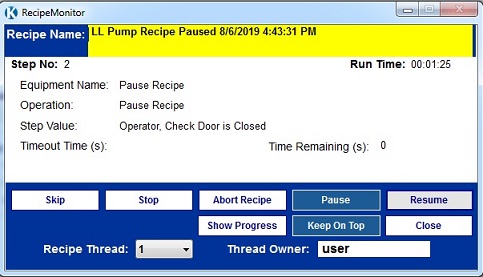
6. "LL Pump and Load" recipe pauses again for confirmation of closing the lid. After the confirmation, click the "Resume" button.
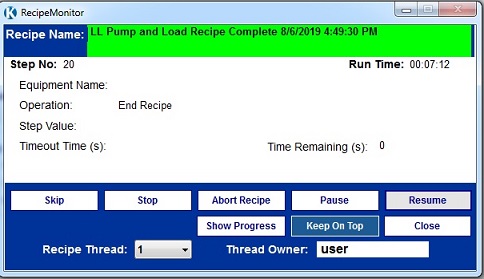
7. When "LL Pump and Load" recipe completes, the sample is loaded to the main chamber, and the sample ID moves to the main chamber.
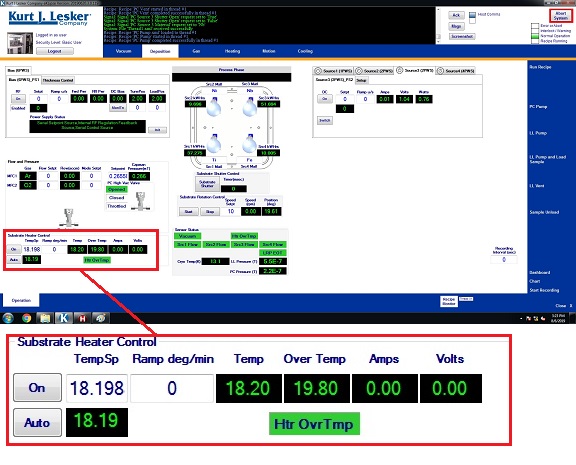
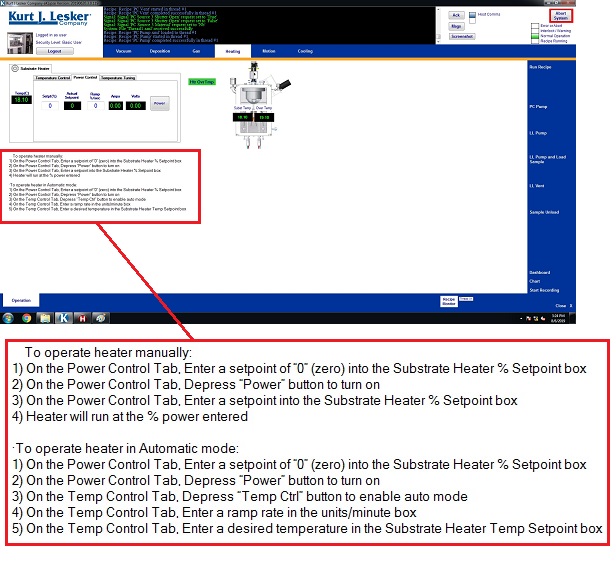
1. You can manually set up the substrate temperature in the "Deposition" and "Heating" screens.
2. Follow the instruction in the "Heating" screen.
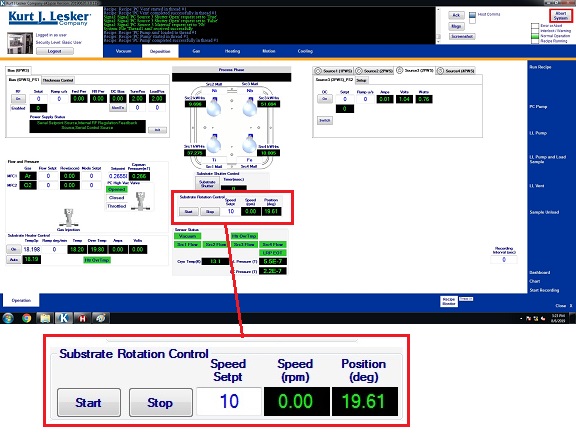
1. The rotation speed of the sample holder can manually be set up in the "Deposition" and "Motion" screens.
2. The rotation speed of the sample holder can automatically be set up in the recipe.
* The sample surface can be cleaned by Ar plasma, if necessary.
1. Start Ar gas flow in the "Gas" screen.
2. Open the substrate shutter.
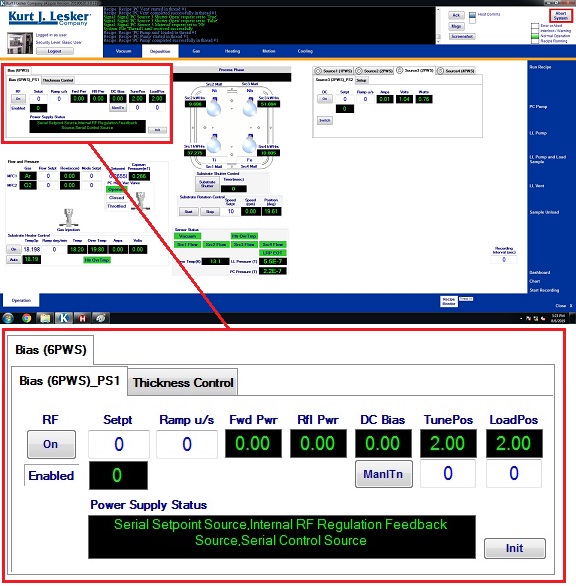
3. Input RF power and ramp rate in the "Setpt" and "Ramp" boxes in the "Bias" box in the Deposition screen.
4. Touch/Click the "ON" button to turn on RF power.
5. When the cleaning is done, close the substrate shutter.
6. Turn off the RF power, and input "0" in the "Setpt" and "Ramp" boxes.
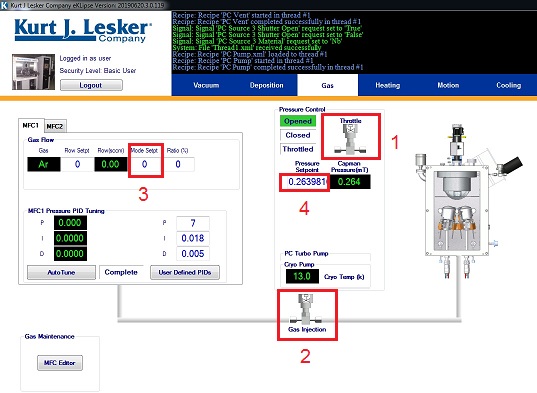
7. Type "0" in the Setpoint box in the "Pressure Control" box in the "Gas" screen.
8. Type "0" in the "Mode Setpt" box.
9. Close the gas injection valve by touching/clicking the "Gas Injection Valve" icon.
10. Turn off the throttled valve by touching/clicking the "Throttled Valve" icon.
1. Turn on the throttled valve by touching/clicking the "Throttled Valve" icon in the "Gas" screen.
2. Open the gas injection valve by touching/clicking the "Gas Injection Valve" icon.
3. Type "4" in the "Mode Setpt" box.
4. Type the pressure (mTorr) in the Setpoint box in the "Pressure Control" box.
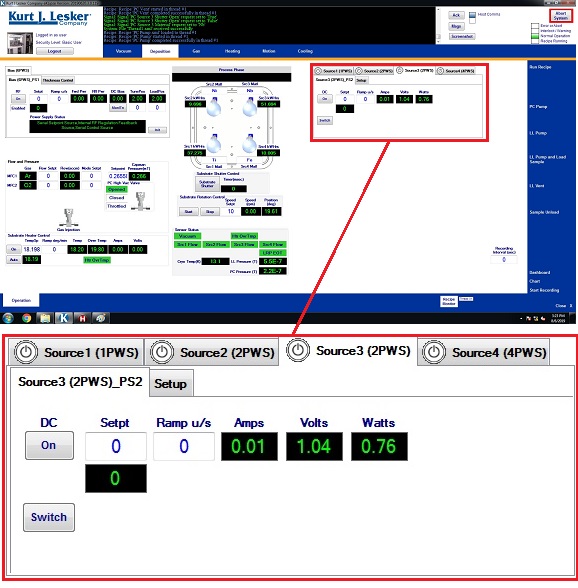
1. Turn on the "Sw" button in the "Source Power Supply" box in the Deposition screen.
2. Input the ramp rate in "Ramp" box.
3. Turn on the RF/DC power supply.
4. Input the power in the "Setpt" box.
1. Start the substrate rotation by touching/clicking the "Start" button in the "Substrate Rotation Controls" box.
2. Open the source shutter by touching/clicking the "SourceX" icon.
3. Open the substrate shutter by touching/clicking the "PC Substrate Shutter" button.
4. Start the deposition.
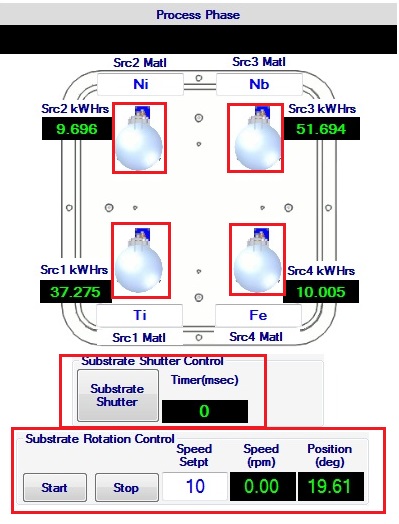
1. Close the substrate and source shutters by touching/clicking the "SourceX" icon and the "PC Substrate Shutter" button.
2. Stop the substrate rotation by touching/clicking the "Stop" button in the "Substrate Rotation Controls" box.
3. Turn off RF/DC power.
4. Stop Ar gas flow in the "Gas" screen.
1. Touch/Click the "Run Recipe" button on the right side of the screen.
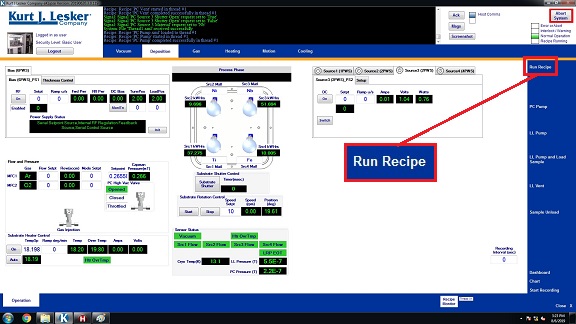
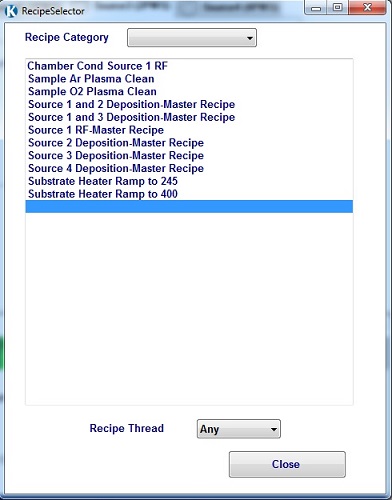
2. The "RecipeSelector" dialog box appears.
3. Choose the recipe for target desired from the list.
4. Touch/Click the "Run Recipe" button, which appears when the recipe is chosen.
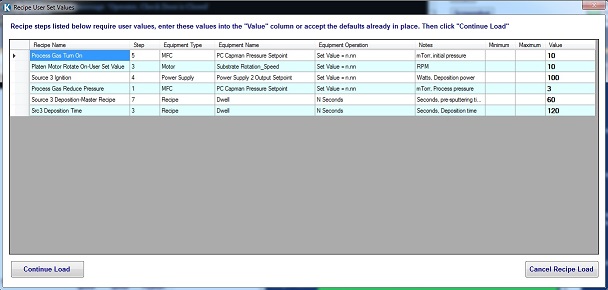
5. The following dialog box appears.
6. Input the following parameters, if necessary.
7. Touch/Click the "Continue Load" button to start the recipe.
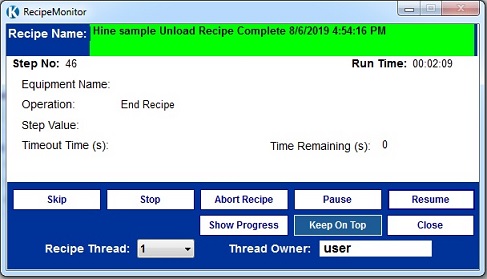
8. When the process is done, the pop-up dialog box indicates "Recipe Complete".
9. Touch/Click the "Close" button.
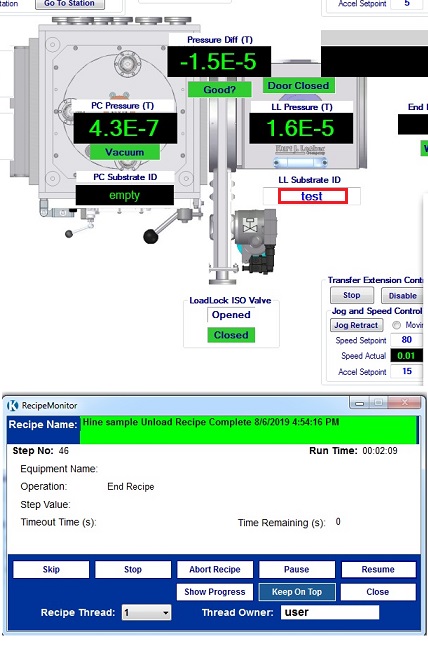
1. Touch/Click the "Sample Unload" button on the right side of the screen.
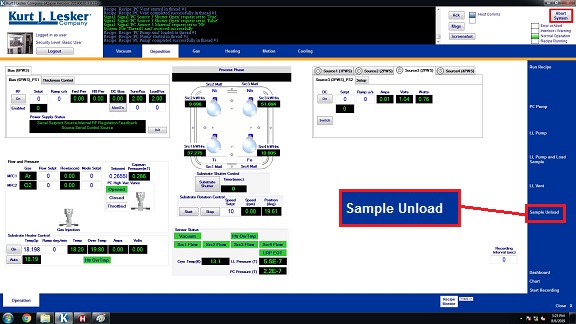
2. When the "Sample Unload" completes, the sample is unloaded to LL, and the substrate ID moves to LL.
Note: The substarte ID will automatically be changed to "Empty". You do not have to change it.
1. Touch/Click the "LL Vent" button on the right side of the screen.
2. When the venting procedure is done, the pop-up dialog box indicates "Recipe Complete".
3. Touch/Click the "Close" button.
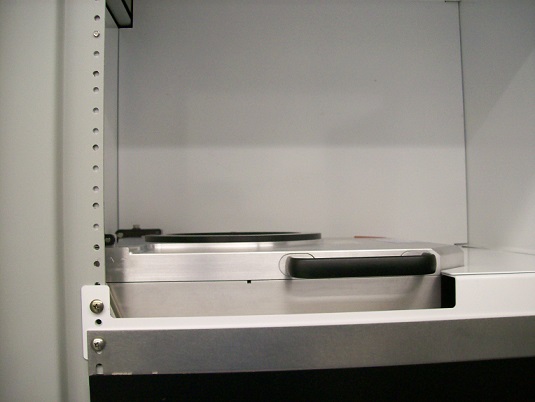
4. Open the lid.
5. Unload the ring with the sample chuck.
6. Close the load lock.
1. Close the right door.
2. Touch/Click the "LL Pump" button on the right side of the screen.
Note: You will only be prompted to close the door (lid) if it is not already closed.
3. When the pumping procedure is done, the pop-up dialog box indicates "Recipe Complete".
4. Touch/Click the "Close" button.
1. Log-out on the ISIS scheduler
a) The target is not ignited.
-> Increase the Ar pressure to 10-20 mTorr, and ignite the target. After the ignition, the Ar pressure is reduced to 3-5 mTorr.
-> Ignite another target, which induces ignition of the target.
-> Clean the target using RF sputtering for 10-20 min.
b) The vacuum cannot be pumped down well, even if it is pumped down overnight.
-> O-ring might be deteriaorated. Consult the staff.
-> Re-generate the cryopump. Consult the staff.
Revision:
8/9/2019, by Hiro, SOP has been revised according to renovation of the tool.