Updated on 5/1/2017
1 Log in
2 Check the pressure sensor and load the sample
3 Etch the sample
4 Unload the sample and log out
5 Pressure Sensor Calibration
6 Supplemental Documents
7 Troubleshooting
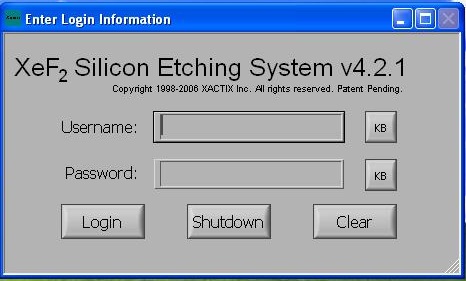
1. Type your “Username” and “Password” in login menu and click "Login" button in order to start using the tool.
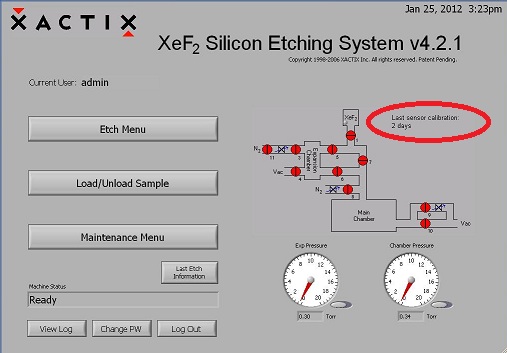
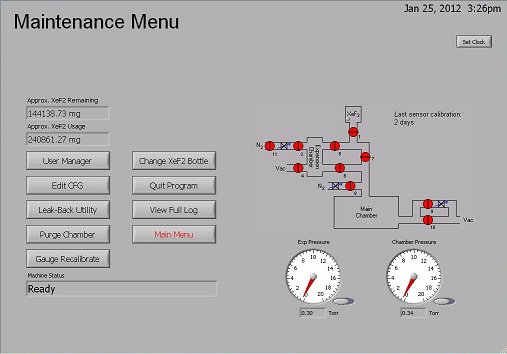
1. Check "Last sensor calibration" time on the right top of the following Main Menu.
2. If it is more than 3 days, it is necessary to perform the pressure sensor re-calibration procedure, posted on the bottom of this page, before starting the etching procedure.
3. Otherwise, click “Load/Unload sample” button in the Main Menu.
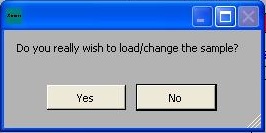
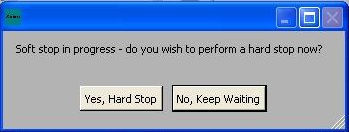
4. The system will prompt to ensure a correct decision "Yes" or "No".
5. Press YES, so that the system will begin chamber purges and flushing cycles to evacuate the chamber.
6. When the chamber is vented, the following dialog box will appear.
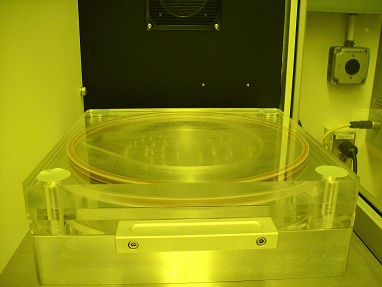
7. Open the chamber lid.
8. Load the sample.
9. Close the lid.
10. Press “Done” button in the dialog box, so that the system will repeat a purge-and-pump down cycle, and will be back to the Main Menu.
1. Click “Etch Menu” button in the Main Menu.
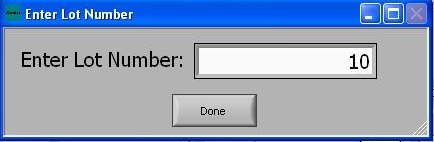
2. The system will prompt the lot number.
3. Type the lot number, and click "Done" button.
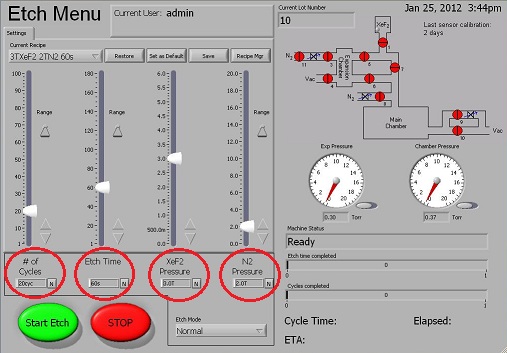
4. The Etch Menu shows up. Put the desired value of “# of Cycles”, “Etch Time”, “XeF2 Pressure” and “N2 Pressure” (see XeF2 Recipes).
5. Select “Normal” in the “Etch Mode” pull-down menu (bottom of the window).
6. Click the “Start Etch” button.
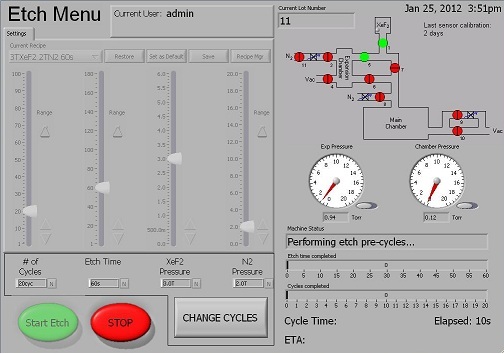
7. When the etching starts, all of the controls will be disabled except for the “Stop Button”.
Note:
8. After the etch process is completed, the Main Menu is displayed.
1. Unload he sample, as described in 2. Check the pressure sensor and load the sample.
2. Press “Done” button in the dialog box after closing the lid, so that the system will repeat a purge-and-pump down cycle, and will be back to the Main Menu.
3. Click "Log Out" in the Main Menu.
4. Do not close the software, do not turn the computer off and do not turn the power off.
5. Record the recipe in the log file on the computer.
1. Click “Maintenance Menu” button in the Main Menu.
2. Click “Gauge Recalibrate” button in the Maintenance Menu.
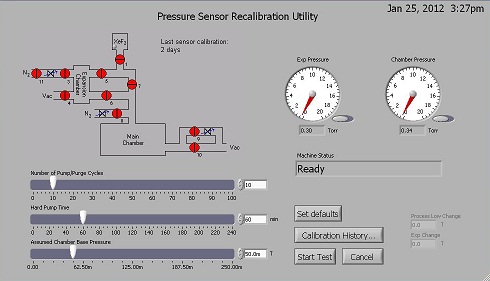
3. Click “Start Test” button at the bottom of Pressure Sensor Recalibration Utility screen.
4. The calibration takes one hour; once it has been completed the “Main Menu” will be displayed again.
a) The chamber cannot be pumped down properly even though the vacuum pump runs fine.
-> Log-out and log-in the IRIS system again, and the system should be fine. The cause is unknown.
Revision
5/1/2017, by Hiro, added troubleshooting.

