Updated on 11/6/2014
1 Load Application
2 Select Objective Lens
3 Load Sample
4 Set Z Stop
5 Find and Null Fringe
6 Set Light Level
7 Set Test and Reference Masks
7.1 Open Mask Editor
7.2 Set Test Mask
7.3 Set Reference Mask
8 Measure
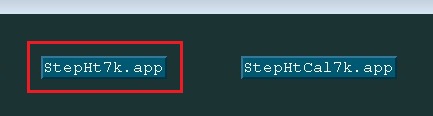
1. Click the "StepHt7k.app" for step height measurement.
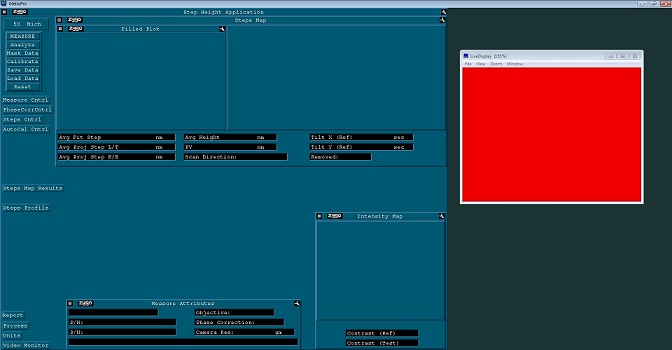
2. The application is opened.
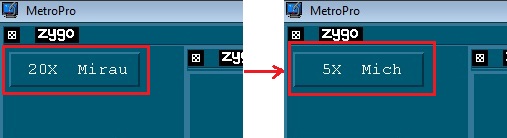
1. Click the "Objective" button to change an objective lens.
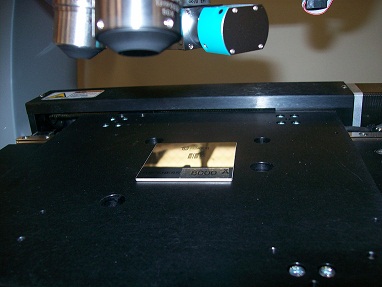
1. Place the sample on the stage.
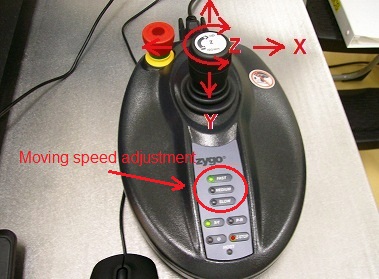
2. Move the stage for the sample to be beneath the objective lens using the joy stick.
1. Move the objective lens down to the following working distance using the joystick.
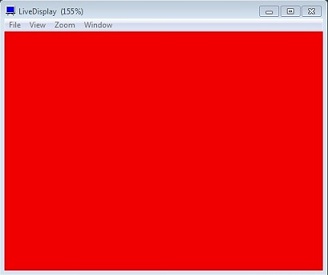
2. Adjust the light intensity of the CCD image on the "LiveDisplay", and focus the image.
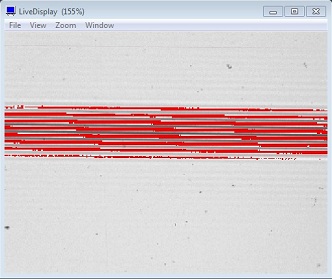
2-1. The CCD image on the "Live Display" shows a red screen because of saturated light.
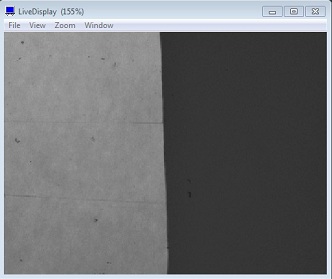
2-2. If you press "F5", then the light intensity is adjusted automatically. Focus the image on the "LiveDisplay" using the joystick.
2-3. If you press "F4", then the "Light Level" dialog box appears. Adjust the intensity manually, and click the "Set" button. Then, focus the image on the "LiveDisplay" using the joystick.
3. Move the objective lens slightly down, and press the "Z-Stop" button on the joystick to set the z-stop position up, so that the objective lens will not go down beyond the z-stop position.
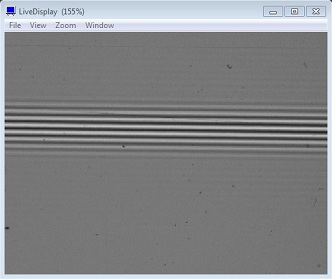
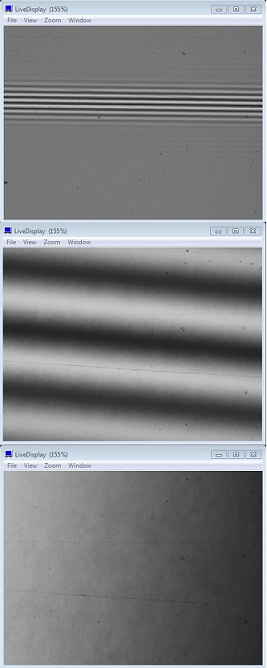
1. Find interference fringes on the CCD image.
2. Adjust the position of the fringes by moving the objective lens in the z-direction.
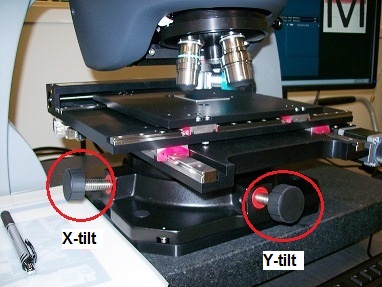
3. Tilt the stage using the tiling knobs to expand the distance between the fringes, until the distance reaches the maximum and the fringes start rotating.
4. The fringes are null now.
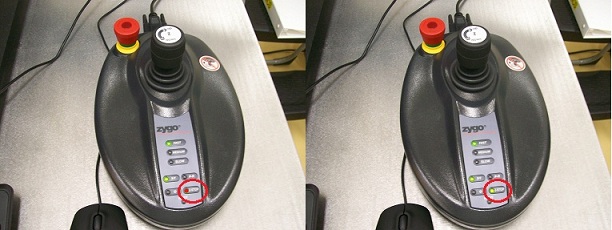
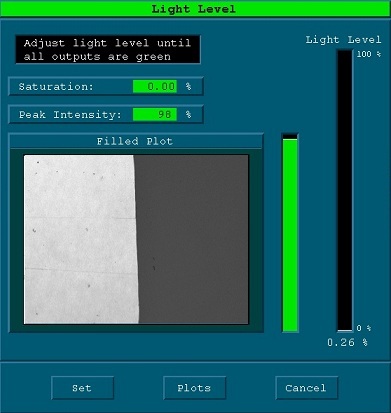
1. Press "F4" to set the final light intensity manually.
2. Click the "Set" button after adjusting the intensity.
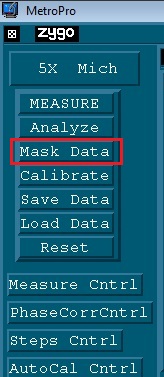
1. Click the "Mask Data" button.
2. The "Mask Editor" window appears.
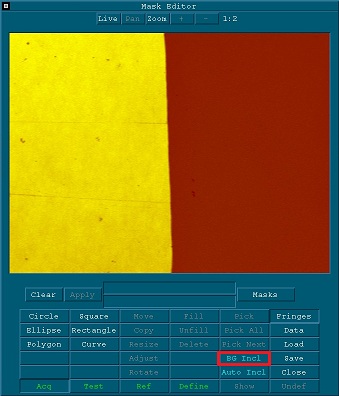
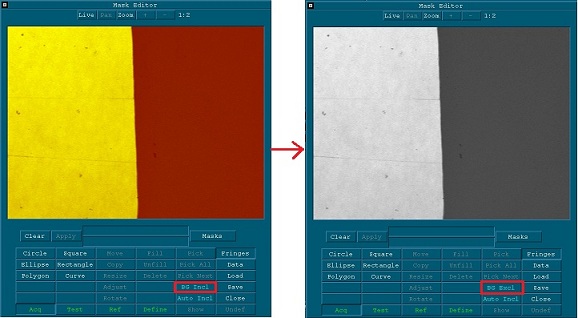
3. Click the "BG Incl" button to change the label to "BG Excl". All area is unfilled for analysis.
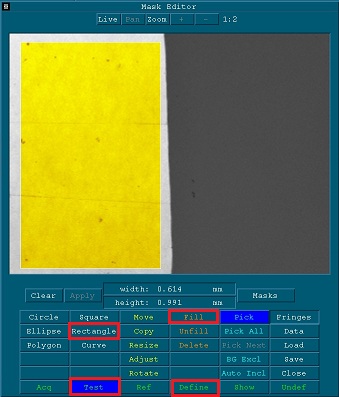
1. Click the "Rectangle" button, and draw the rectangle on the high step area.
2. Ensure that the inside of the rectangle is colored.
3. Click the "Test" button.
4. Click the "Define" button.
5. Ensure that the "Test" button is blue-highlighted.
6. Click on unfill to unfill the test mask.
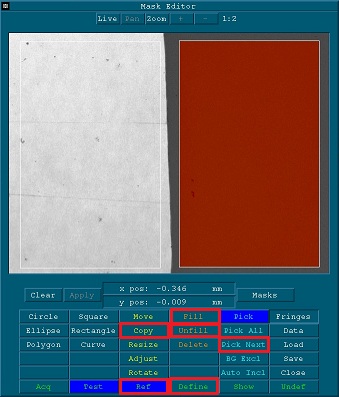
1. Click the "Copy" button.
2. Move the copied rectangle to the low step area.
3. Ensure that the inside of the rectangle ONLY in the low step area is colored.
4. Click the "Ref" button.
5. Click the "Define" button.
6. Ensure that the "Ref" button is blue-highlighted.
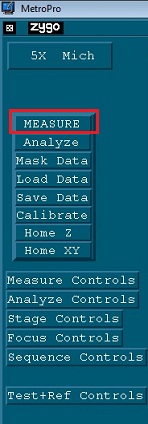
1. Click the "Measure" button.
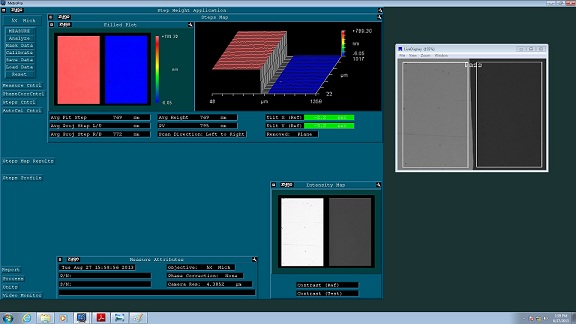
2. The result is shown on the screen.
