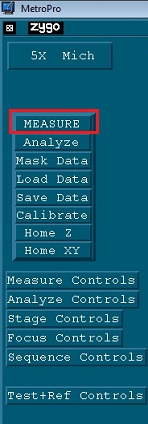
1. Click the "Micro7k.app" for surface structure and roughness measurement.
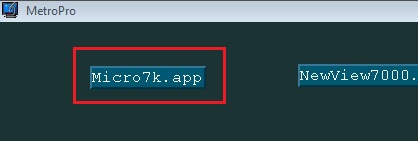
2. The application is opened.
Updated on 11/5/2014
1 Load Application
2 Select Objective Lens
3 Load Sample
4 Set Z Stop
5 Find and Null Fringe
6 Set Light Level
7 Set Measurement Controls
8 Set Analyze Controls
9 Measure
1. Click the "Micro7k.app" for surface structure and roughness measurement.
2. The application is opened.
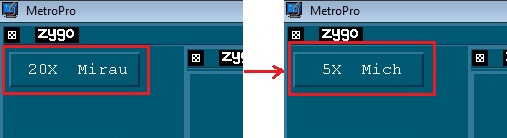
1. Click the "Objective" button to change an objective lens.
- The objective lens is automatically changed.
- The objective lenses of x5, x20, x50 are available.
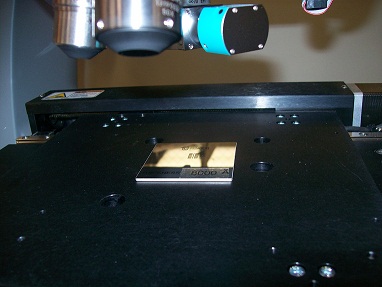
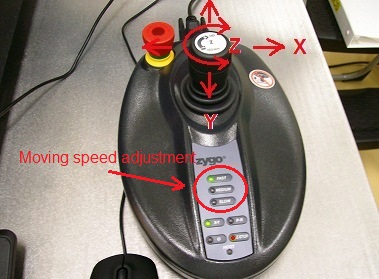
1. Place the sample on the stage.
2. Move the stage for the sample to be beneath the objective lens using the joy stick.
- The green light spot from the objective is seen on the stage.
- Joystick
- X-direction: place down on the left or right side.
- Y-direction: place down on the top or bottom side.
- Z-direction: rotate clockwise (up) or counter-clockwise (down).
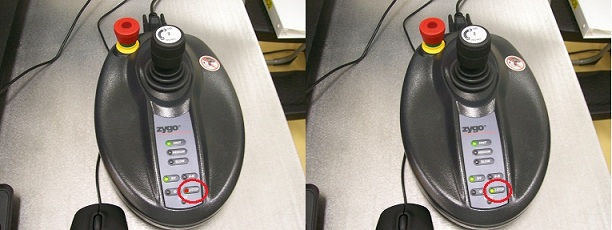
- The moving speed can be changed by pressing the "Fast", "Medium", or "Slow" button.
1. Move the objective lens down to the following working distance using the joystick.
- NOTE: When the lens is close to the sample, the moving speed should be changed to "Slow". Otherwise, the objective might crash the sample, meaning that both of the lens and the sample are damaged.
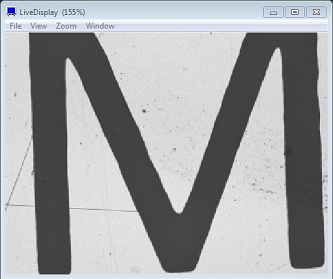
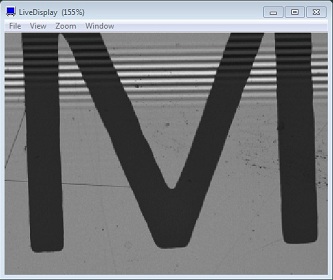
2. Adjust the light intensity of the CCD image on the "LiveDisplay", and focus the image.2-1. The CCD image on the "Live Display" shows a red screen because of saturated light.
2-2. If you press "F5", then the light intensity is adjusted automatically. Focus the image on the "LiveDisplay" using the joystick.
2-3. If you press "F4", then the following dialog box appears. Adjust the intensity manually, and click the "Set" button. Then, focus the image on the "LiveDisplay" using the joystick.
- "/": coarse down
- "*": coarse up
- "-": fine down
- "+": fine up
2-4. Field Stop Focus Aid
- See Using F-stop.
- If the smooth surface is viewed at high magnification, it would be difficult to be focused on. In this case, this aid would be most effective.
- When the sample gets close to focus, a second image of the iris will appear blurred; when they exactly overlap, fringes should appear.
- If the light intensity is saturated in red on purpose, then you can see the image of the iris expand a little when the sample gets close to focus.
3. Move the objective lens slightly down, and press the "Z-Stop" button on the joystick to set the z-stop position up, so that the objective lens will not go down beyond the z-stop position.
- If the z-stop position is not set up, then the LED is blinking in red.
- If the z-stop position is set up, the blinking of LED stops.
- If the objective is moved above the z-stop position, the LED turns into green.
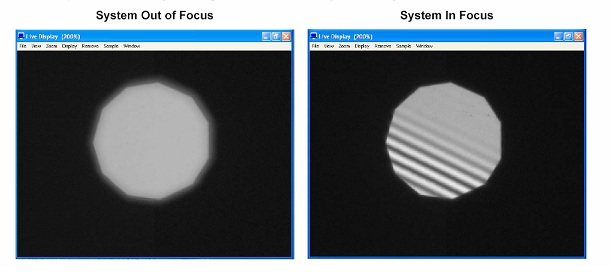
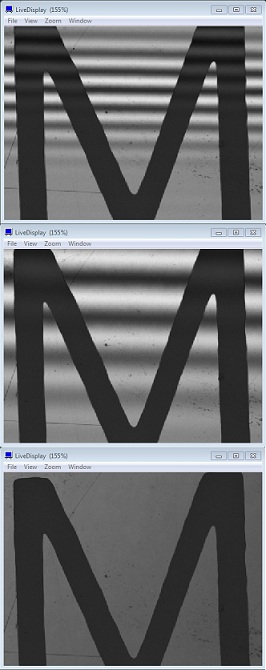
1. Find interference fringes on the CCD image.
- When you focus the image, you may find the fringes.
2. Adjust the position of the fringes by moving the objective lens in the z-direction.
- The red fringes means the saturated intensity. Press "F5" if necessary.
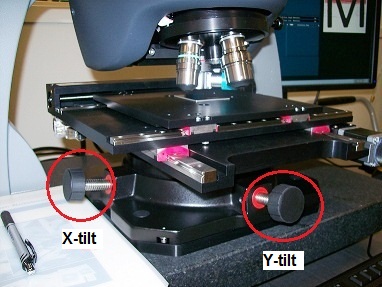
3. Tilt the stage using the tiling knobs to expand the distance between the fringes, until the distance reaches the maximum and the fringes start rotating.
4. The fringes are null now.
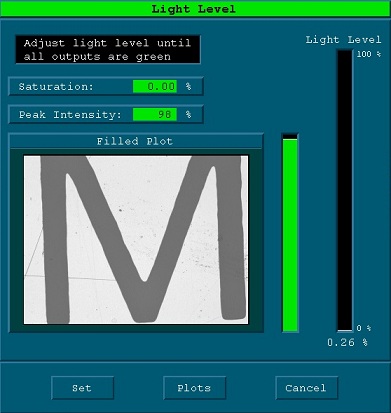
1. Press "F4" to set the final light intensity manually.
- Use numeric keypad to set peak intensity to 90-99 %.
- Ensure that there is no saturation (red)
2. Click the "Set" button after adjusting the intensity.
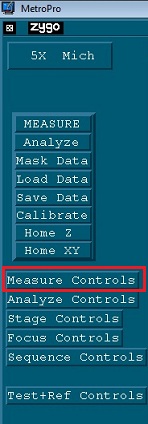
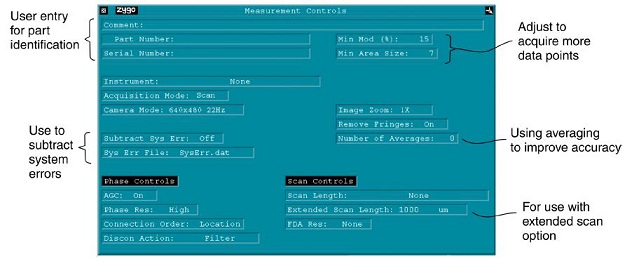
1. Click the "Measure Controls" button.
2. The "Measurement Controls" window appears.
3. Input the parameters.
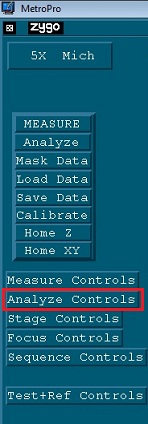
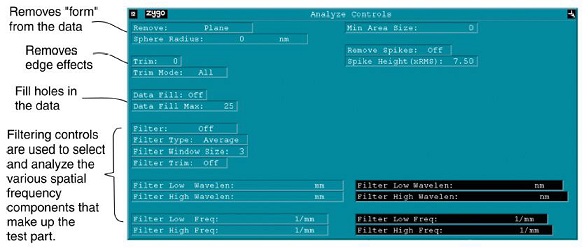
1. Click the "Analyze Controls" button.
2. The "Analyze Controls" window appears.
3. Input the parameters.
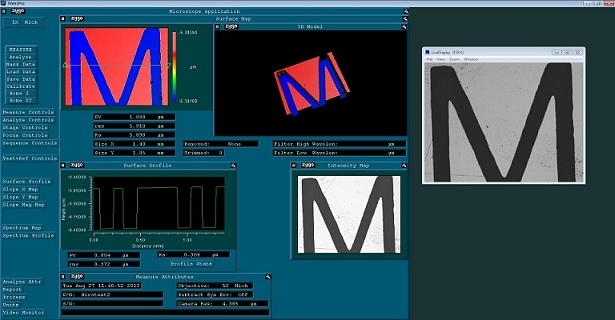
1. Click the "Measure" button.
2. The result is shown on the screen.


