Transparent or Semi-transparent Film Measurement
Updated on 11/6/2014
Contents
1 Load Application
2 Select Objective Lens
3 Setting in Measure Controls window
3.1 System Characterization File
3.2 Film Controls
3.3 Others
4 Load Sample
5 Set Z Stop
6 Find and Null Fringe
7 Set Light Level
8 Set Analyze Controls
9 Measure
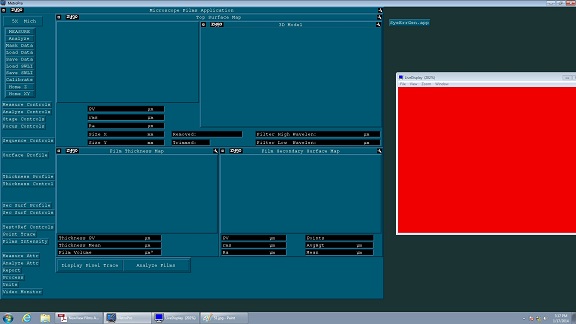
1. Load Application
1. Click the "Film7k.app" for transparent or semi-transparent films measurement.

2. The application is opened.
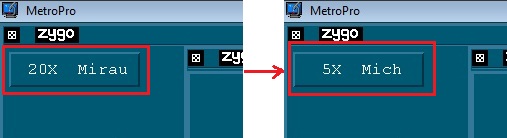
2. Select Objective Lens
1. Click the "Objective" button to change an objective lens.
- The objective lens is automatically changed.
- The objective lenses of x5, x20, x50 are available.
3. Setting in Measure Controls window
1. Click the Measure Controls button.
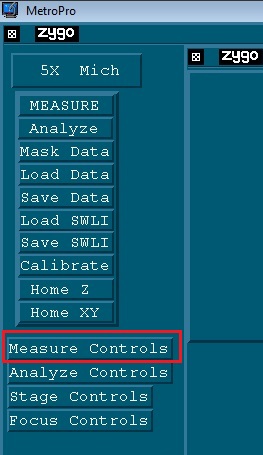
2. Measure Controls window opens.

3.1 System Characterization File
1. Click the "Select Sys Char File".
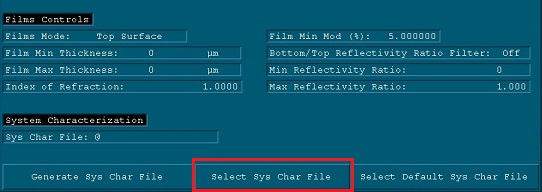
2. MetroPro file directory opens.
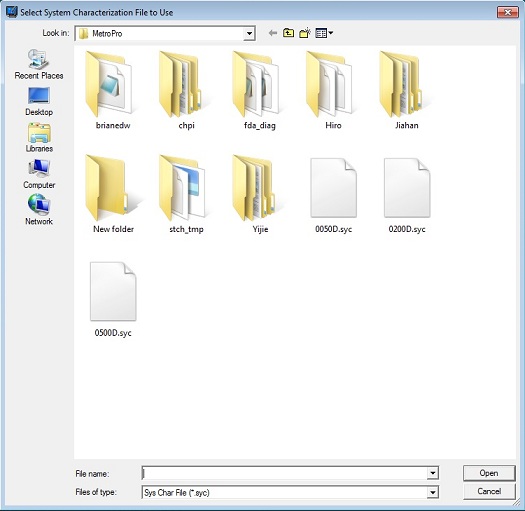
3. Choose the following System Characterization file from the file directory.
- If the objective lens is x5, then 0050D.syc.
- If the objective lens is x20, then 0200D.syc.
- If the objective lens is x50, then 0500D.syc.
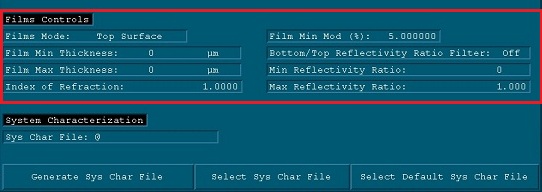
3.2 Film Controls
1. Set up Film Mode, Film Min Thickness, Film Max Thickness, and Index of Refraction (see NewView_Films_Application,_OMP-0506B).
- Resist pattern: Top Surface
- No pattern film: Top Surface for surface roughness, FilmThickness for thickness measurement
- You need to know refractive index before measurement because it affects the result very much.
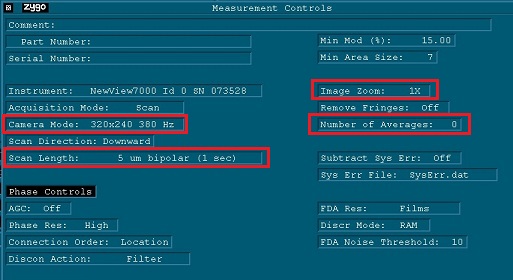
3.3 Others
1. Set up Camera Mode, Scan Length, Image Zoom, and Number of Averages, if necessary.
* The procedures from #4 to #8 are the same as those of Surface Structure and Roughness Measurement.
4. Load Sample
5. Set Z Stop
6. Find and Null Fringe
7. Set Light Level
8. Set Analyze Controls
9. Measure
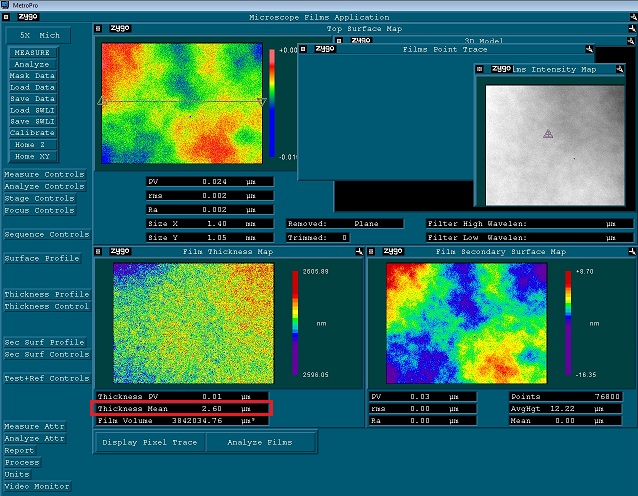
1. Click the "Measure" button.
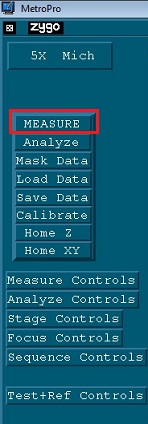
2. The result is shown on the screen.
- The film shown below was a spin-coat resist film without development.
- The Film mode was Film Thickness mode.
- If the resist film is developed, use "Top Surface".
- You can also try "Display Pixel Trace" or "Analyze Film".
- The "Thickness Mean" strongly depends on the refractive index.
- See NewView_Films_Application,_OMP-0506B as well.
- You might want to double-check the thickness using another metrology tool.