
Updated on 2/13/2018
Note:
1 Check-in
2 Pre Dehydration Process
3 Cold Start
4 Load Sample
5 Auto Mode Run
6 Unload Sample
7 Shut Down
8 Check-out
9 Supplemental Docments
1. Log-in on the ISIS scheduler
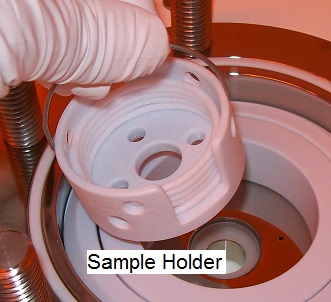
1. Put the sample into the sample holder provided.
2. If you treat your sample with some chemicals, e.g. hydrofluoric acid, before critical point drying, you must remove the chemicals from the solution after the treatment. This is done by immersing the sample in de-ionized water or some solvent miscible with alcohol, using three separate changes of water or the solvent.
3. Immerse the sample in ultrapure anhydrous methanol, using three separate changes of methanol, to dehydrate the sample.
Note: Only ultrapure anhydrous methanol in a glass bottle, provided by QNF, is allowed on the critical point dryer.
4. Keep the sample in the alcohol until it is transferred to the process chamber.
Warning: You MUST NOT dry the sample!
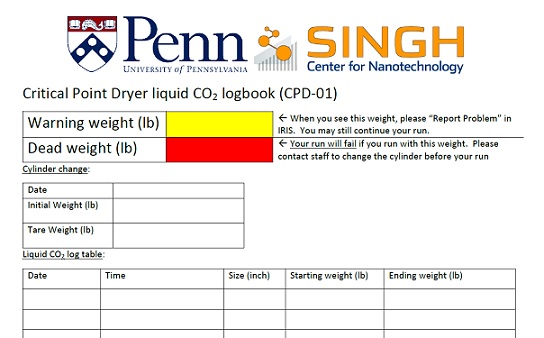
1. Write down date, time carrier size and weight of liquid CO2 cylinder on the CPD log sheet
a. If the cylinder weight is below the Warning Weight, please submit a Problem Report in IRIS. You may continue your run.
b. If the cylinder weight is below the Dead Weight, please ask staff to help change the cylinder before proceeding. If you proceed anyway, you will run out of liquid CO2 before the process finishes and the process will fail.
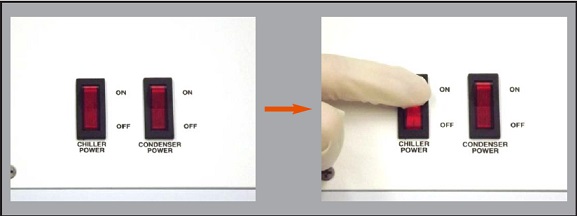
2. Turn on the "Chiller Power" 30 min before the process run.
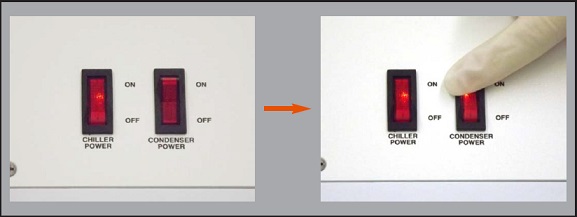
3. Turn on the "Condenser Power".
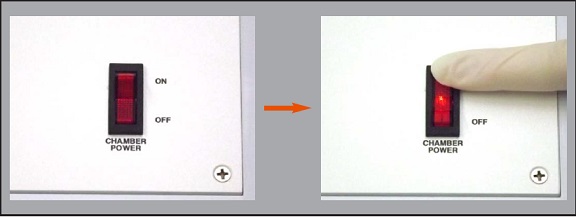
4. Turn on the "Chamber Power".
5. The following screen appears.
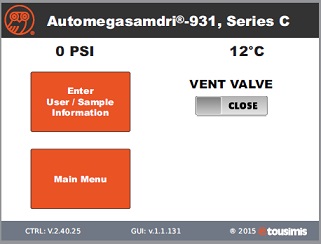
6. Press the "Enter User/Sample Information" button to enter user/sample information, if necessary.
7. You may also press the "Main Menu" button to start operation without entering user/sample information.
Note:
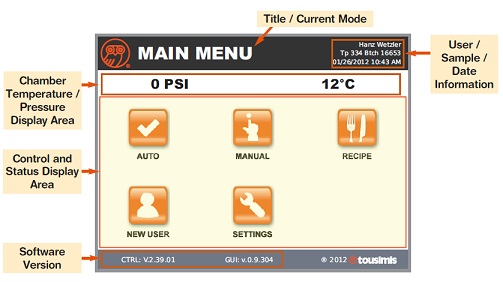
8. The "Main Menu" screen will be displayed.
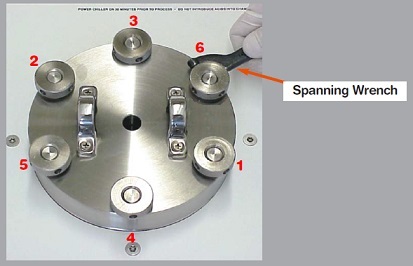
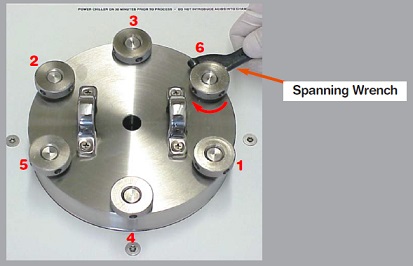
1. Loosen the knurl nuts according to the numbering sequence, using the spanning wrench provided.
2. Remove the chamber lid carefully.
Note: Make sure that the chamber lid is placed on a clean wipe.
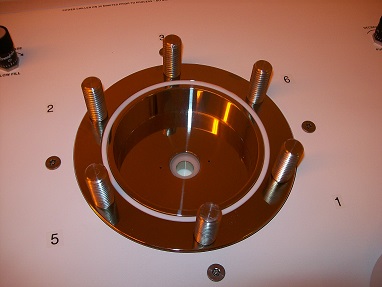
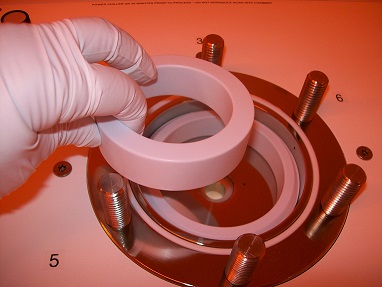
3. Place the spacers into the process chamber to minimize the space other than the sample holder.
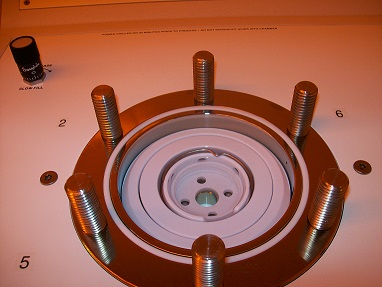
3. Pour sufficient alcohol into the process chamber to cover the sample.
4. Quickly transfer the sample holder containing the sample into the process chamber.
5. Carefully lower the chamber lid onto the chamber.
6. Use fingers to evenly tighten the nuts.
7. Tighten each nut uniformly according to the numbering sequence, using the spanning wrench.
Note: Do not tighten the nuts too much from the begining.
8. Repeat this tightening until the nuts are unable to tighten further.
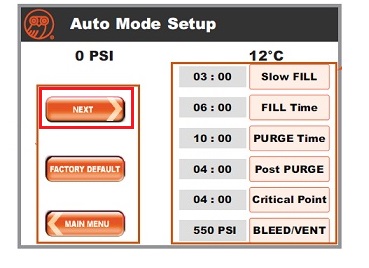
1. Press the "Auto" button on the "Main Menu" screen.
2. The following screen appears.
Note: The factory default setting values are shown on the screen.
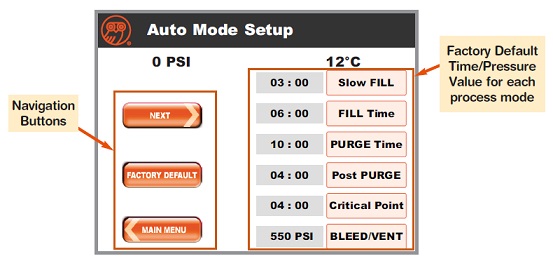
Each Process Mode:
3. To modify the setting value, press the button of each process mode, and change the parameter.
4. Press the "NEXT" button after changing the parameters.
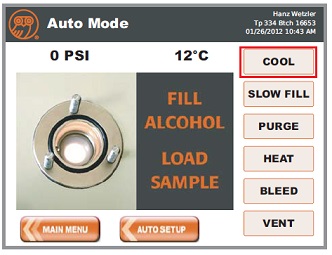
5. The following screen appears.
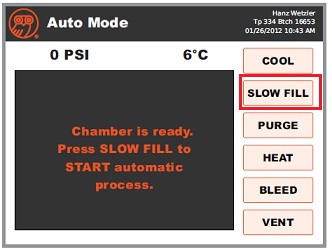
6. Press the "COOL" button.
7. When the cooling process is completed, the following screen will appear.
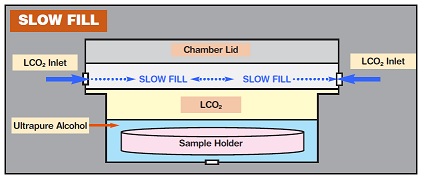
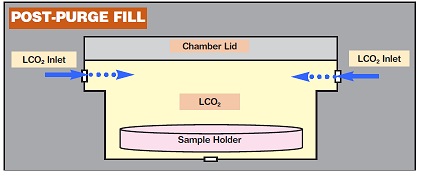
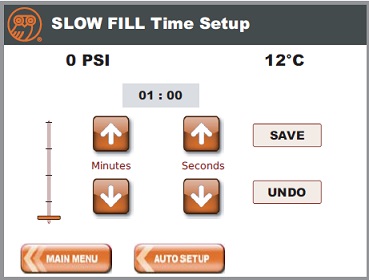
8. Press the "SLOW FILL" button.
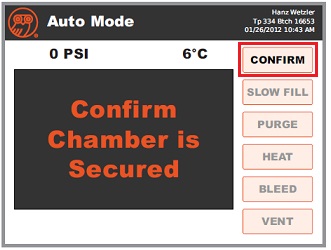
9. The following screen appears.
10. Press the "CONFIRM" button, and the critical point drying from the "SLOW FILL" to the "VENT" process mode will start automatically.
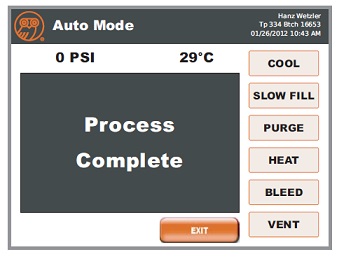
11. When the critical point drying is completed, the following screen will appear.
12. Press the "EXIT" button.
1. Remove the knurl nuts using the spanning wrench provided.
2. Remove the chamber lid carefully.
3. Remove the sample holder from the process chamber.
4. Reseal the chamber with the lid to keep it clean and moisture free.
1. Turn off the "Chiller Power".
2. Turn off the "Condenser Power".
3. Turn off the "Chamber Power".
4. Write down the weight of the liquid CO2 cylinder on the CPD log sheet.
1. Log-out on the ISIS scheduler
Revisions
9/14/2016, by Hiro, added Critical Point Failure Correction.
9/27/2016, by Meredith, added QNF Critical Point Dryer Wet Chemical Procedure
2/13/2018, by David, added CPD log sheet