Updated on 10/15/2014
1 Check-in
2 Vent the chamber and load the sample(s)
3 Pump down the chamber and Etch the sample
4 Unload the sample(s)
5 O2 Plasma Cleaning
6 AFTER YOU ARE DONE CLEANING
7 Check-out
8 Supplemental Documents
1. Log-in on the ISIS scheduler. Otherwise, you cannot use Techincs etcher.
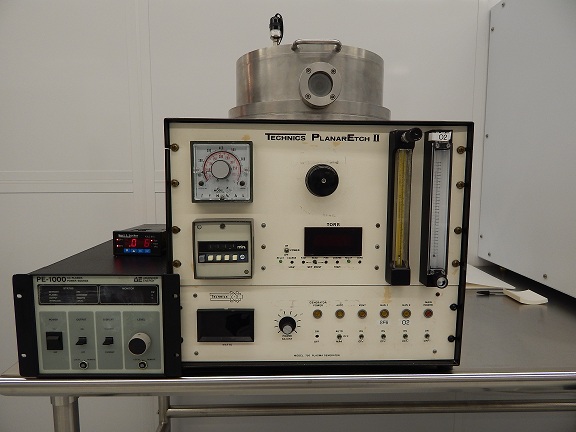
1. Ensure that the switches on the tool are set as follows:
(PLEASE NOTE: The onboard power generator is no longer in use.)
2. Turn on MAIN POWER switch.
3. Turn on VENT switch.
4. Wait until chamber lid pops up slightly.
5. Turn off VENT switch.
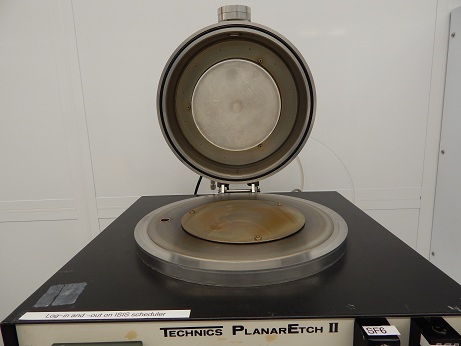
6. Open chamber lid.
7. Load samples.
8. Close chamber lid.
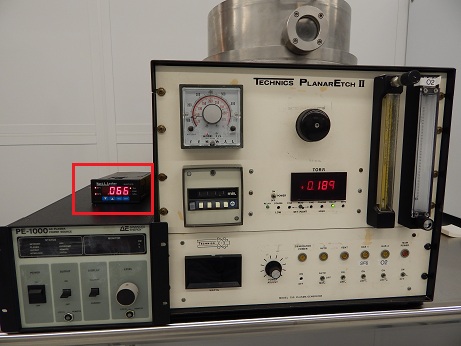
1. Slowly open the PROCESS VALVE.

2. Wait until the pressure reaches ~0.06 Torr and stabilizes.
* Note: The vacuum indicator on the tool is not accurate.
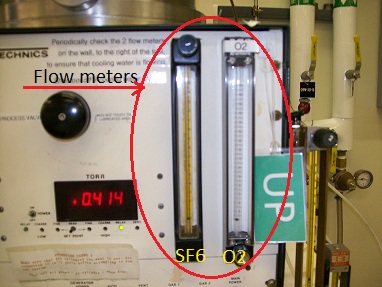
3. Adjust the flow rate(s) for the gas(es) you plan on using.
4. Wait until the pressure inside the chamber stabilizes.
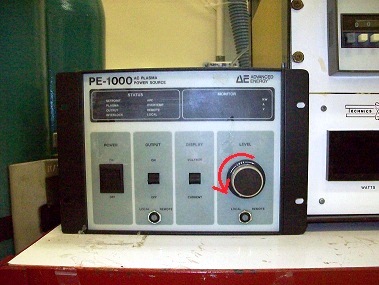
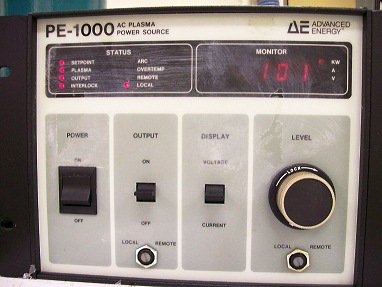
5. Ensure that the LEVEL knob on the PE-1000 plasma power source is turned down all the way (counter-clockwise).
6. Turn on the PE-1000 plasma power source.
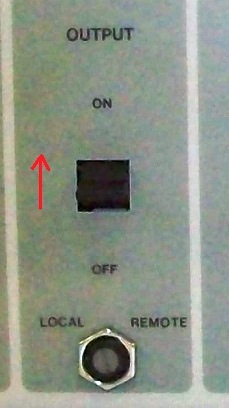
7. Toggle on the OUTPUT switch (The LED is ON).
8. Turn the PE-1000 LEVEL knob slowly until the desired power level is attained. Wait for the desired etch time.
Note: alternative procedure for setting the power level prior to etching.
a. Complete steps 1 – 10 WITHOUT samples in chamber.
b. Once desired power level is attained, keep power level knob at that position.
c. Turn off OUTPUT switch on power supply.
d. Turn off gas with switch on front panel.
e. Close process valve.
f. Vent.
g. Open chamber lid and position samples.
h. Close lid and open process valve.
i. Once pressure reaches ~0.06 Torr, switch on gas at front panel.
j. Adjust pressure to previous level.
k. Now toggle the OUTPUT switch on for desired time.
9. When your etching process is done, toggle the PE-1000 OUTPUT switch OFF.
10. Turn the PE-1000 LEVEL knob all the way down (counter-clockwise).
11. Turn the PE-1000 plasma power source OFF.
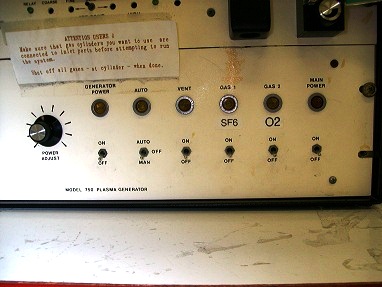
12. On the tool, turn off the GAS1 and/or GAS2 switch(es).
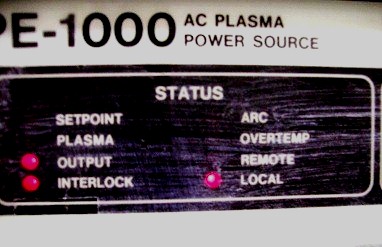
Note: If your sample is sitting too high in the chamber, the impedance of the chamber may have been altered too much by your sample, which prevents a plasma from being struck, due to the high reflected power (no power will be displayed on the PE-1000). In this case, shut off the power output immediately and consult with WNF staff.
Notes
1. Log-out on the ISIS scheduler.