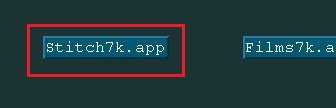
1. Click the "Stitch7k.app" for Stitching measurement to open the application.
Updated on 1/7/2015
Note: Calibration Standard is not available.
1 Load Application
2 Select Objective Lens
3 Reset Home Position
3 Load Sample
4 Focus and Null or Minimize The number of Fringes
5 Set Measurement Controls
6 Image Shot
7 Stage Alignment Check
8. Stitching Measurement
9. Zip Stitching
1. Click the "Stitch7k.app" for Stitching measurement to open the application.
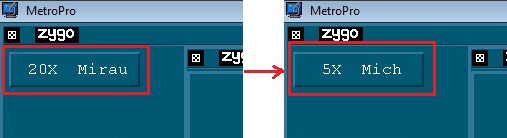
1. Click the "Objective" button to change an objective lens.
- The objective lens is automatically changed.
- The objective lenses of x5, x20, x50 are available.
1. Click the Home XY and Home Z Axis buttons to re-establish the motorized stage home positions.
1. Place the sample on the stage.
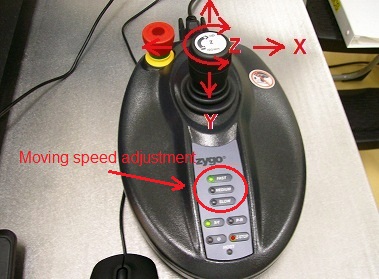
2. Move the stage for the sample to be beneath the objective lens using the joy stick.
- The green light spot from the objective is seen on the stage.
- Joystick
- X-direction: place down on the left or right side.
- Y-direction: place down on the top or bottom side.
- Z-direction: rotate clockwise (up) or counter-clockwise (down).
- The moving speed can be changed by pressing the "Fast", "Medium", or "Slow" button.
1. Refer to the standard operating procedure of Surface Structure and Roughness Measurement.
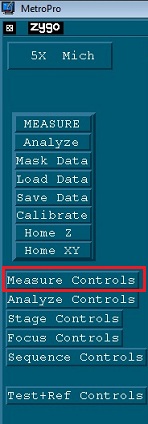
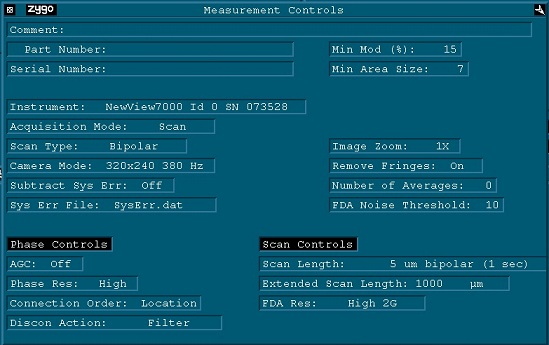
1. Click the "Measure Controls" button.
2. The "Measure Controls" window appears.3. Set the Camera Mode, Scan Length, and Scan Dir controls to the desired settings.
4. Make sure that the software Image Zoom control is set to match.
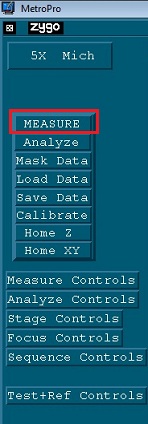
1. Click the "Measure" button.
2. The result is shown on the screen.3. Make sure that the image is acceptable. If it is not acceptable, repeat the process of 4, as shown above.
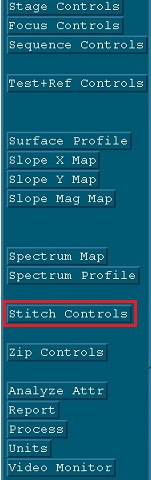
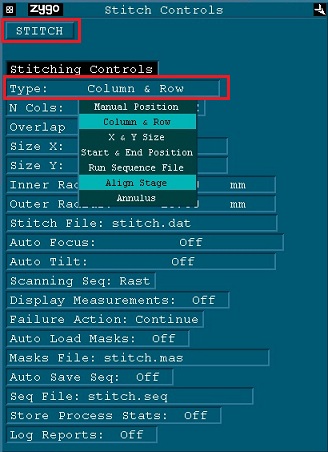
1. Click the "Stitch Controls" button.
2. The "Stitch Controls" window appears.
3. Click on the "Type" to show the drop-down menu.
4. Choose "Align Stage".
5. Click the "STITCH" button.
6. The stitching of two columns and one row will be carried out.
7. Make sure that the stitching is acceptable. If it is not acceptable, consult the staff.
- See the detail of Manual Stitching Application.
1. Click on the "Type" to show the drop-down menu.
2. Choose the stitching method desired from the followings.
- Manual Position: The user teaches the software the location of all measurement positions. Useful for measuring odd shaped parts, like an S-curve. It is the user’s responsibility to ensure that the overlap is sufficient between measurement positions. The pattern starts at the first saved location.
- Column & Row: The stitched area is determined by the number of rows and columns. Requires entries in N Cols, N Rows, and Overlap (%) controls. The pattern always starts in the upper right.
- X & Y Size: The stitched area is determined by entered dimensions. Useful when the size of the measurement area is known. The number of rows and columns to cover the area is automatically calculated. Requires entries in Size X, Size Y, and Overlap (%) controls. The pattern always starts in the upper right.
- Start & End Position: The user teaches the software the starting position (upper right) and the ending position (lower left) of the stitched area. The number of measurements needed is automatically calculated. Requires an entry in the Overlap (%) control. The pattern always starts in the upper right.
- Annulus: The stitched area is circular or ring shaped. The measurement locations are automatically determined. Requires entries in the Inner Radius, Outer Radius, and Overlap (%) controls. The pattern starts at the 12 o’clock position on the outer radius.
- Run Sequence File: The Sequence file as specified in the Seq File control is used for measurement locations. The pattern starts at the first saved location.
- See the detail of "Stitching Methods" in Manual Stitching Application.
3. Set the Auto Focus and Auto Tilt to be "ON", if necessary.
4. Make software control adjustments, if necessary.
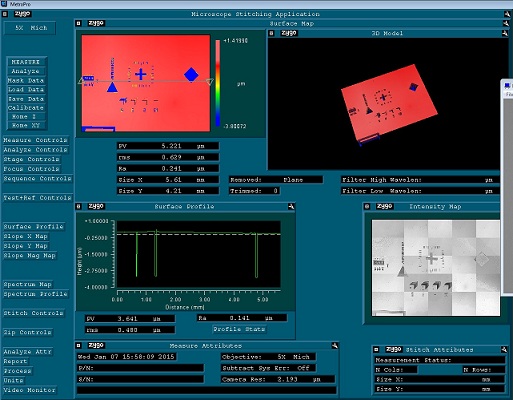
5. Click the "STITCH" button.
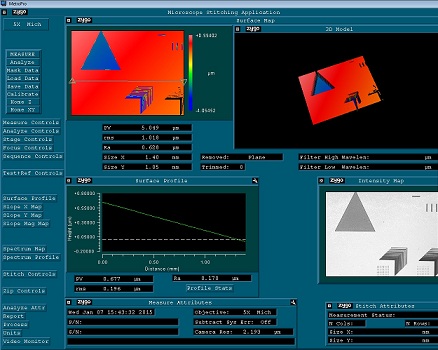
6. The result is shown on the screen.
- In this example, stitching measurement for 5 columns and 5 rows was carried out.


