
2. Getting Started on Amazon EC2
Warning
Make sure to stop your Amazon instances! We only have $150 of credits and we need it to last through Homework 7. You may need to take a long break during a homework, or you might take longer to read about something on google/stackoverflow; remember to stop your instance and restart it when you are ready to continue.
2.1. Basic Model
For this course, as a minimum, we need you to have a machine that you can use for software development. A typical configuration is Intel Core i5 + 256GB SSD + 8GB RAM. You can use any OS— Mac/Linux/Windows, however, keep in mind that Xilinx only supports Linux and Windows (you can use this video tutorial to run Linux on a virtualization software).
For HW 1-4, we will use a command-line workflow. We will introduce some Xilinx specific GUI workflow in HW 5-7. You will need to be comfortable with using a terminal. We will be using a terminal to ssh into an Amazon instance.
To edit your source files, you can use vim or emacs directly in the remote terminal. Or you can ssh from an editor in your local machine to edit files remotely. For instance:
2.2. Create an AWS account
Go to https://aws.amazon.com/, click on Create an AWS account, and follow the instructions.
Select Type of Account to be Personal.
Add your Payment Info (this is required even though we will be using a coupon).
Select Support Plan to be the Basic Plan.
Proceed by clicking Sign in to the Console.
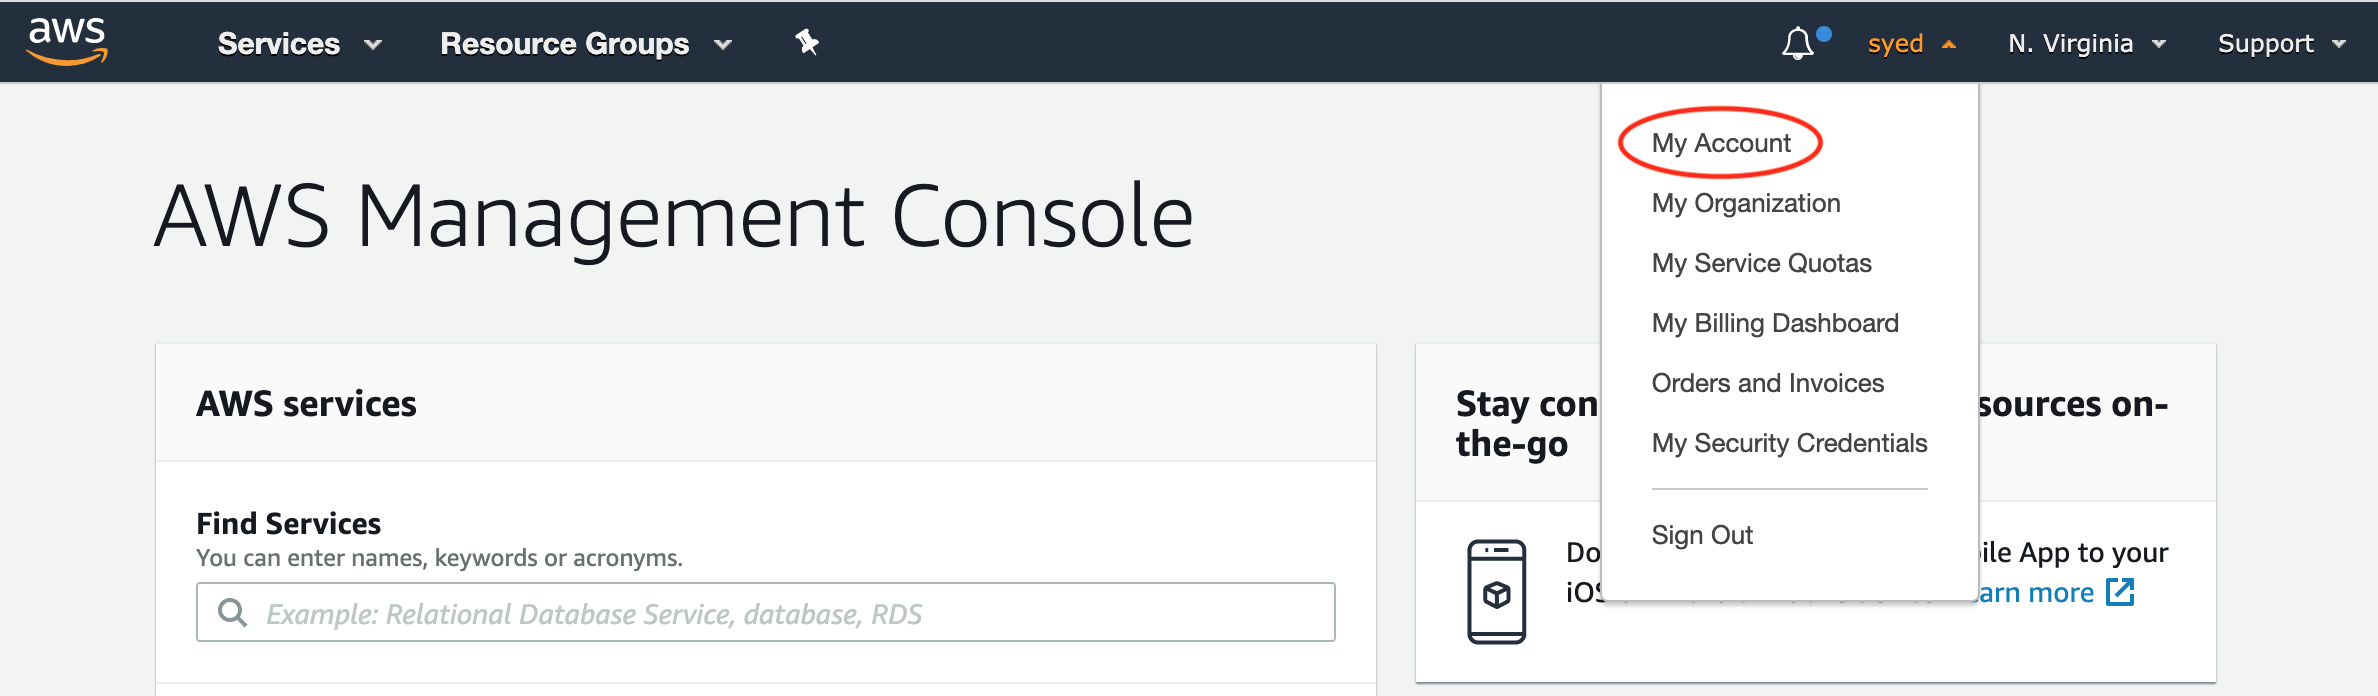
2.3. Note down your Account ID
We will need this to get you access to F1 instances, while you work with A1 instances. Go to the following page, find your Account ID and put it in your report.
2.4. Redeem Coupon
Go to this link: https://aws.amazon.com/awscredits/ and click on Redeem Credit. In the follow-up screen, add your coupon code that we gave you, type the captcha and click on Redeem
2.5. Usage and Costs
We will be using two types of instances:
For homework 1-4 we will use an
a1.xlargewith ARM cores. It costs$0.102/hr.For homework 5-7 we will use an
f1.2xlargewith Xilinx FPGAs. It costs$1.65/hr.
Students from the past offerings of this class reported that they took about 9-16 hours on average to complete an assignment. Given that, we expect a total usage of \(\$\)\(0.102\) \(\times\) \(16\) \(\times\) \(4\) \(+\) \(\$\)\(1.65\) \(\times\) \(16\) \(\times\) \(3\) \(\approx\) \(\$\)\(86\) per student for doing all the assignments on Amazon AWS. We are giving you \(\$\)\(150\) in credit—so there is some leeway. For the project, you will have the option to use SEAS Biglab or use up the rest of the AWS credits or build locally (if you manage to have a local installation of Xilinx Vitis/Vivado tools).
2.6. Create and Launch an A1 instance
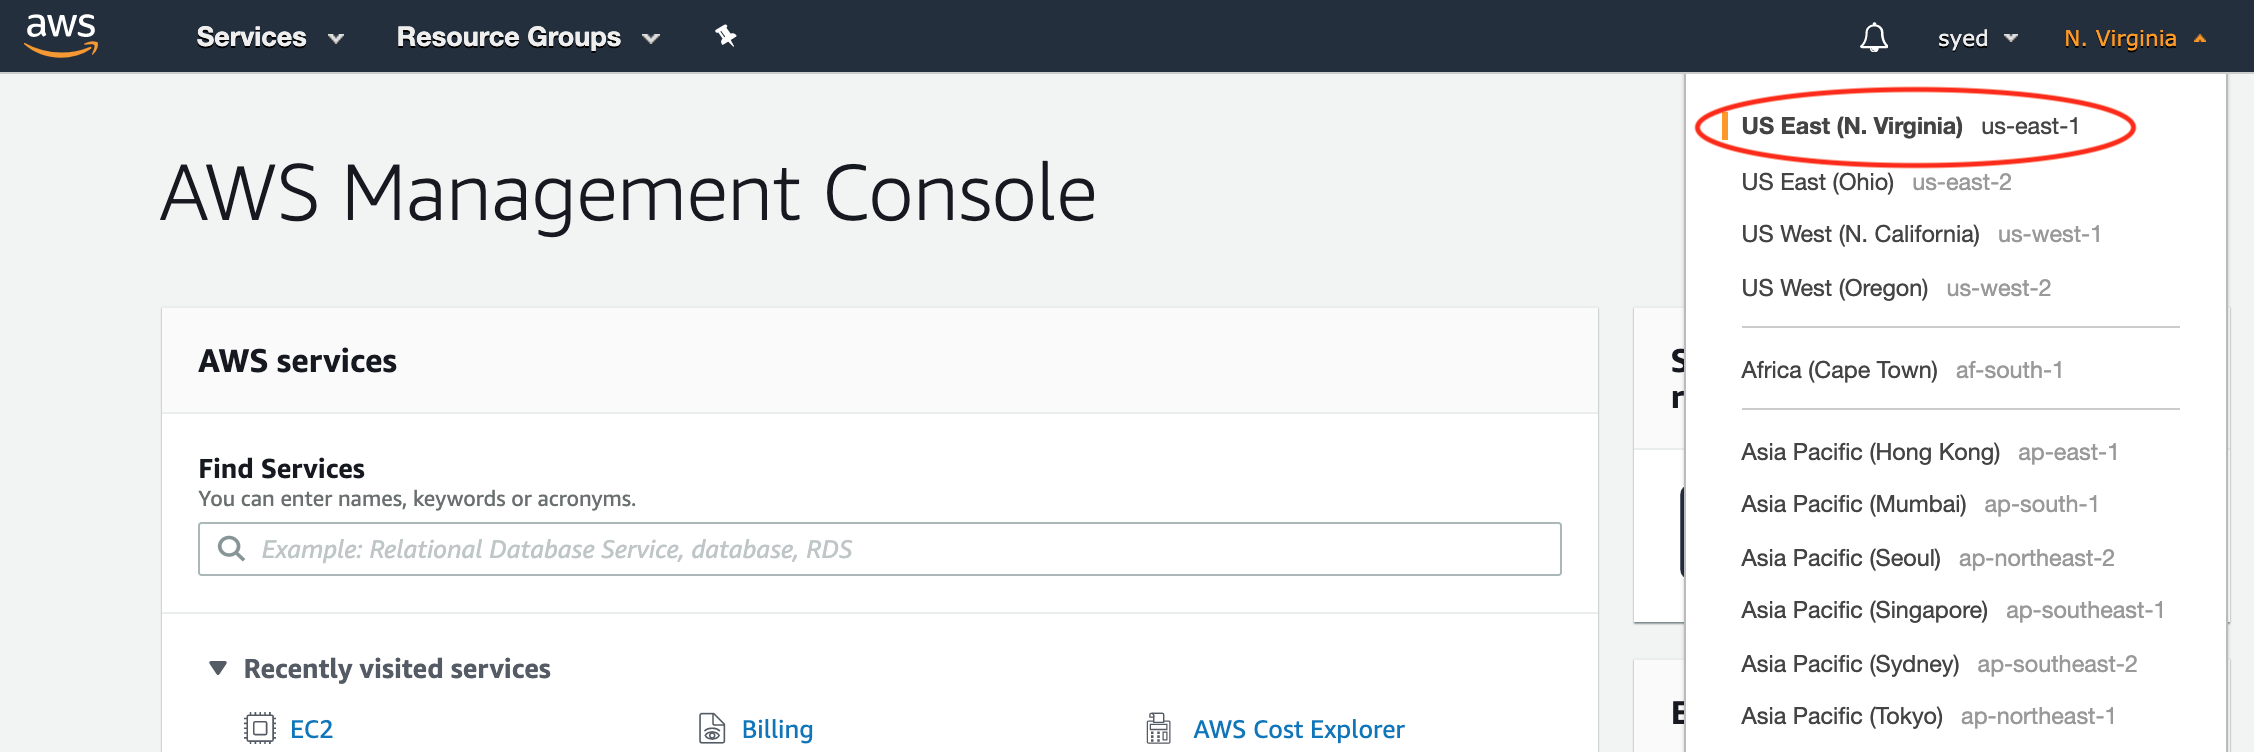
First make sure you the region you have selected is N. Virginia us-east-1 from the top right corner of the screen:
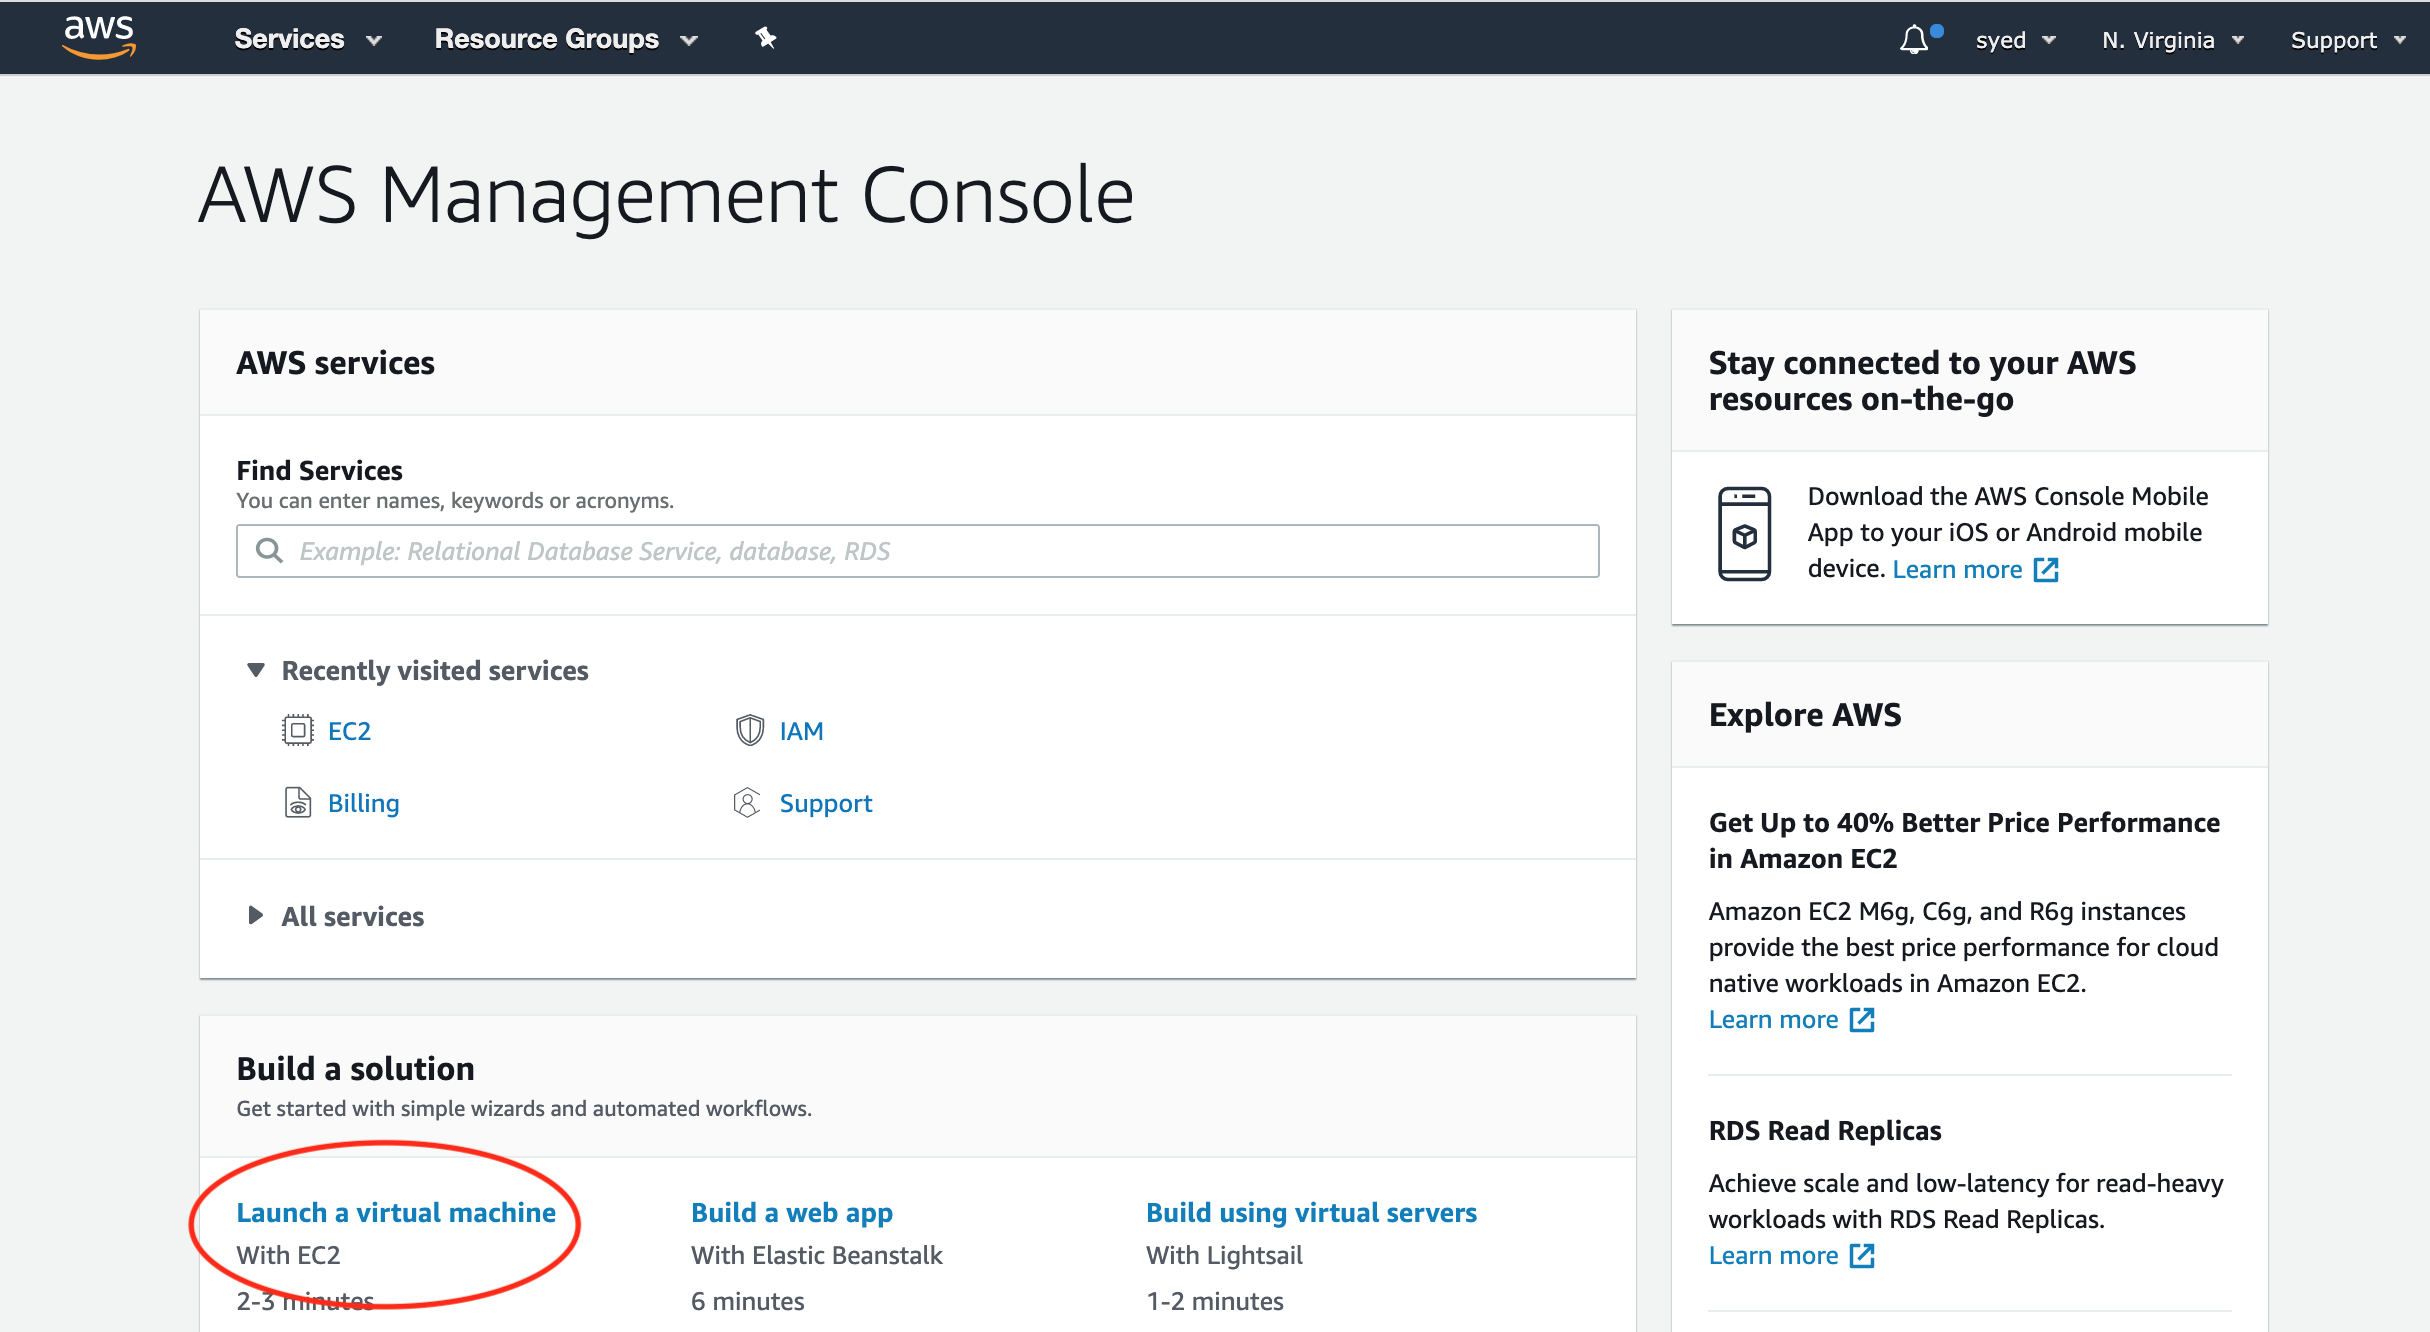
From the management console, click on Launch a virtual machine:
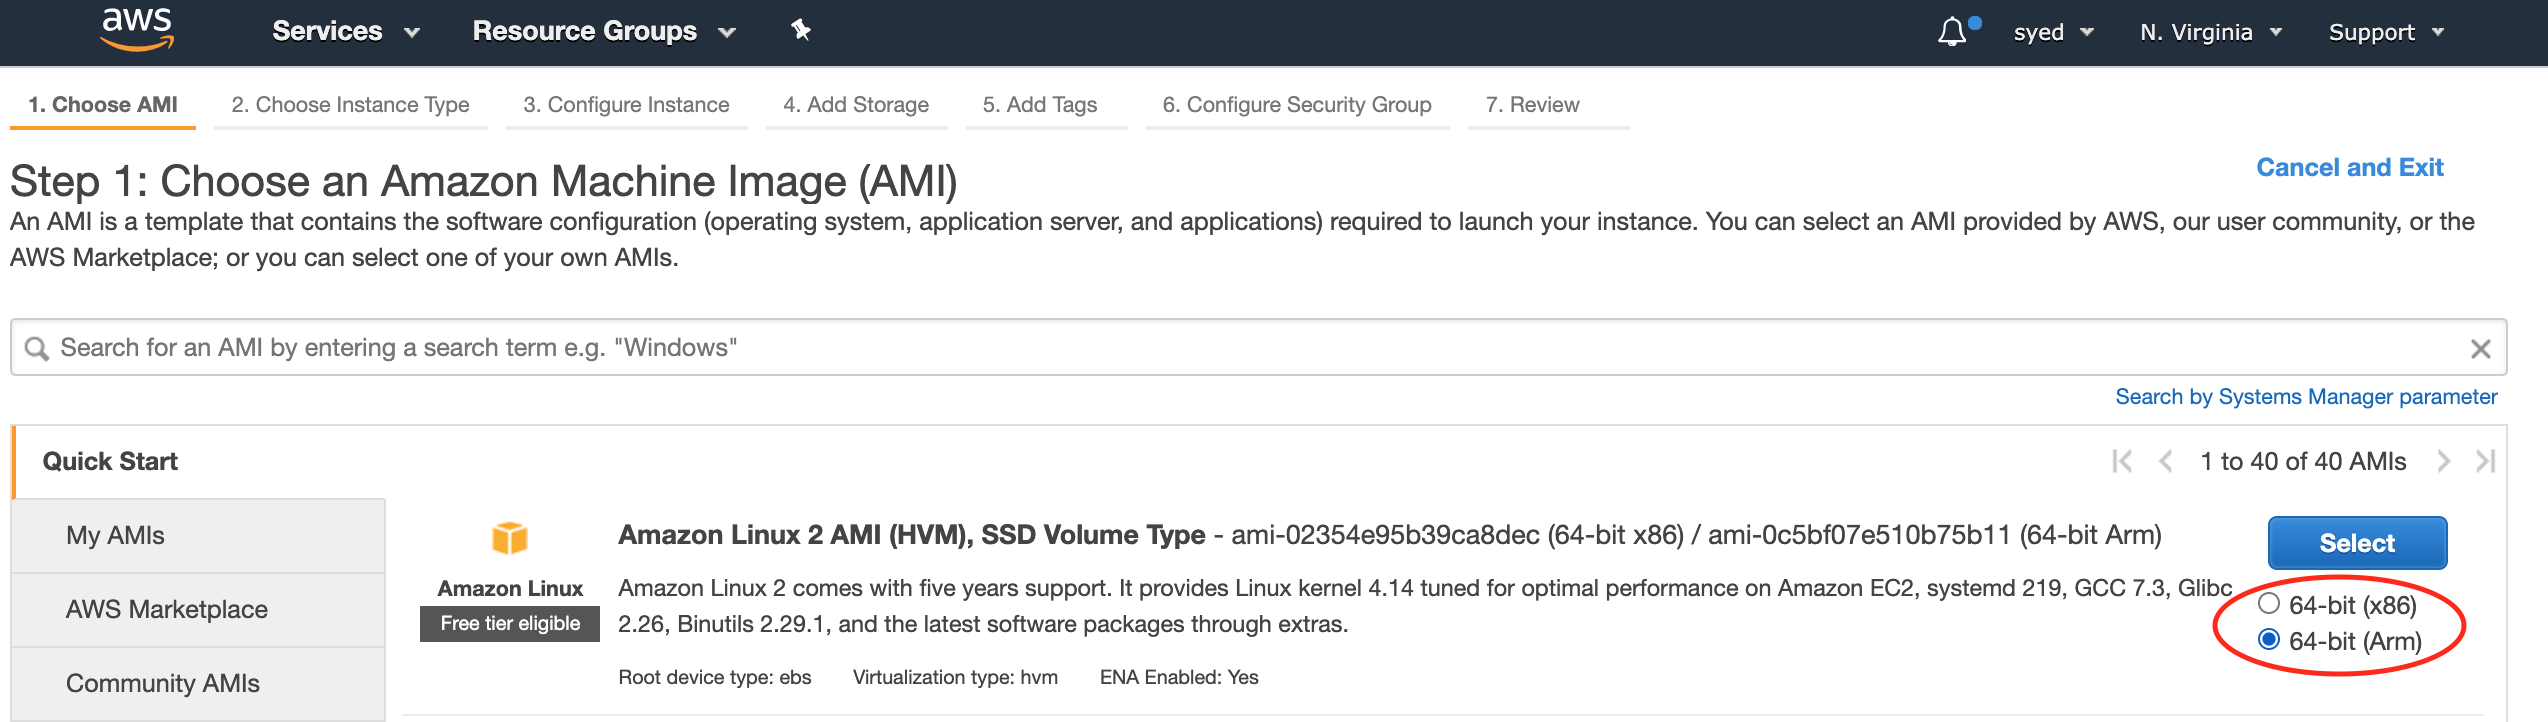
Select Amazon Linux 2 AMI (HVM) as your AMI and make sure 64-bit (Arm) is checked.
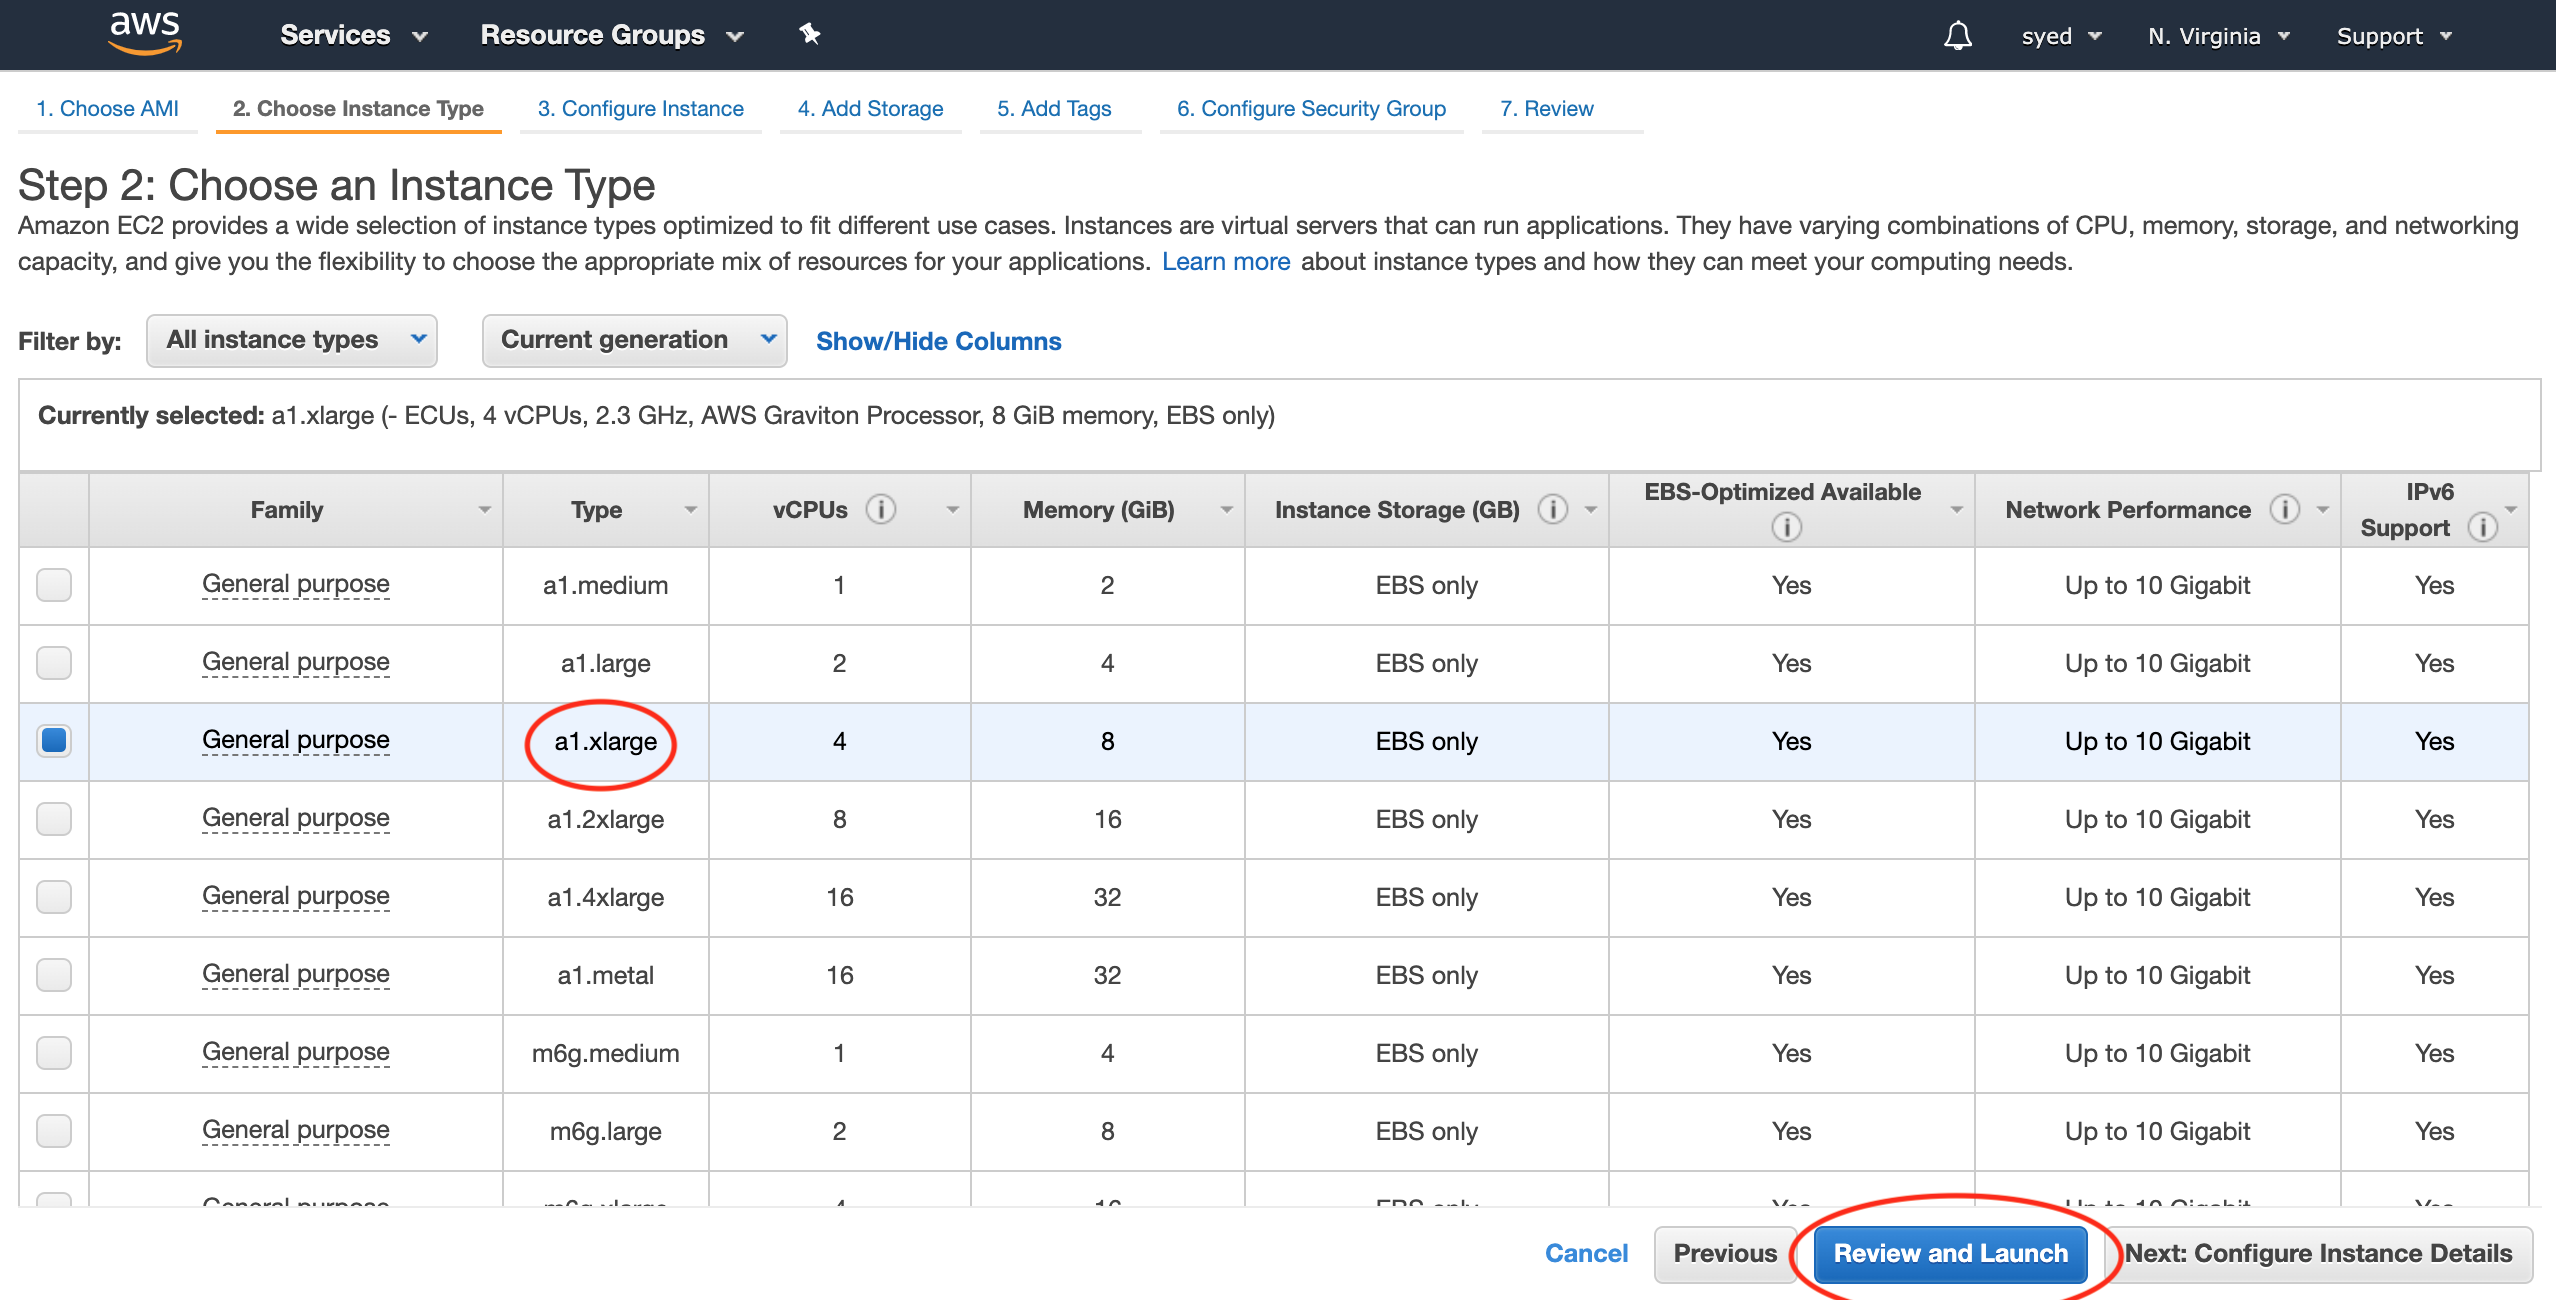
Select a1.xlarge instance type and click on Review and Launch
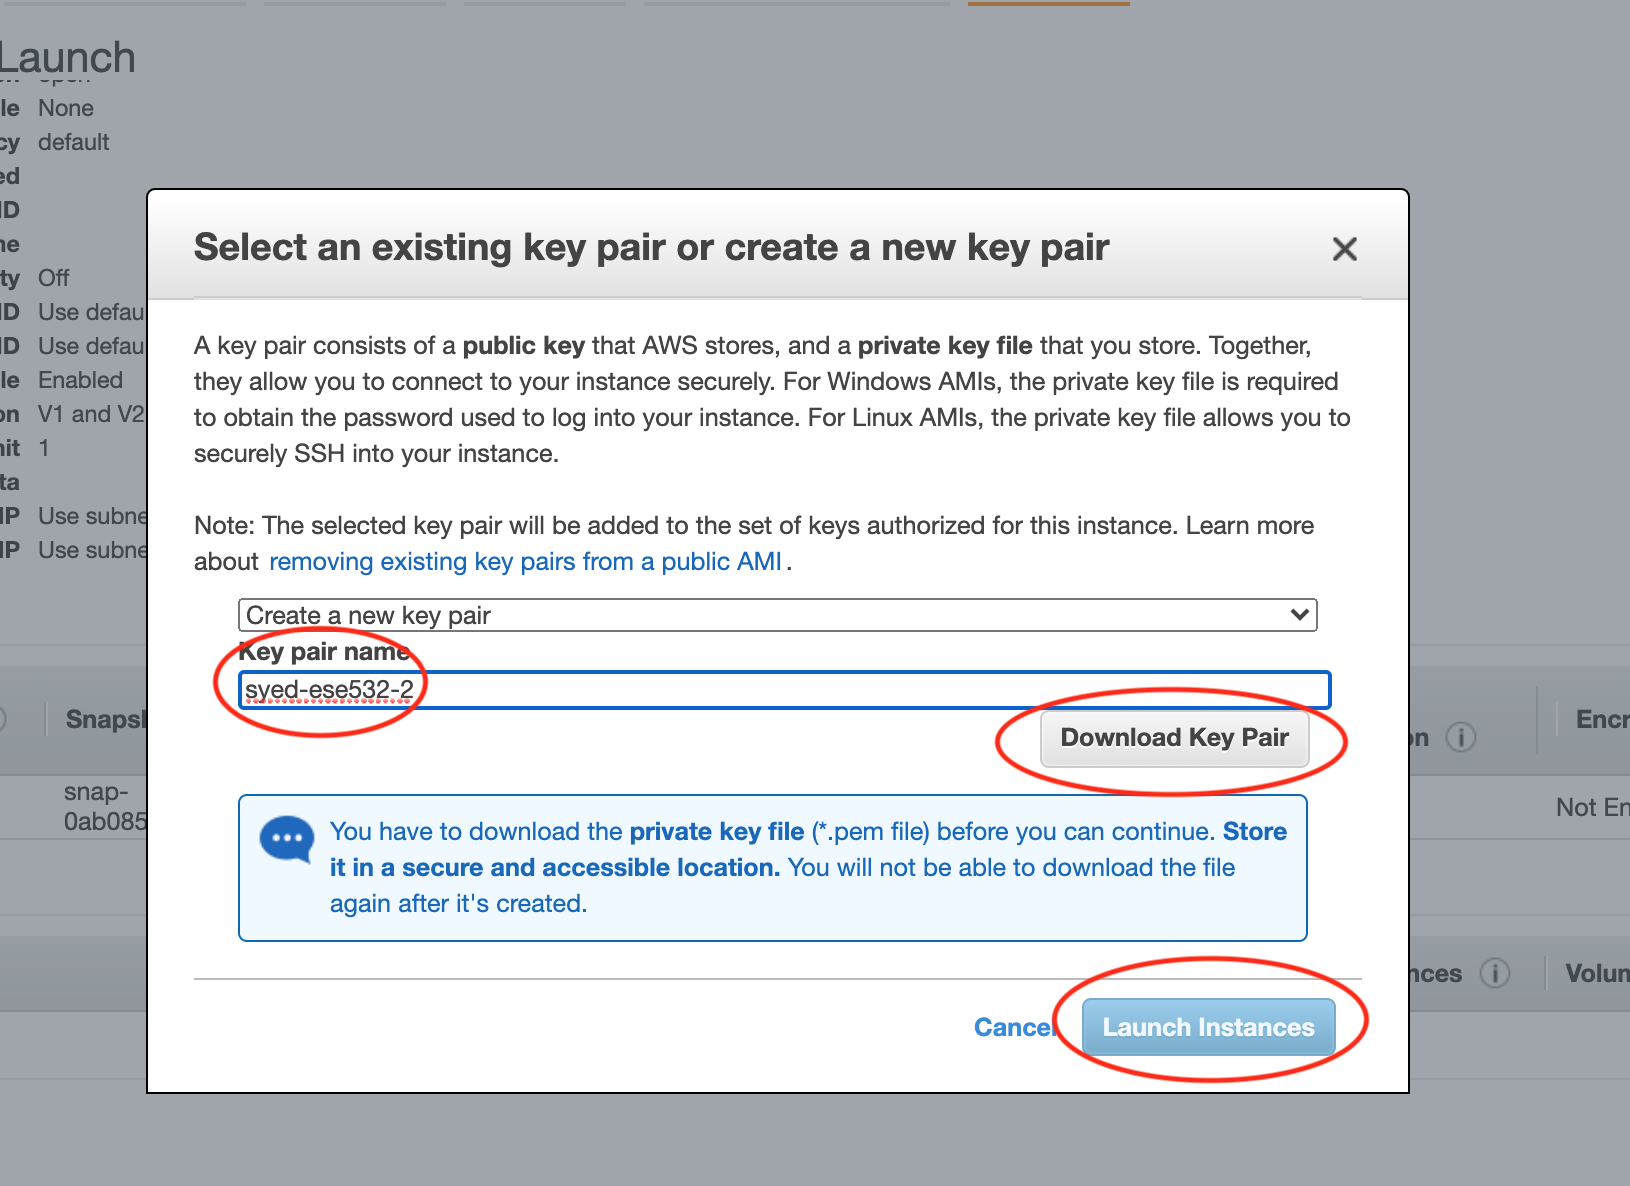
Select Launch on the current page. Create a key pair by giving a suitable name and then selecting Download Key Pair (we will use this key to ssh into the machine later). Now click on Launch Instance.
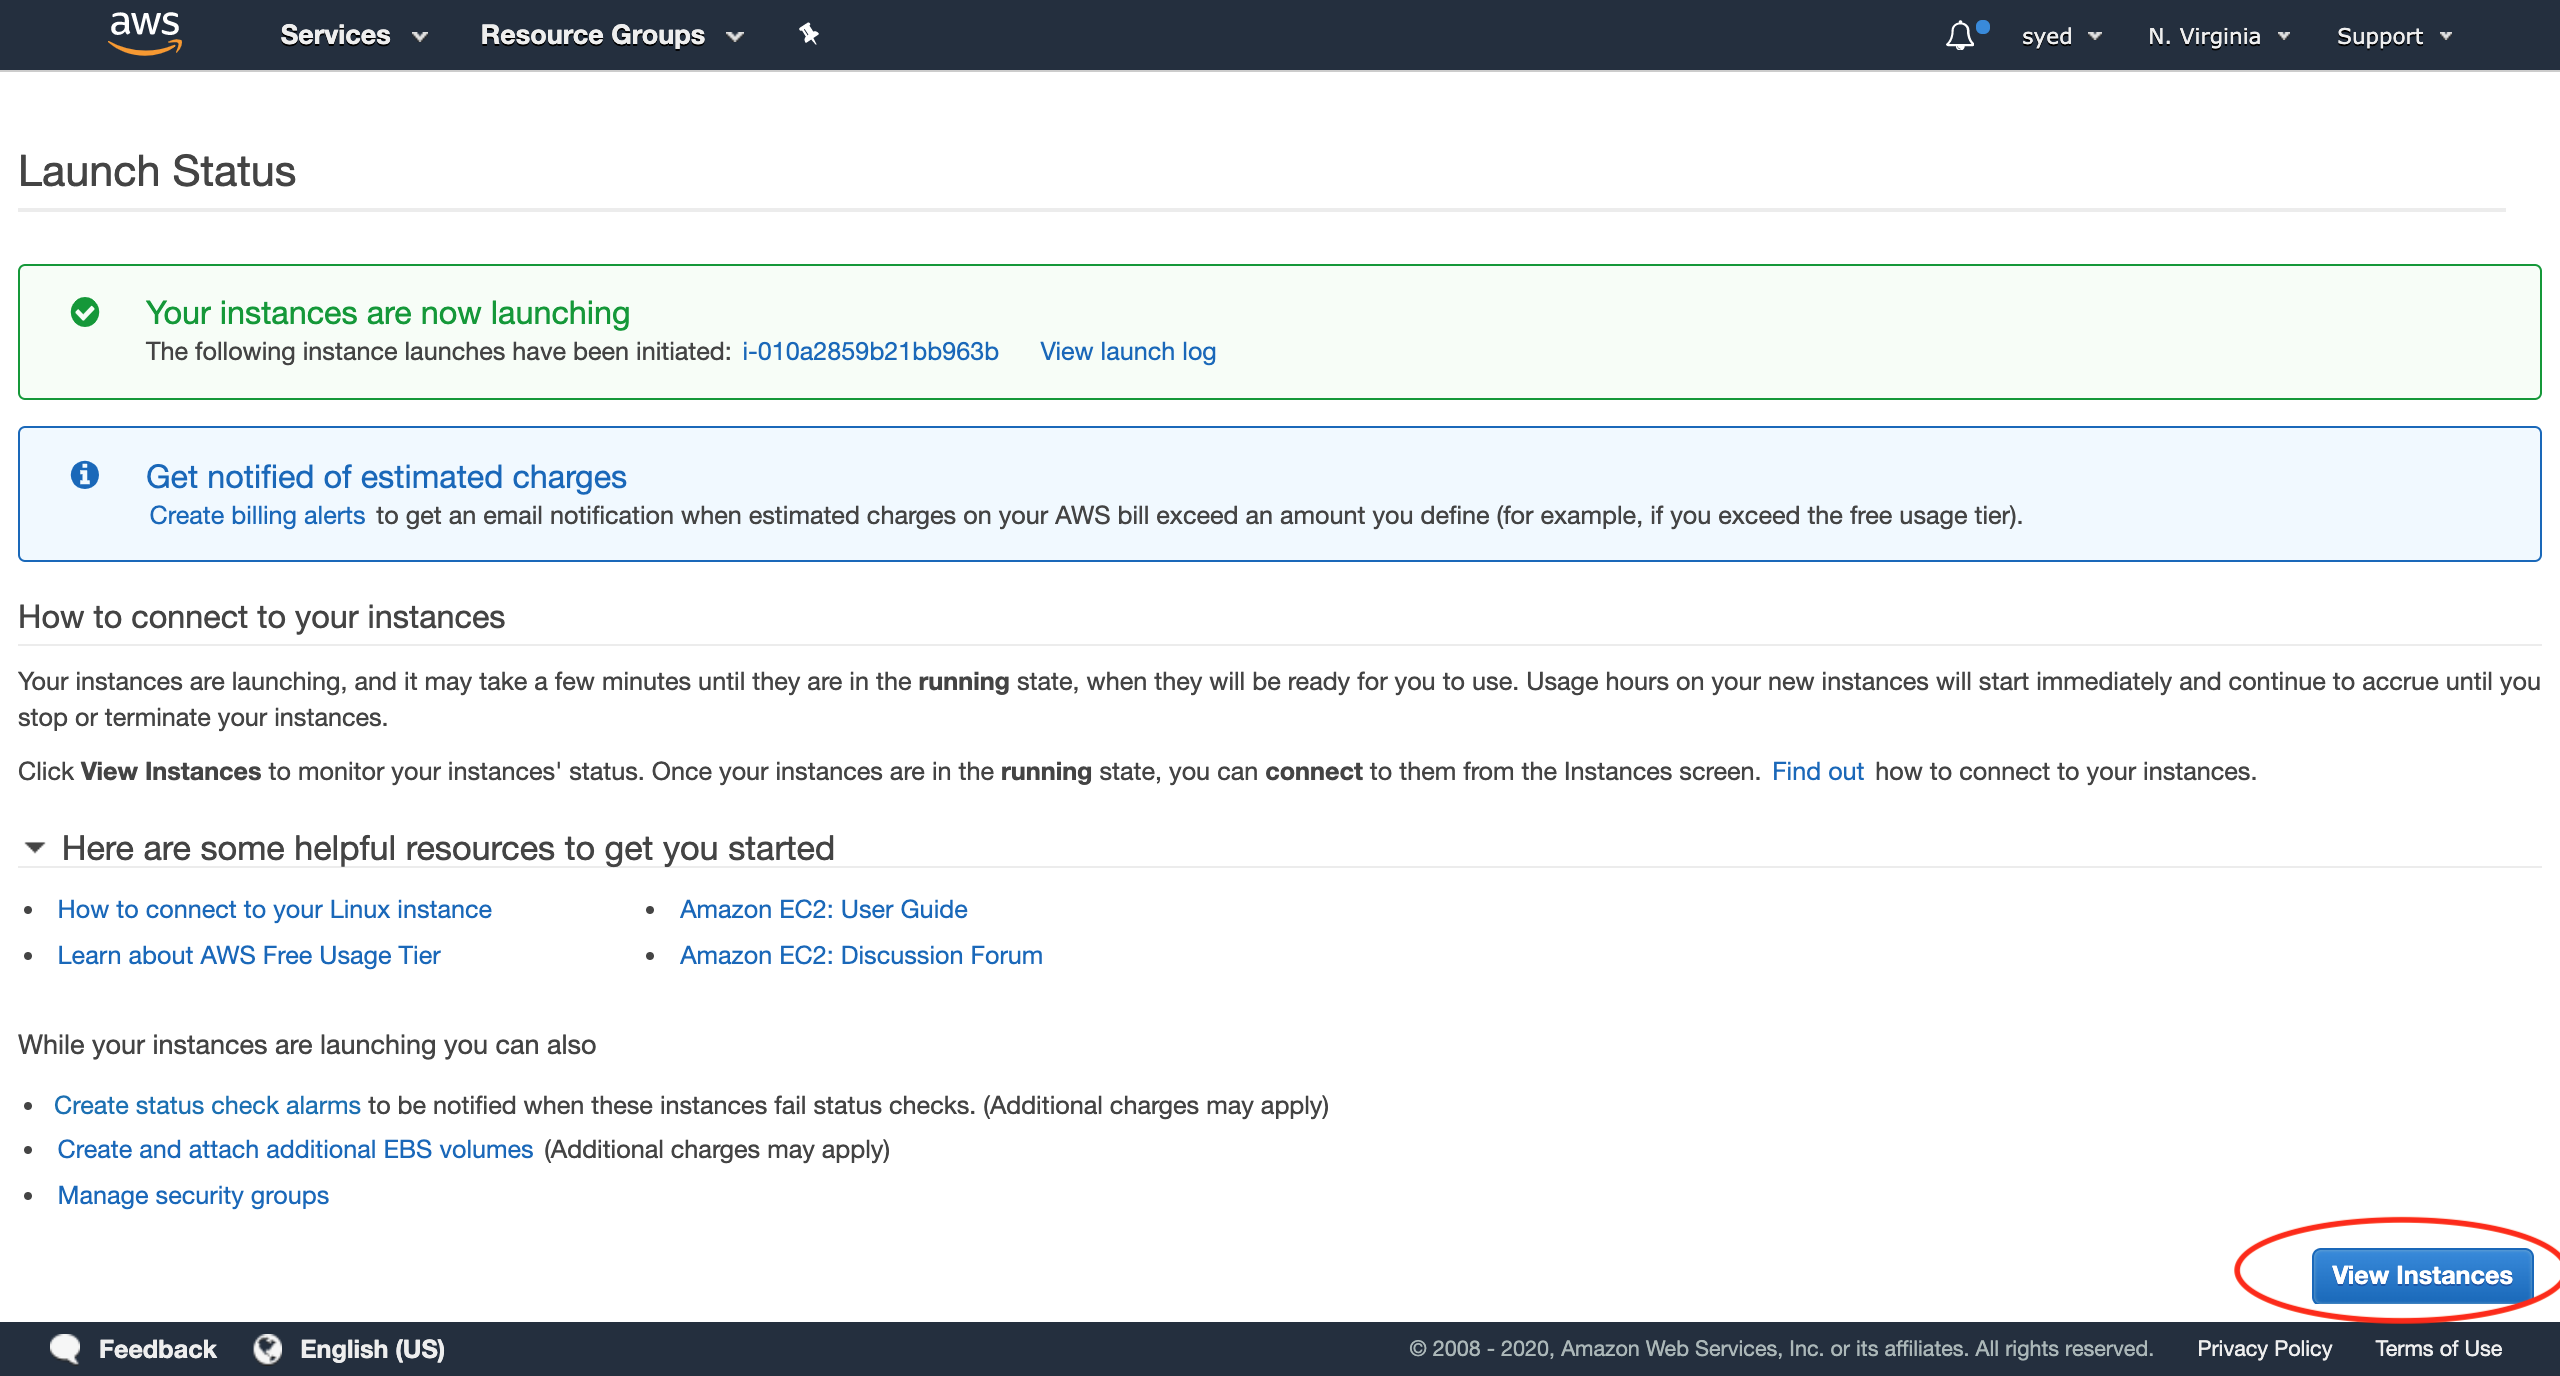
You should see a screen as follows. Select View instances.
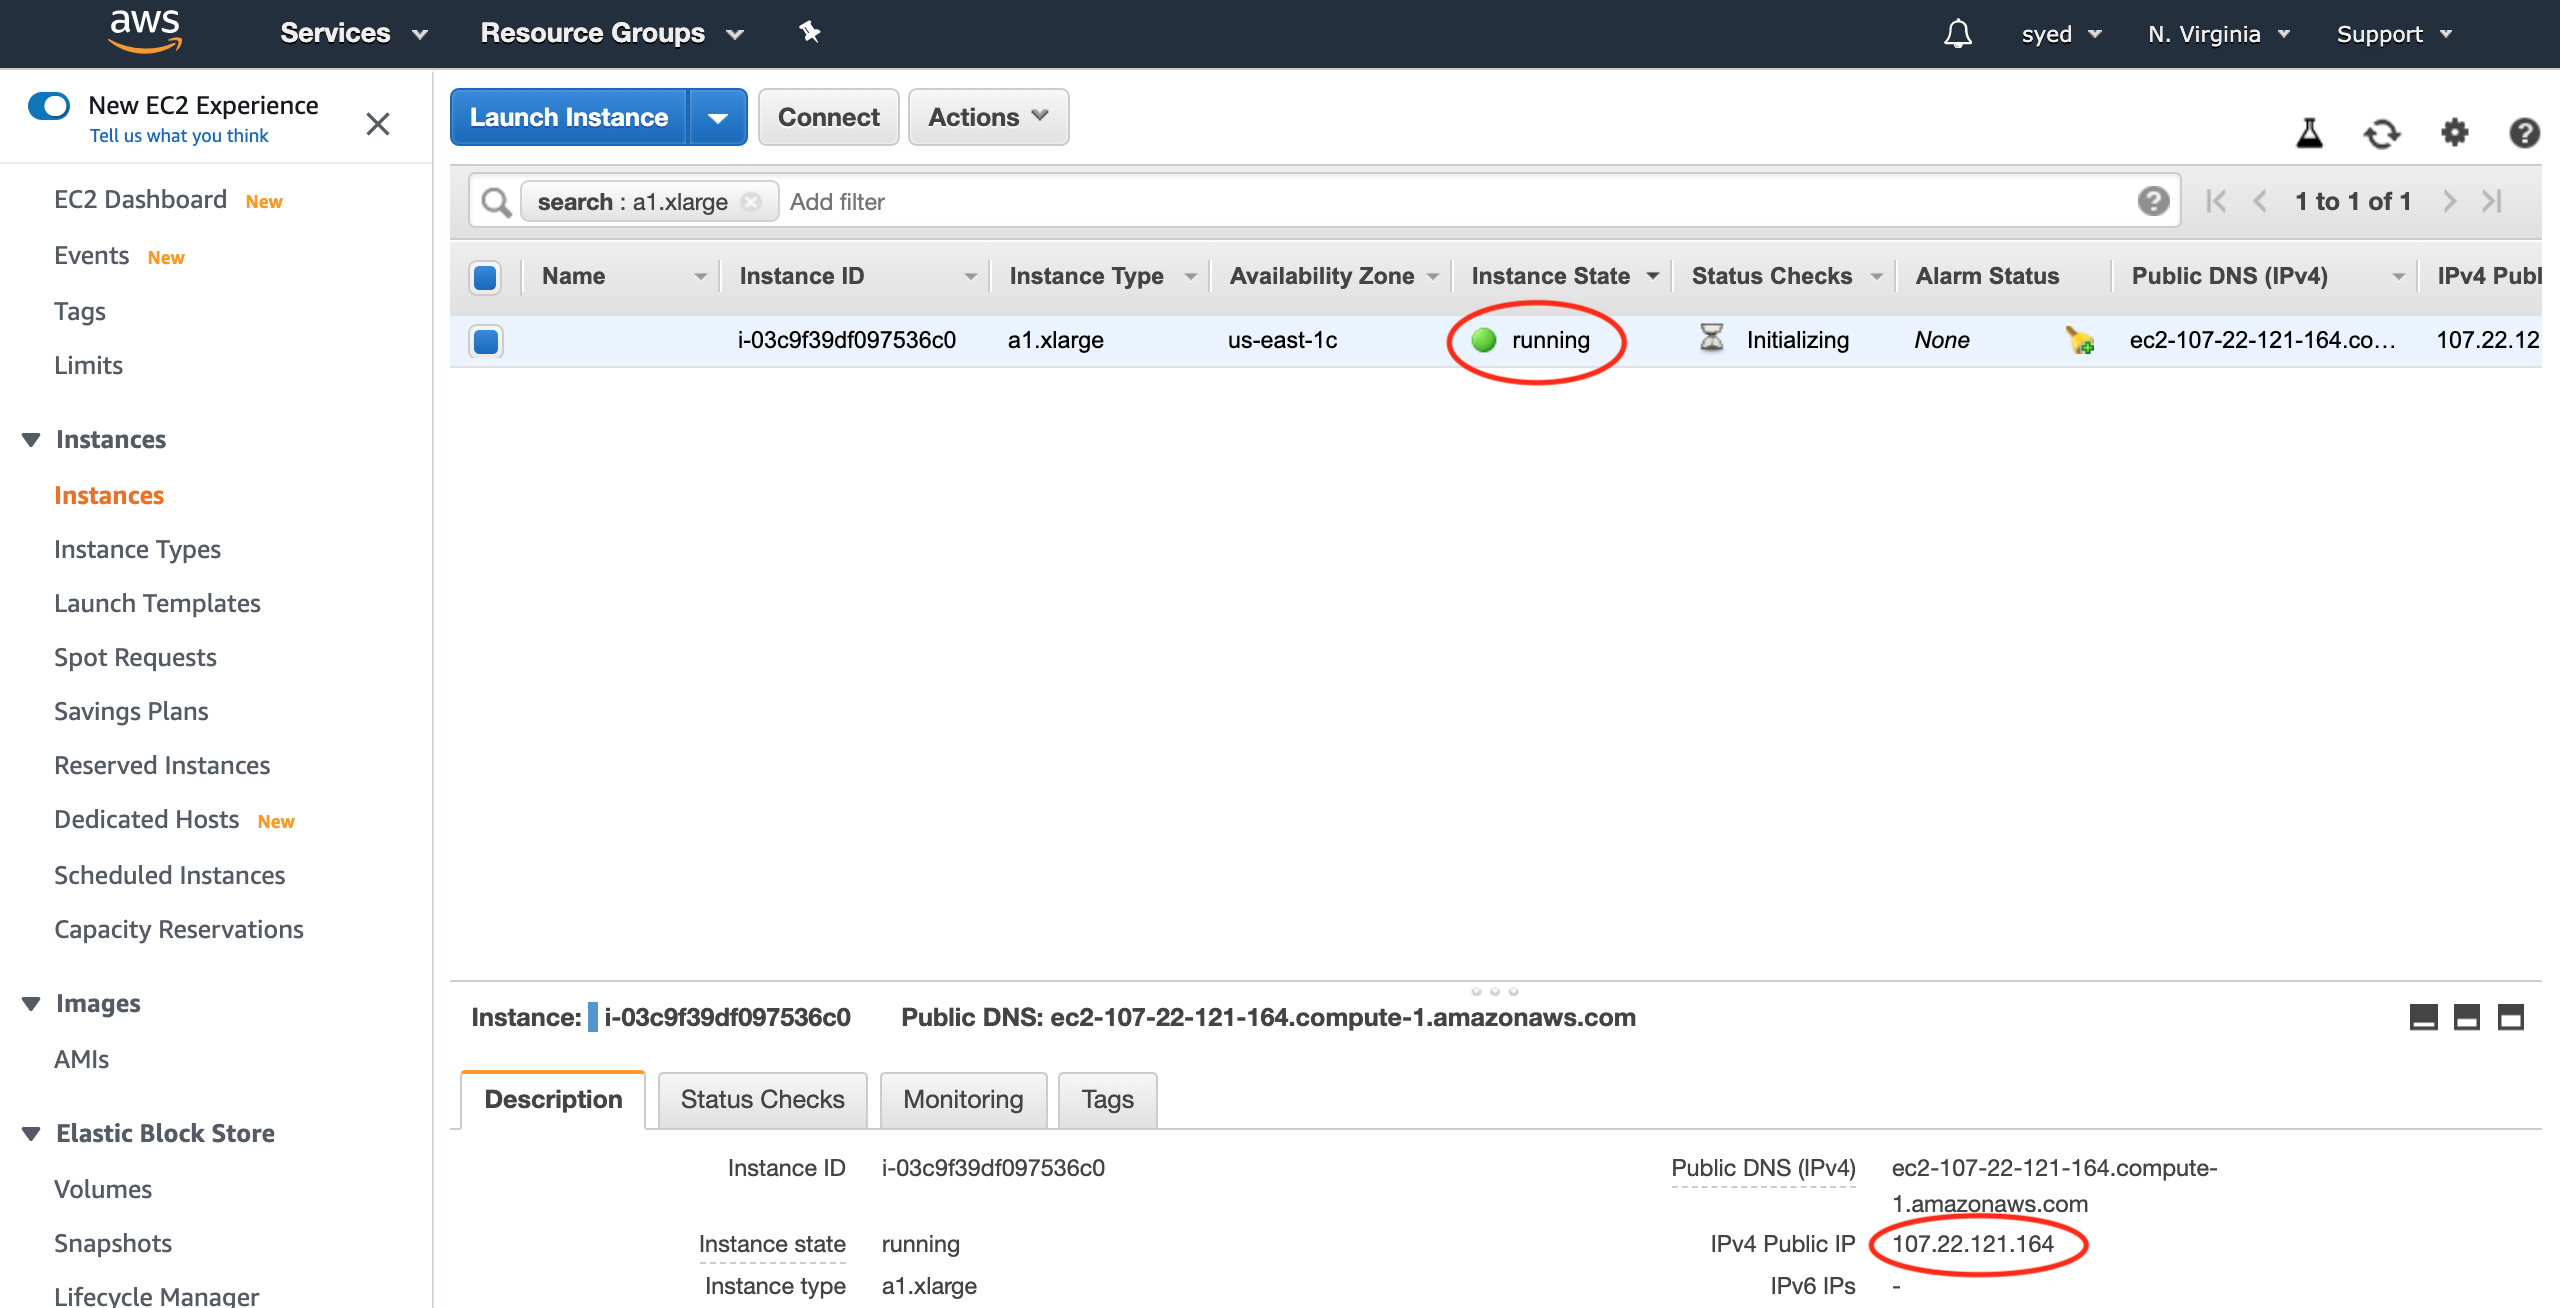
Wait for your instance to be running. You can refresh the page by clicking on the refresh button on the top right. Note down the ip address from the bottom right.
Open a terminal and ssh into your machine using your key pair and ip address (alternatively, use VS Code to ssh in)
ssh -L 8000:localhost:8000 -i /path/to/key_pair.pem ec2-user@<ip address of your machine>
Note
We are tunnelling the remote port 8000 to our local port 8000
using -L 8000:localhost:8000. We will use this port occasionally
to serve a file for download/viewing. You can enable port 8000 globally
in the security group of AWS if you want.
You should see a screen similar to the following:
       __|  __|_  )
       _|  (     /   Amazon Linux 2 AMI
      ___|\___|___|

https://aws.amazon.com/amazon-linux-2/
4 package(s) needed for security, out of 8 available
Run "sudo yum update" to apply all updates.
[ec2-user@ip-172-31-41-240 ~]$
Open the file /etc/yum.repos.d/amzn2-core.repo as follows and
enable debug info:
sudo vim /etc/yum.repos.d/amzn2-core.repo
# press 'i' to edit

# change the "enabled" from 0 to 1
[amzn2-core-debuginfo]
name=Amazon Linux 2 core repository - debuginfo packages
mirrorlist=http://amazonlinux.$awsregion.$awsdomain/$releasever/$product/$target/debuginfo/$basearch/mirror.list
priority=10
gpgcheck=1
gpgkey=file:///etc/pki/rpm-gpg/RPM-GPG-KEY-amazon-linux-2
enabled=1
metadata_expire=300
mirrorlist_expire=300
report_instanceid=yes

# write file and quit by pressing ':wq'
Execute the following commands. This will get the compiler necessary for running homeworks 1-4.
sudo yum update -y
sudo yum groupinstall "Development Tools" -y
sudo debuginfo-install glibc-2.26-35.amzn2.aarch64 libgcc-7.3.1-9.amzn2.aarch64 libstdc++-7.3.1-9.amzn2.aarch64 -y
sudo yum install tmux -y
sudo yum install perf -y
Note down the system information and gcc version using the following commands and put it in your report.
lscpu
uname -a
gcc --version
Try the Makefile Tutorial in this running instance!
Tip
When working in the terminal, use tmux. Sometimes your ssh connection
to AWS may drop. When you work inside tmux, you can continue
back from your previous terminal session. Learn more from here.
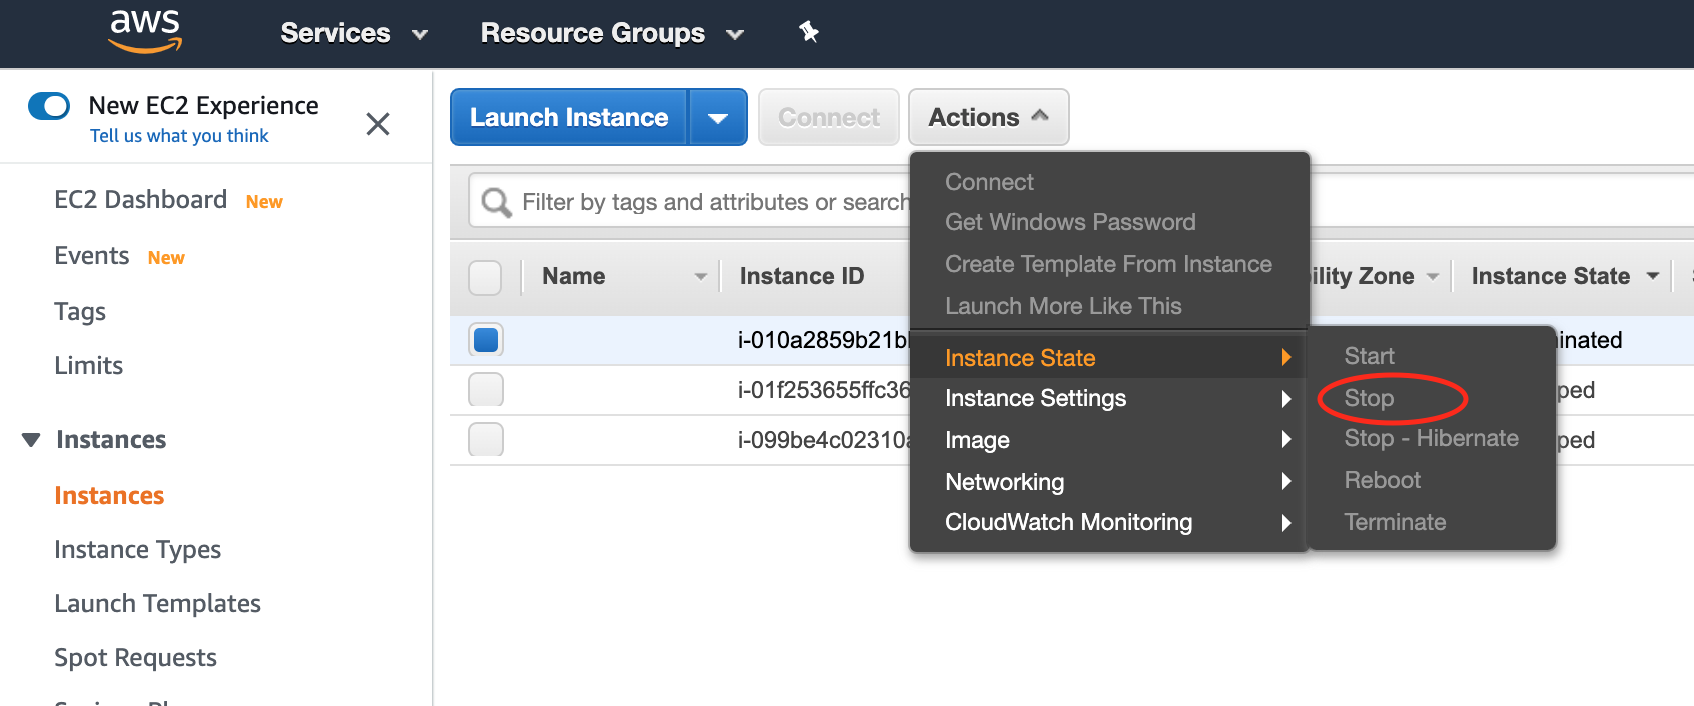
When you are done, stop the instance by right-clicking on the instance as follows:
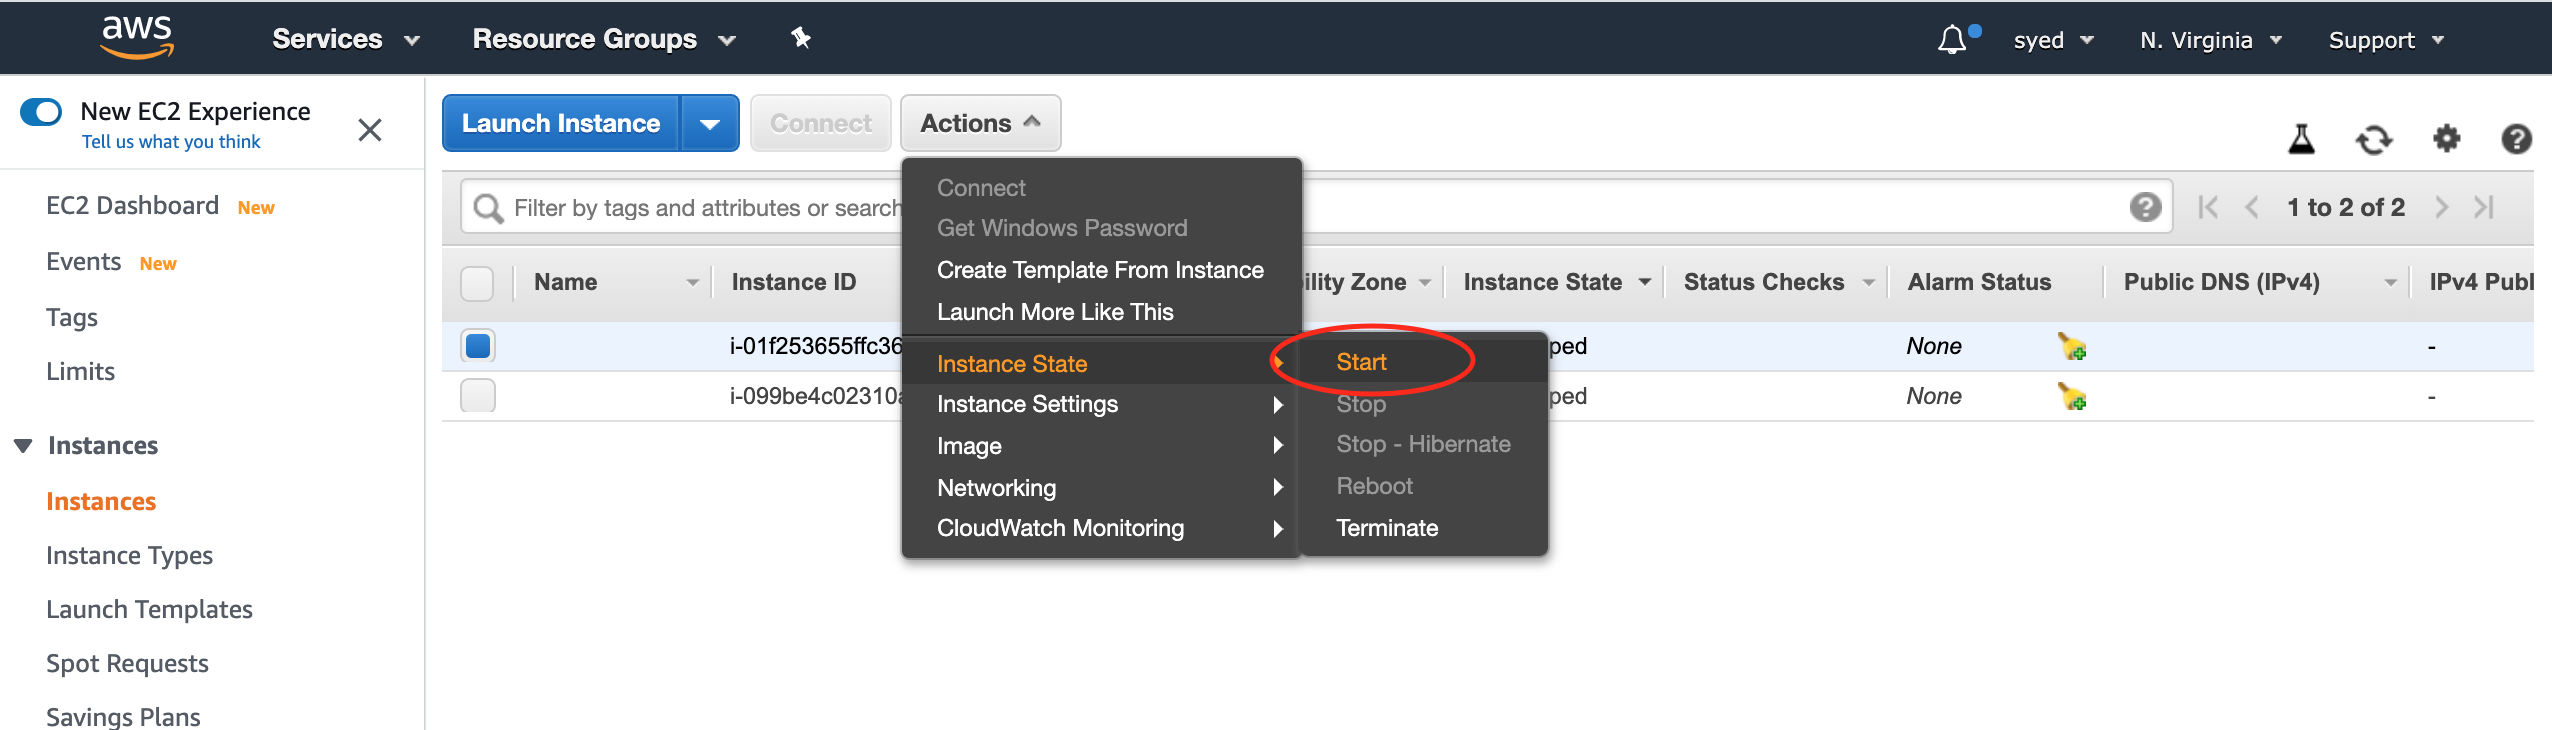
You can re-start the instance by right-clicking on the instance as follows:
Note
The ip address changes when you restart an instance.
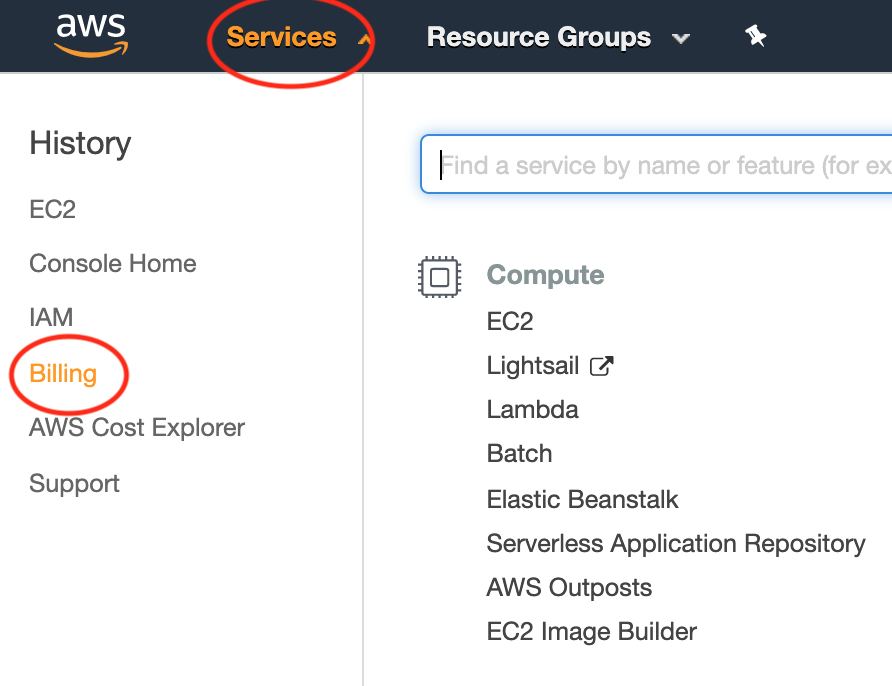
Check how much of credit you have used up as follows:
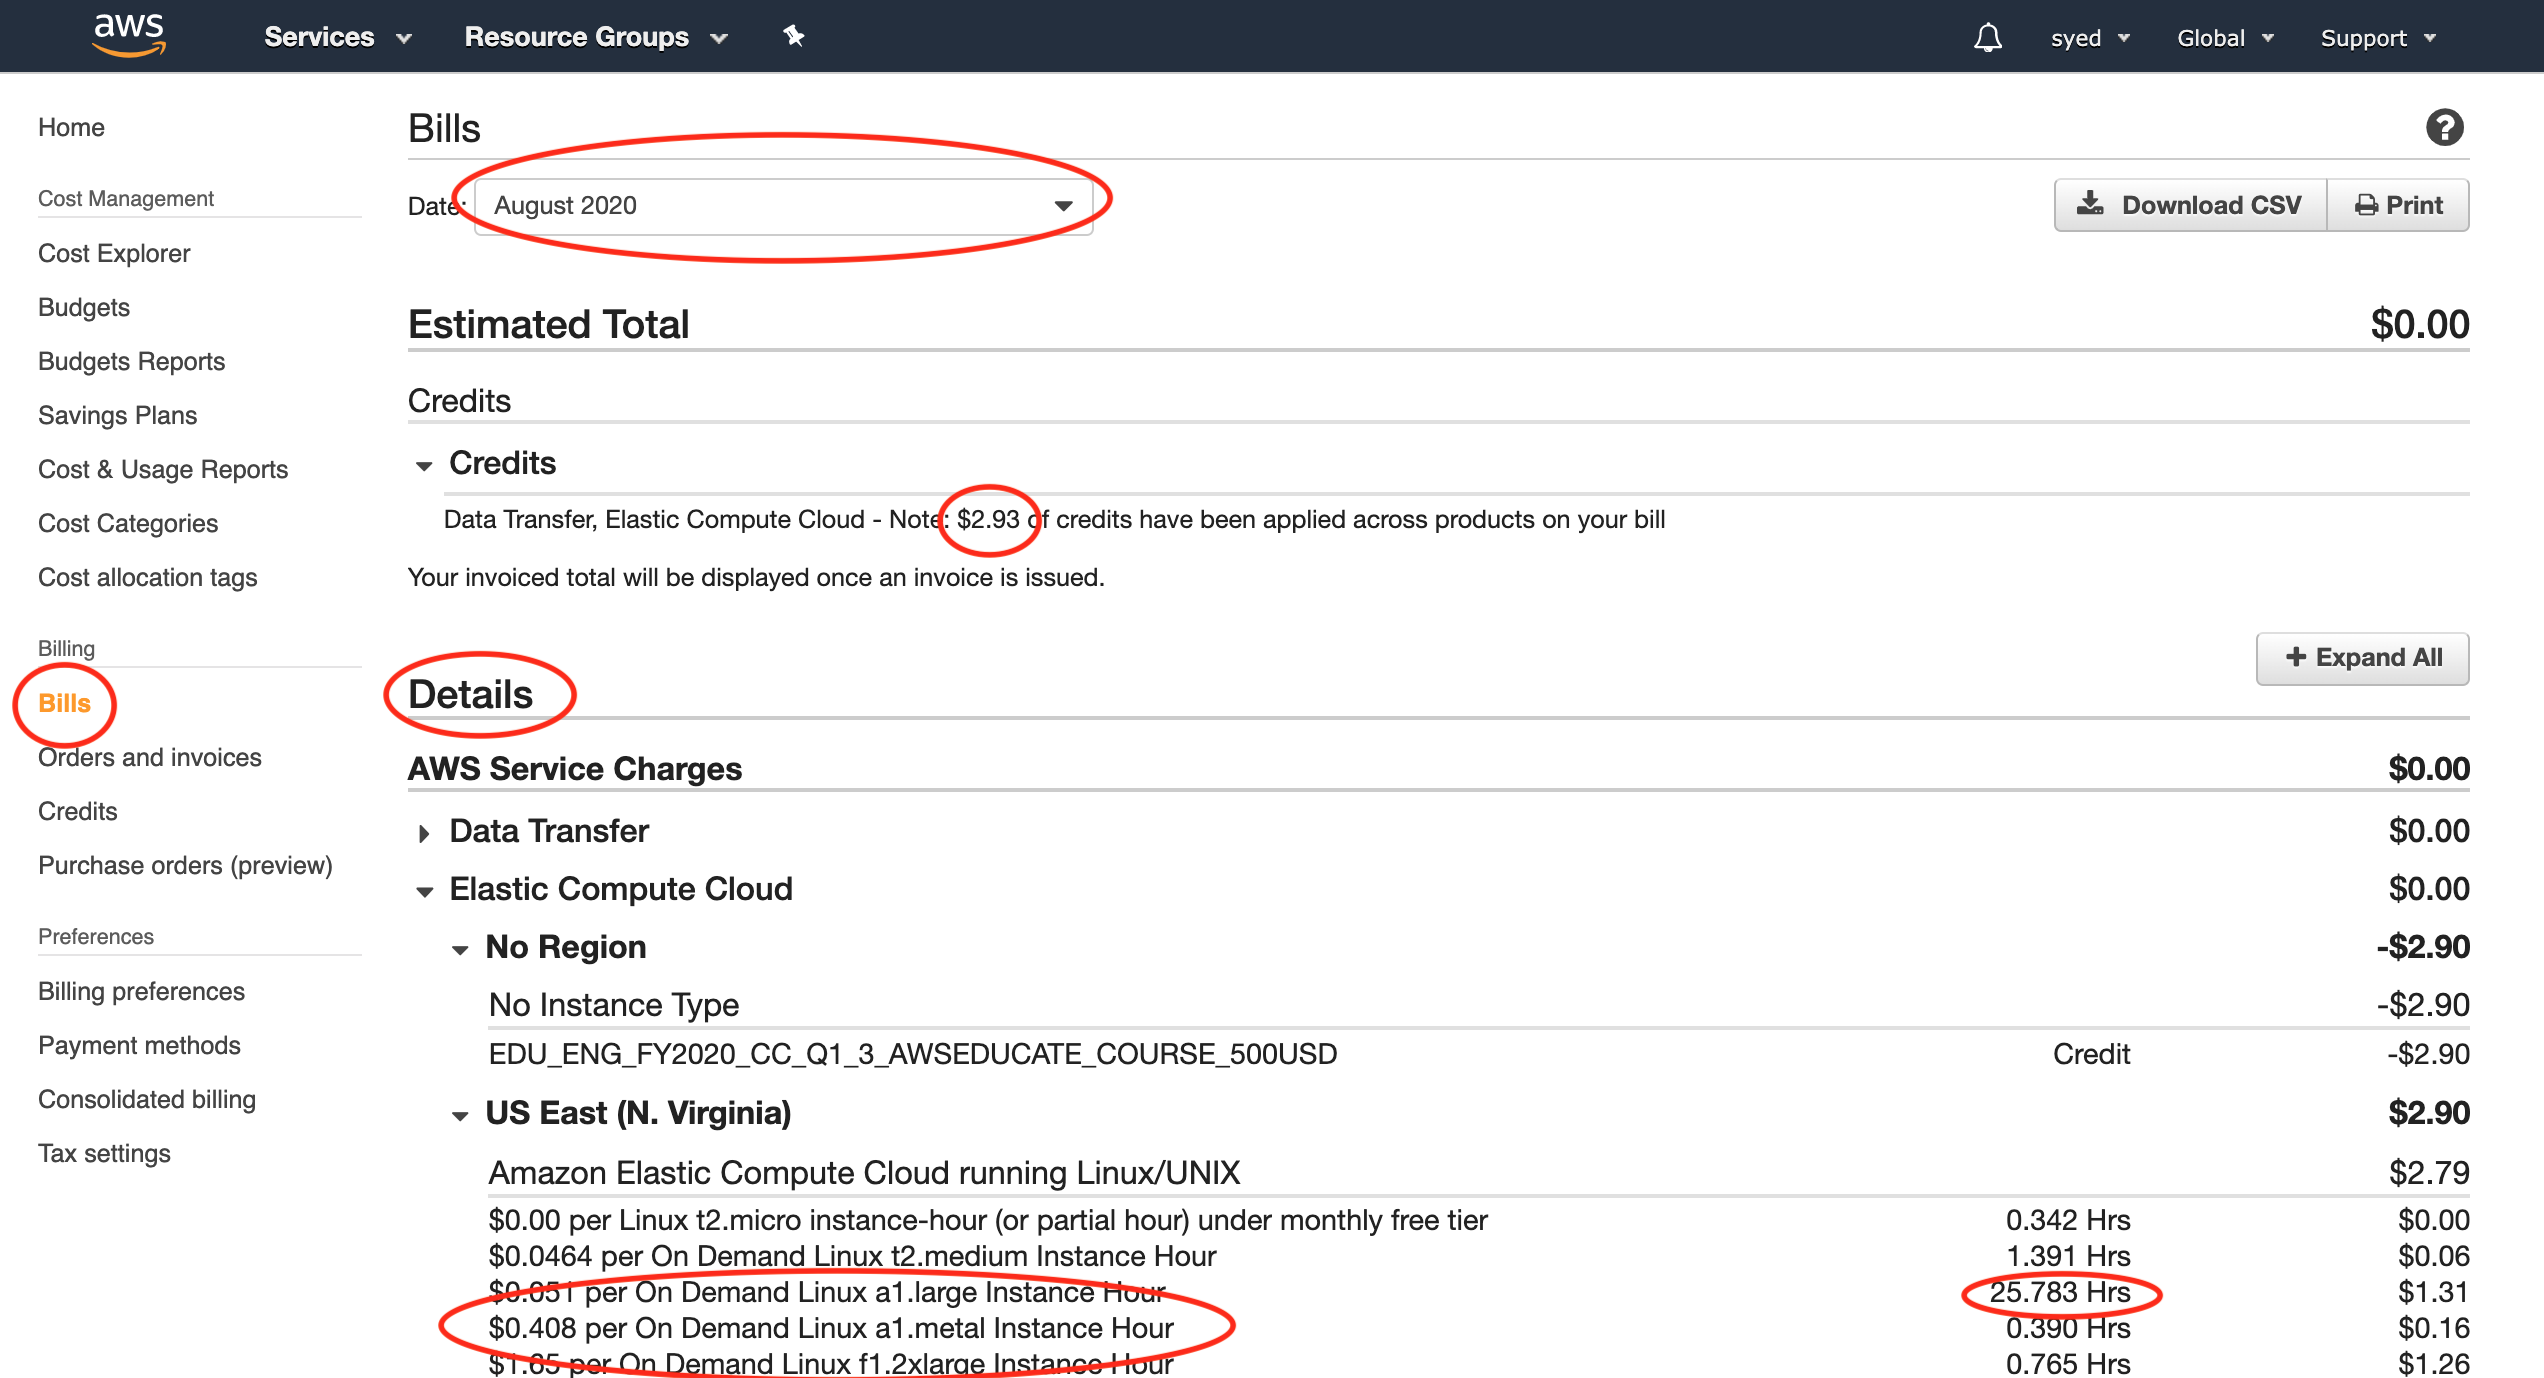
Take a screenshot of your credit usage and put it in your report.
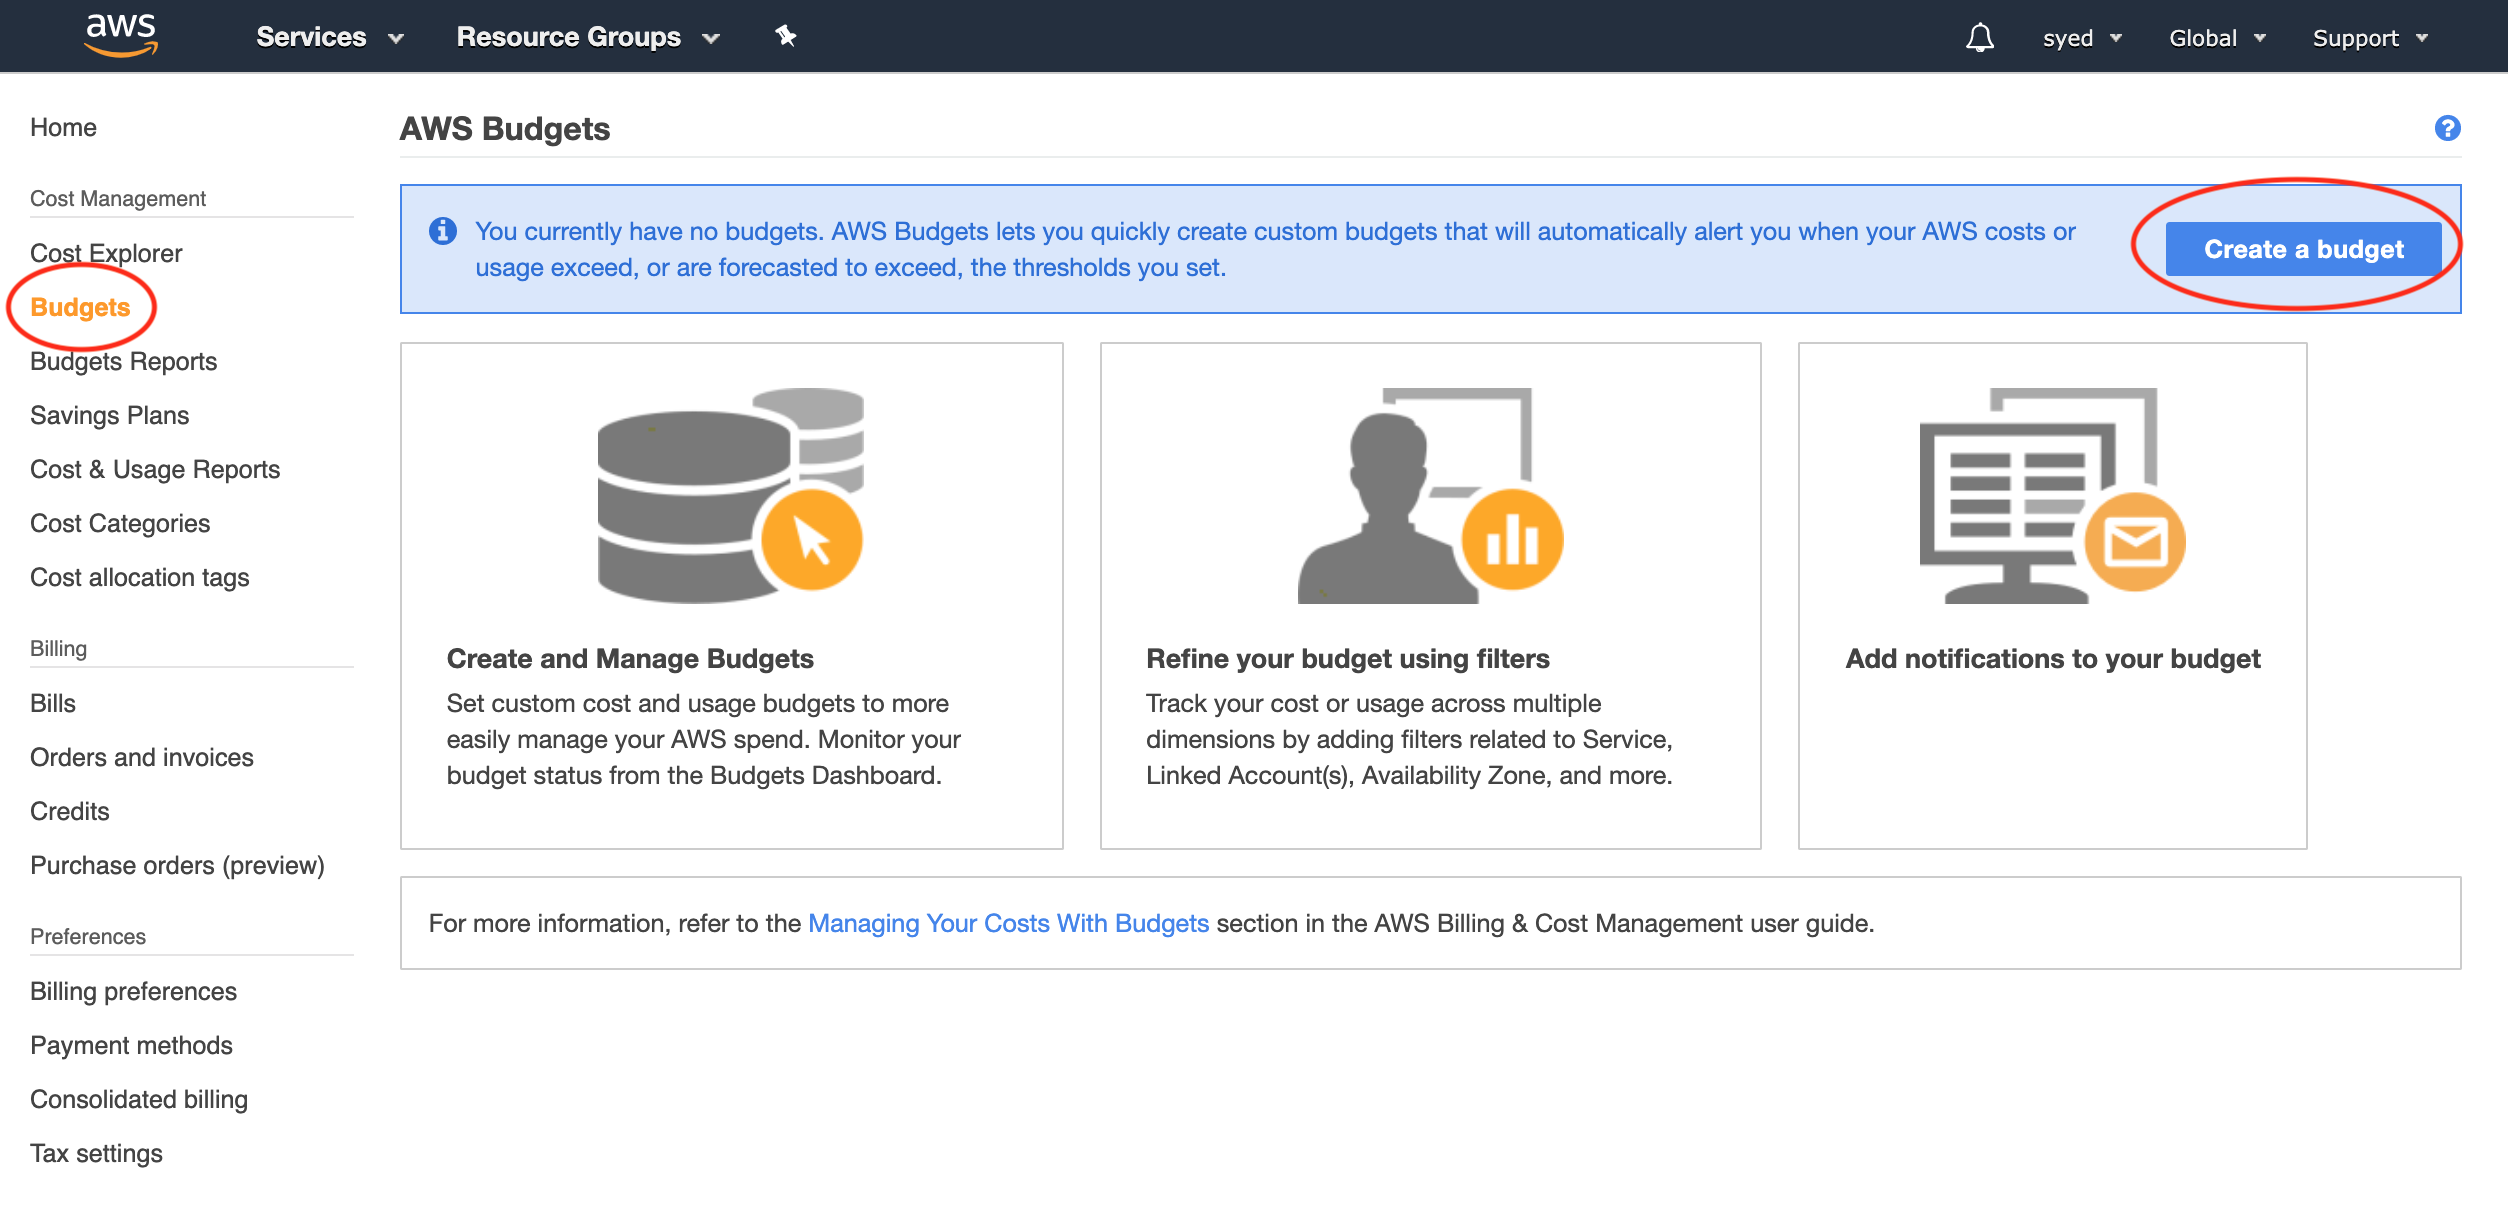
2.7. Creating a budget
We put a warning message at the beginning of every assignment to remind you to stop your instance. We understand that even with the message, you may accidentally forget to stop your instance. Let’s do one more thing to remind ourselves to stop our instance.
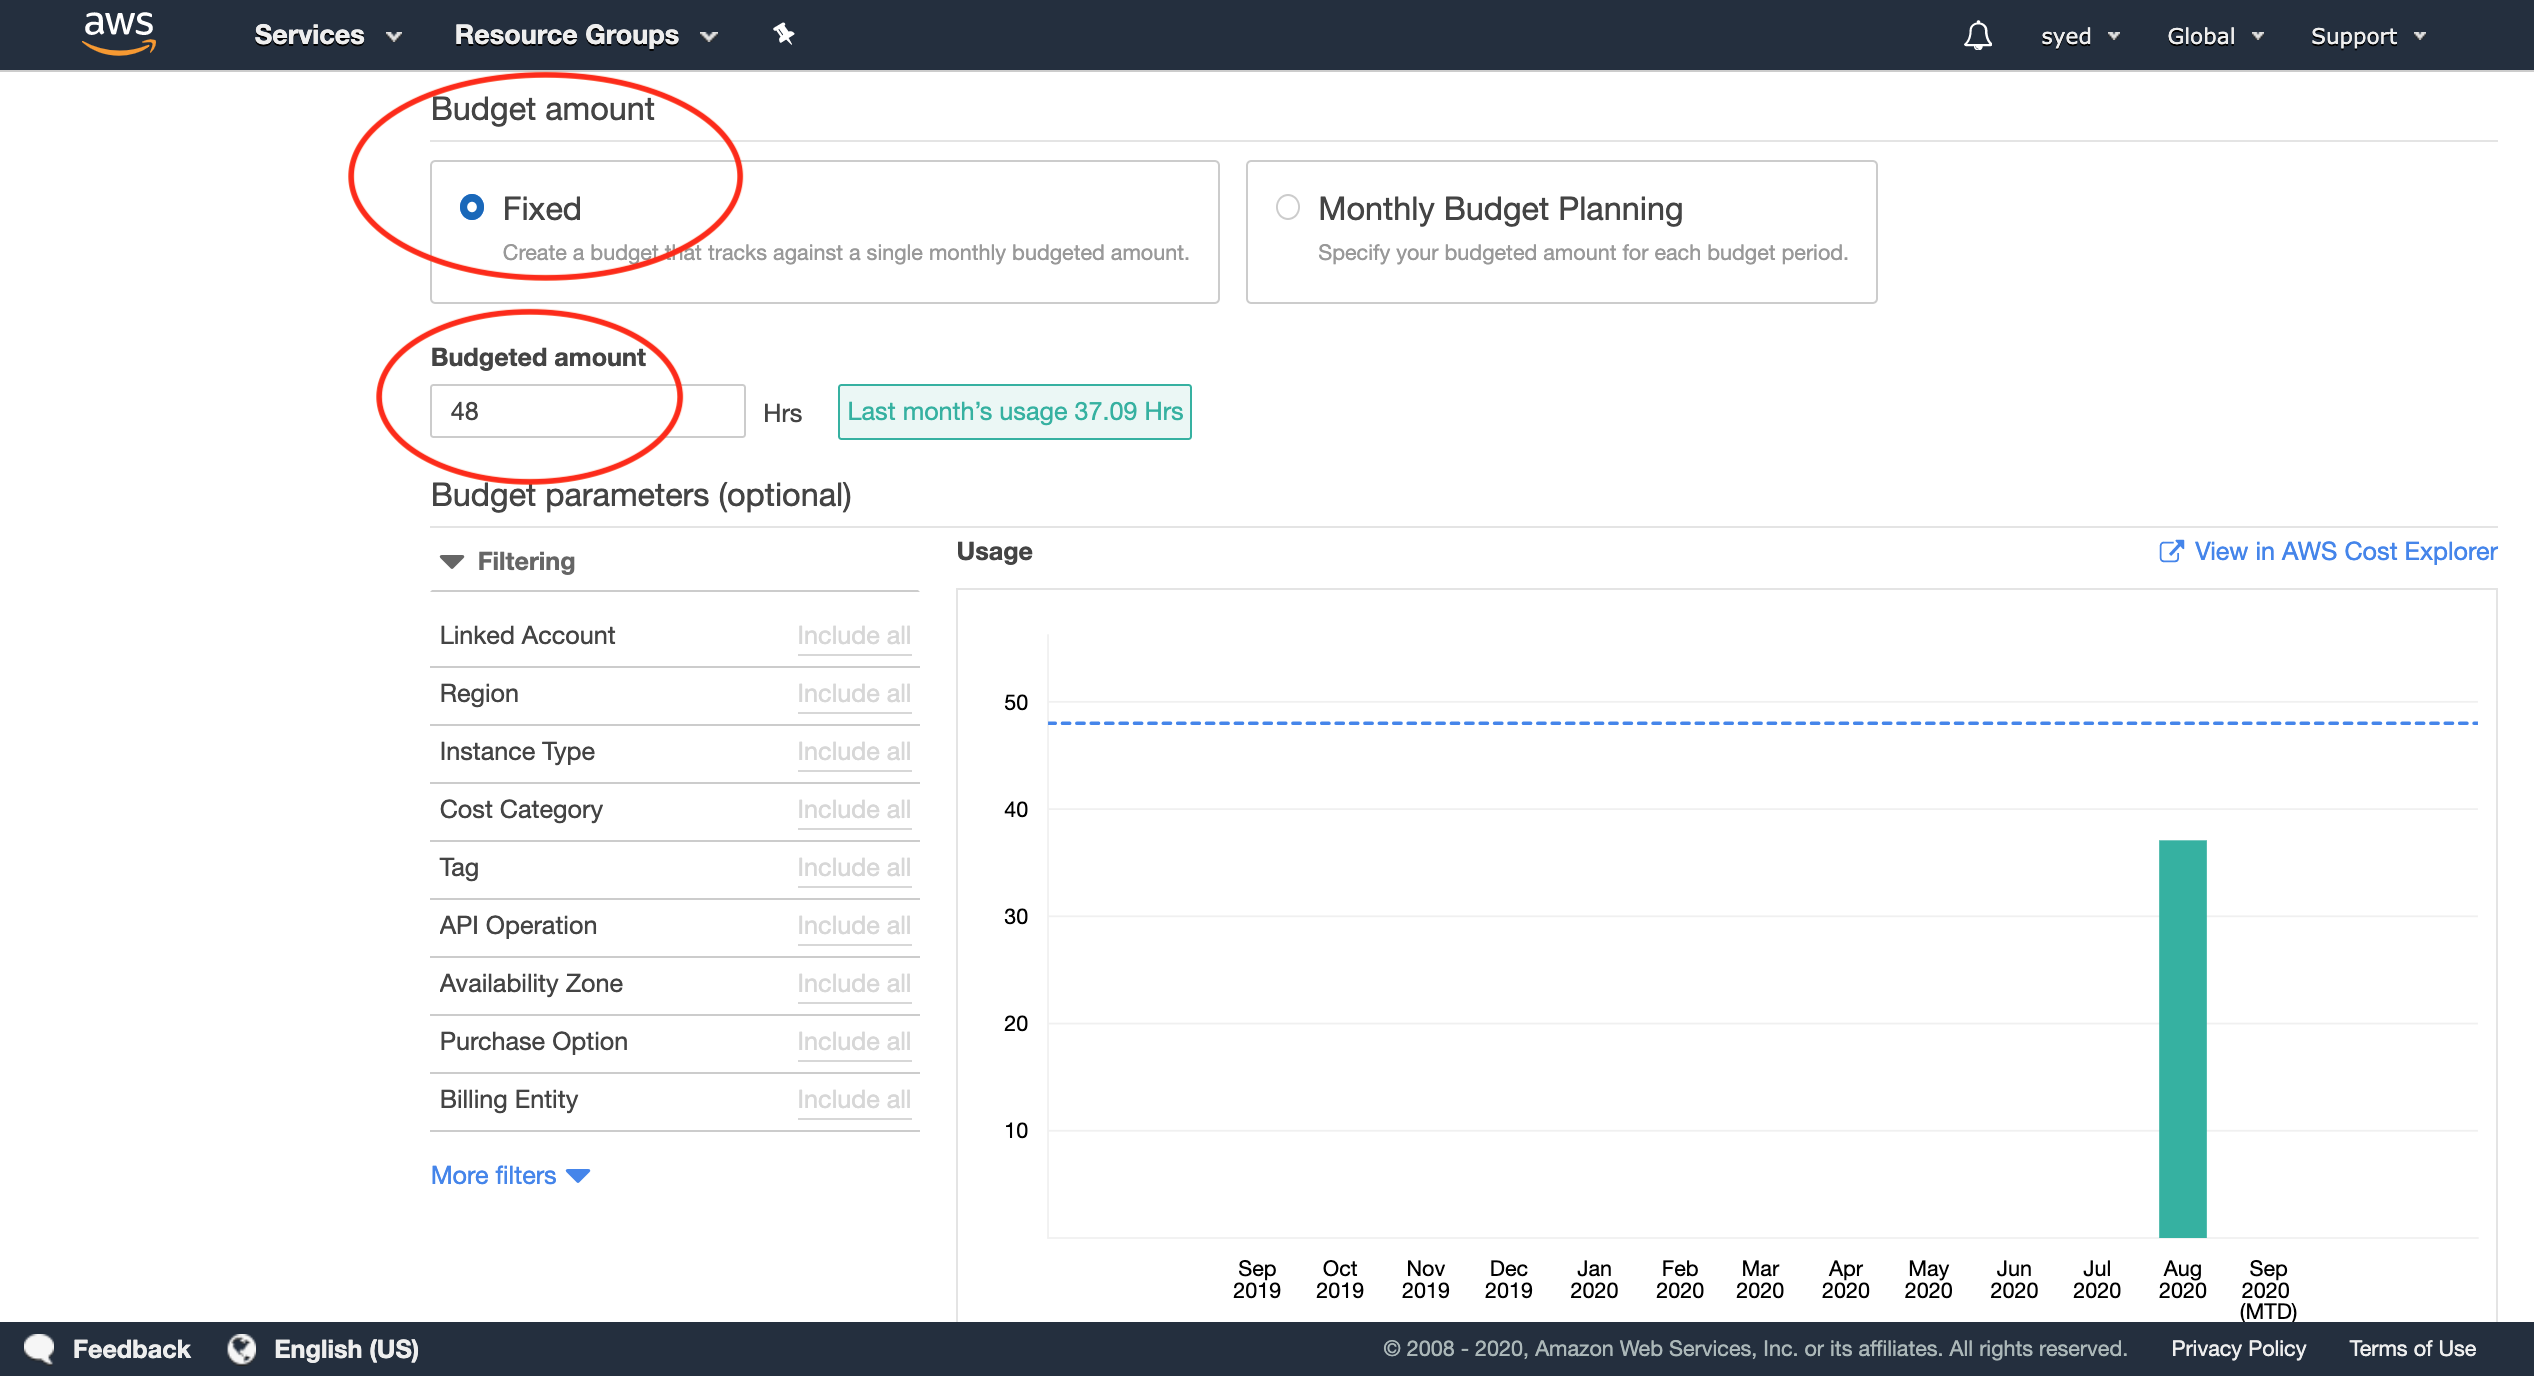
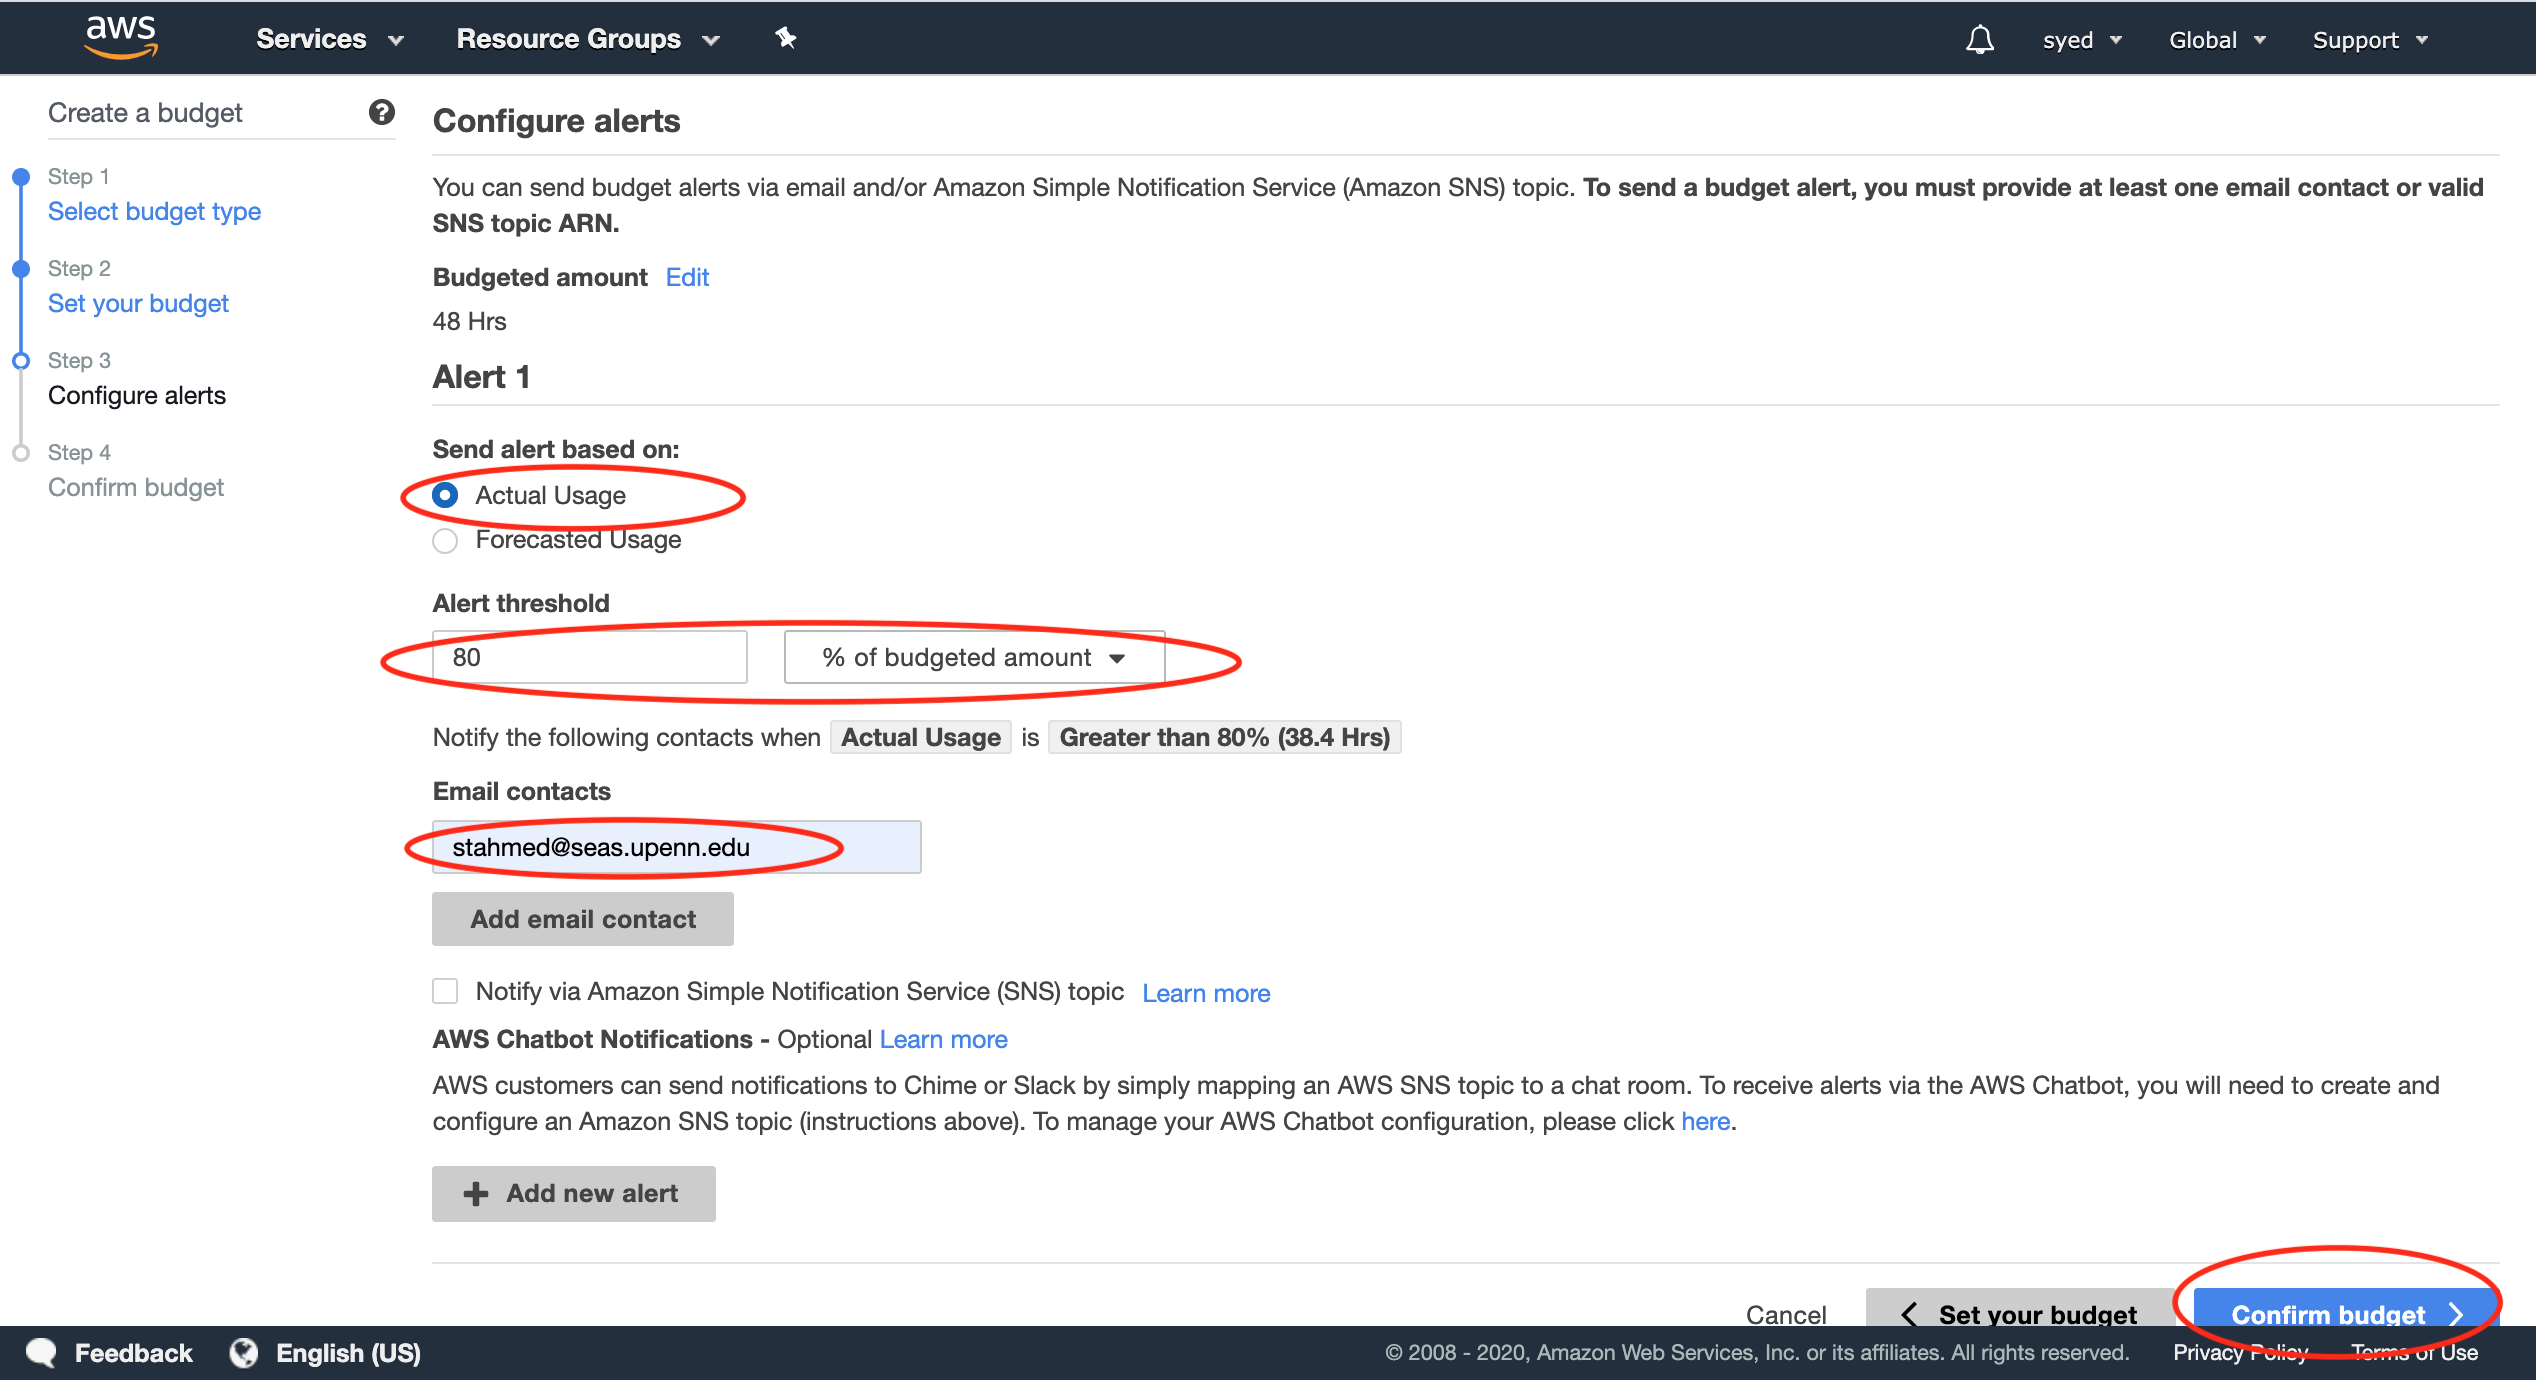
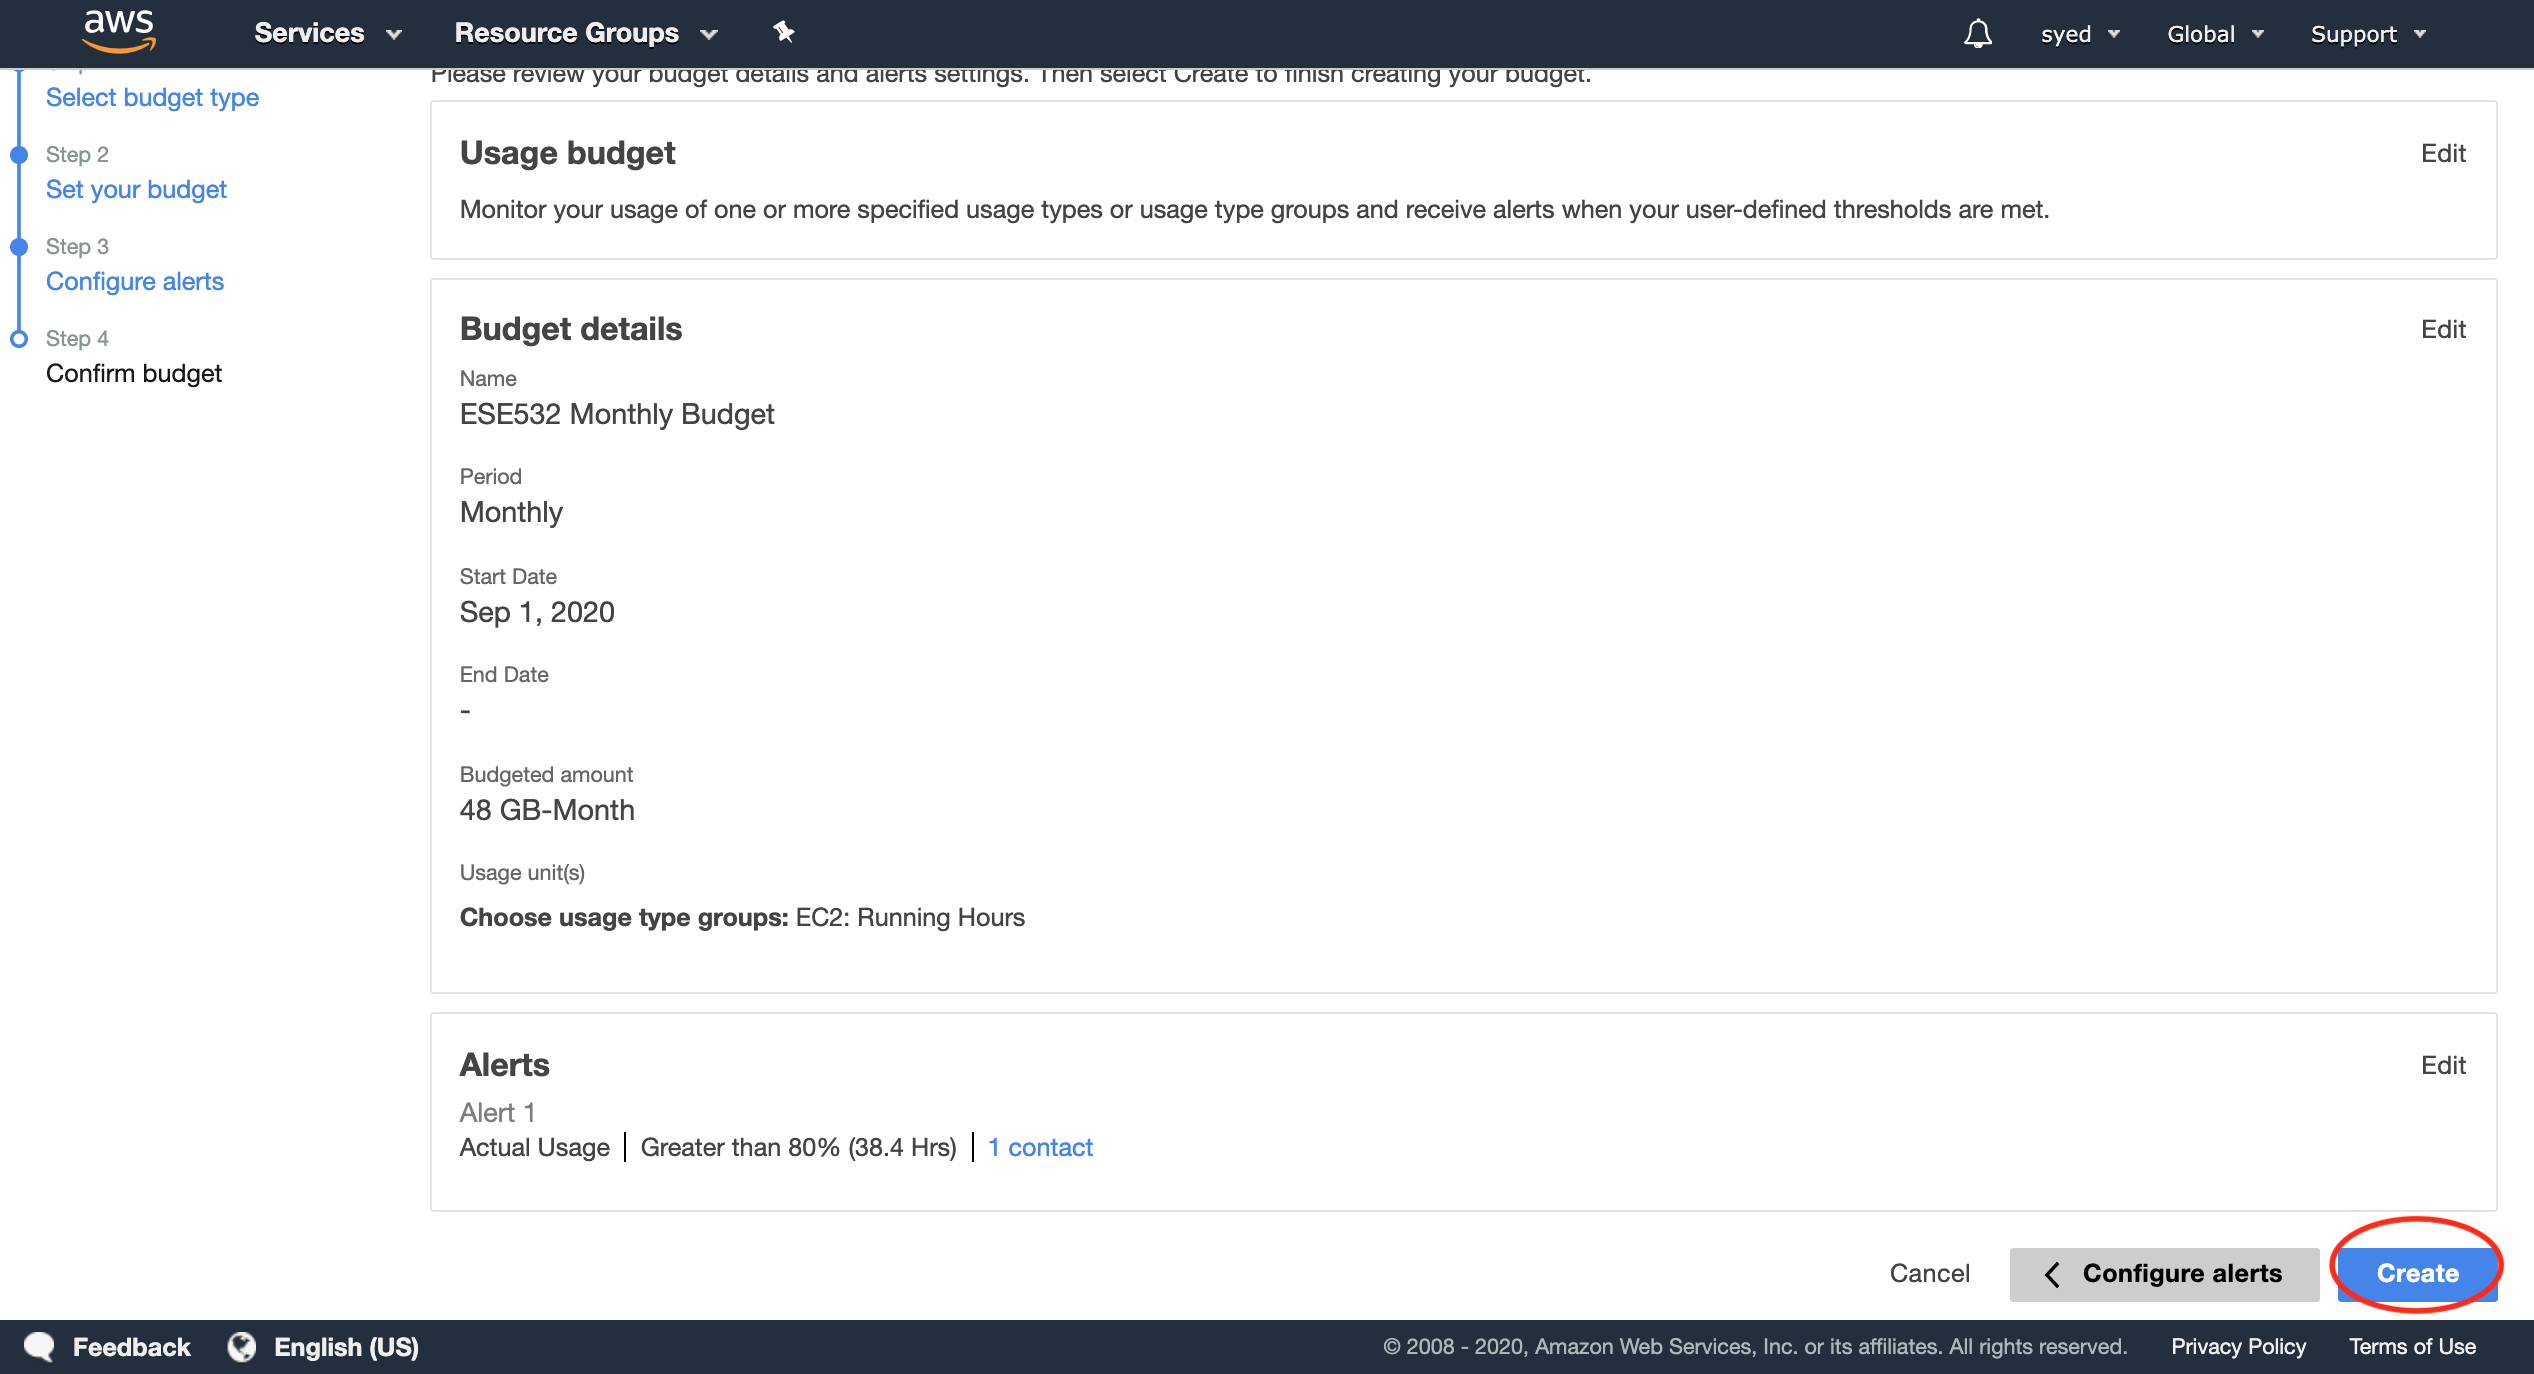
In AWS, you can set a budget and get an alert if you cross a threshold of that budget. We will complete about 3 homework assignments every month, and estimating we will use a maximum of 16 hours per homework, our monthly usage should be about 48 hours.
From the billings page, click on the Budgets tab:
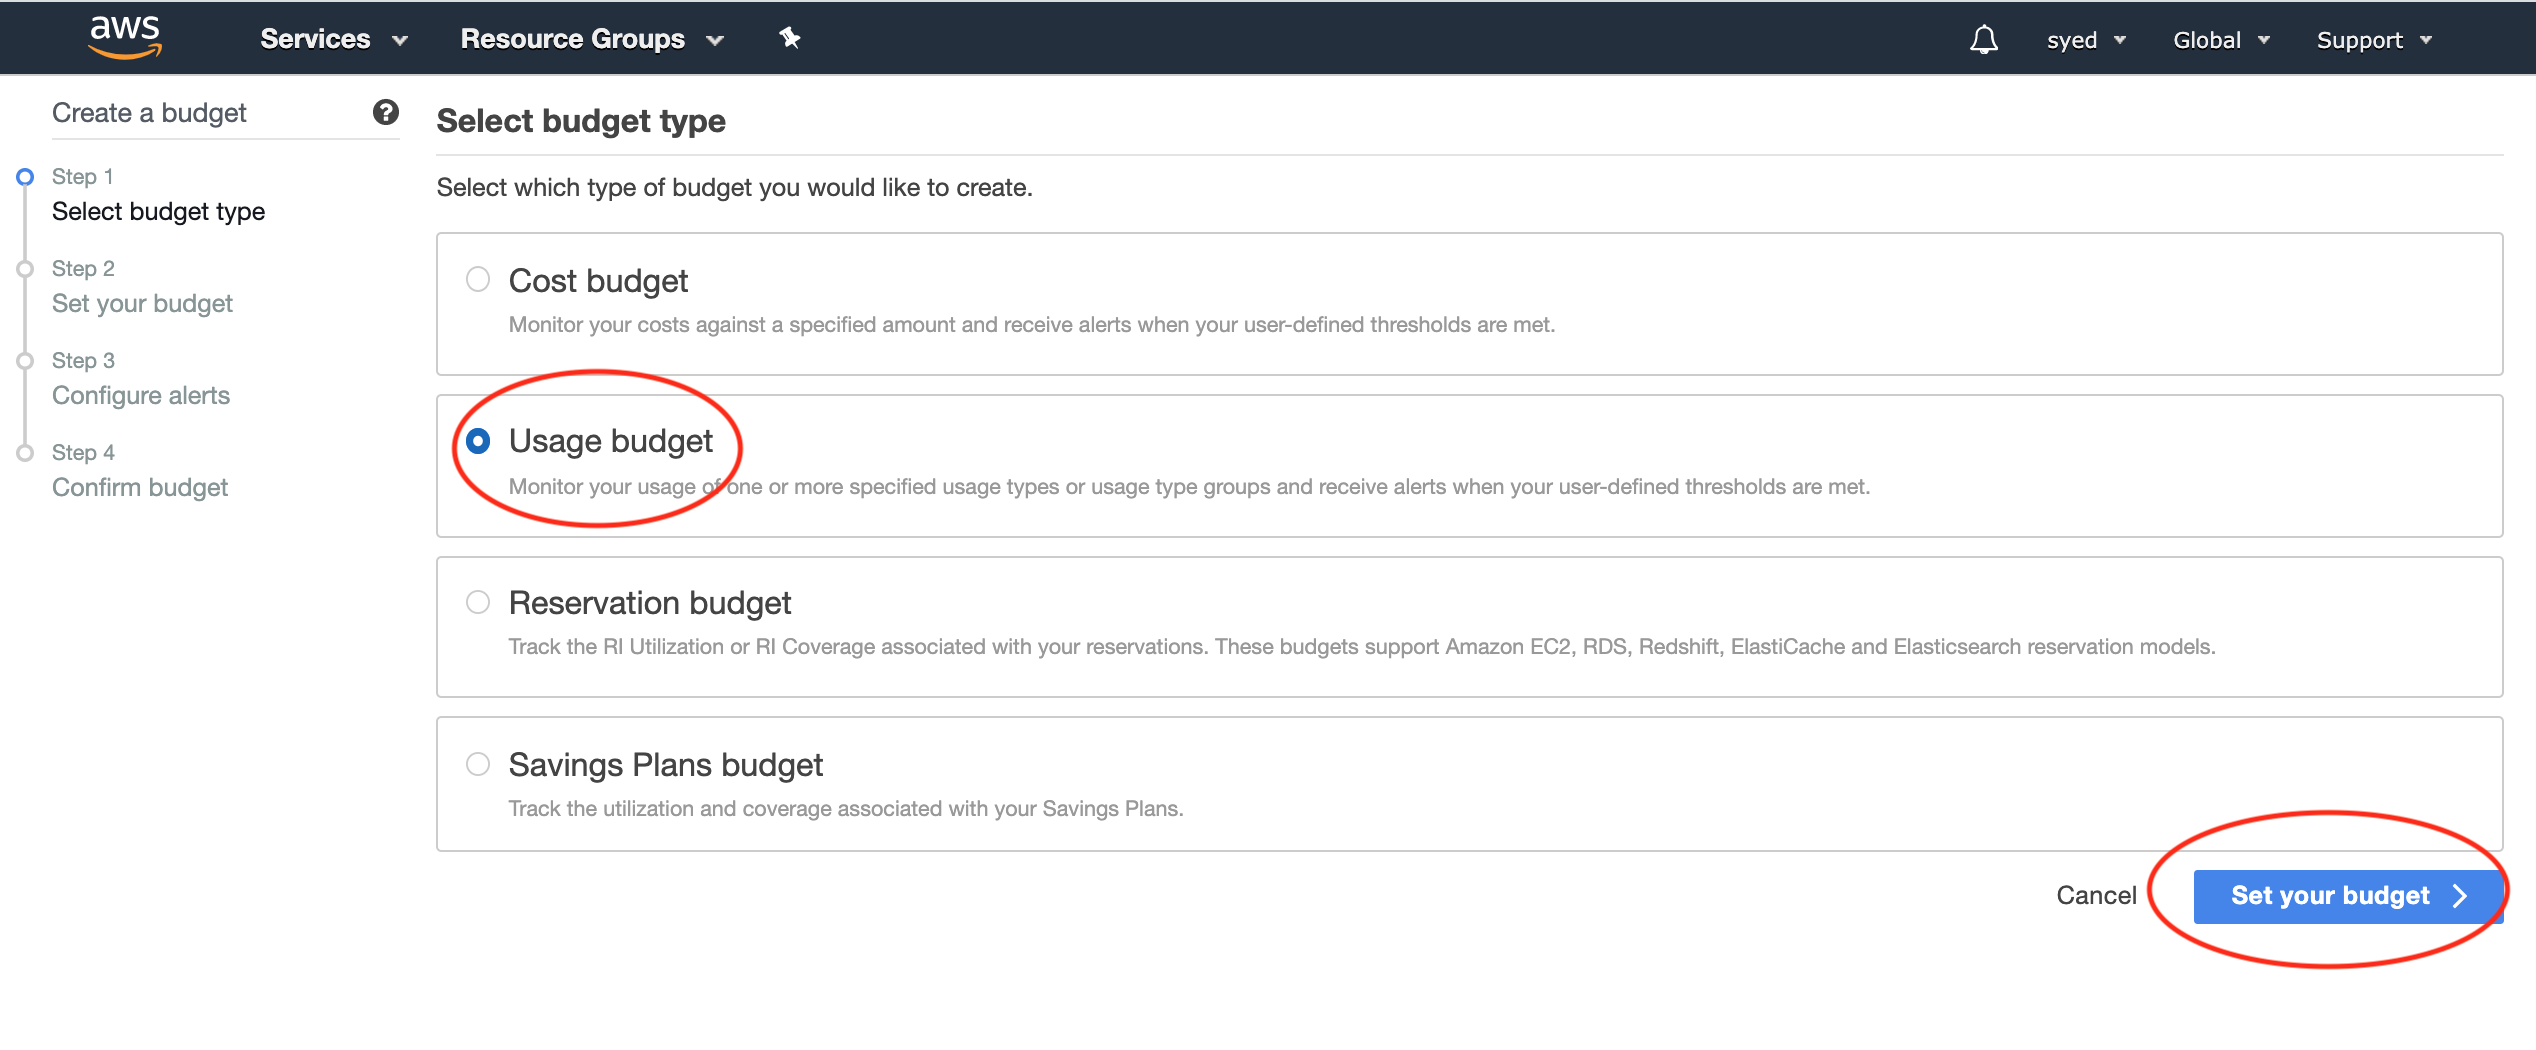
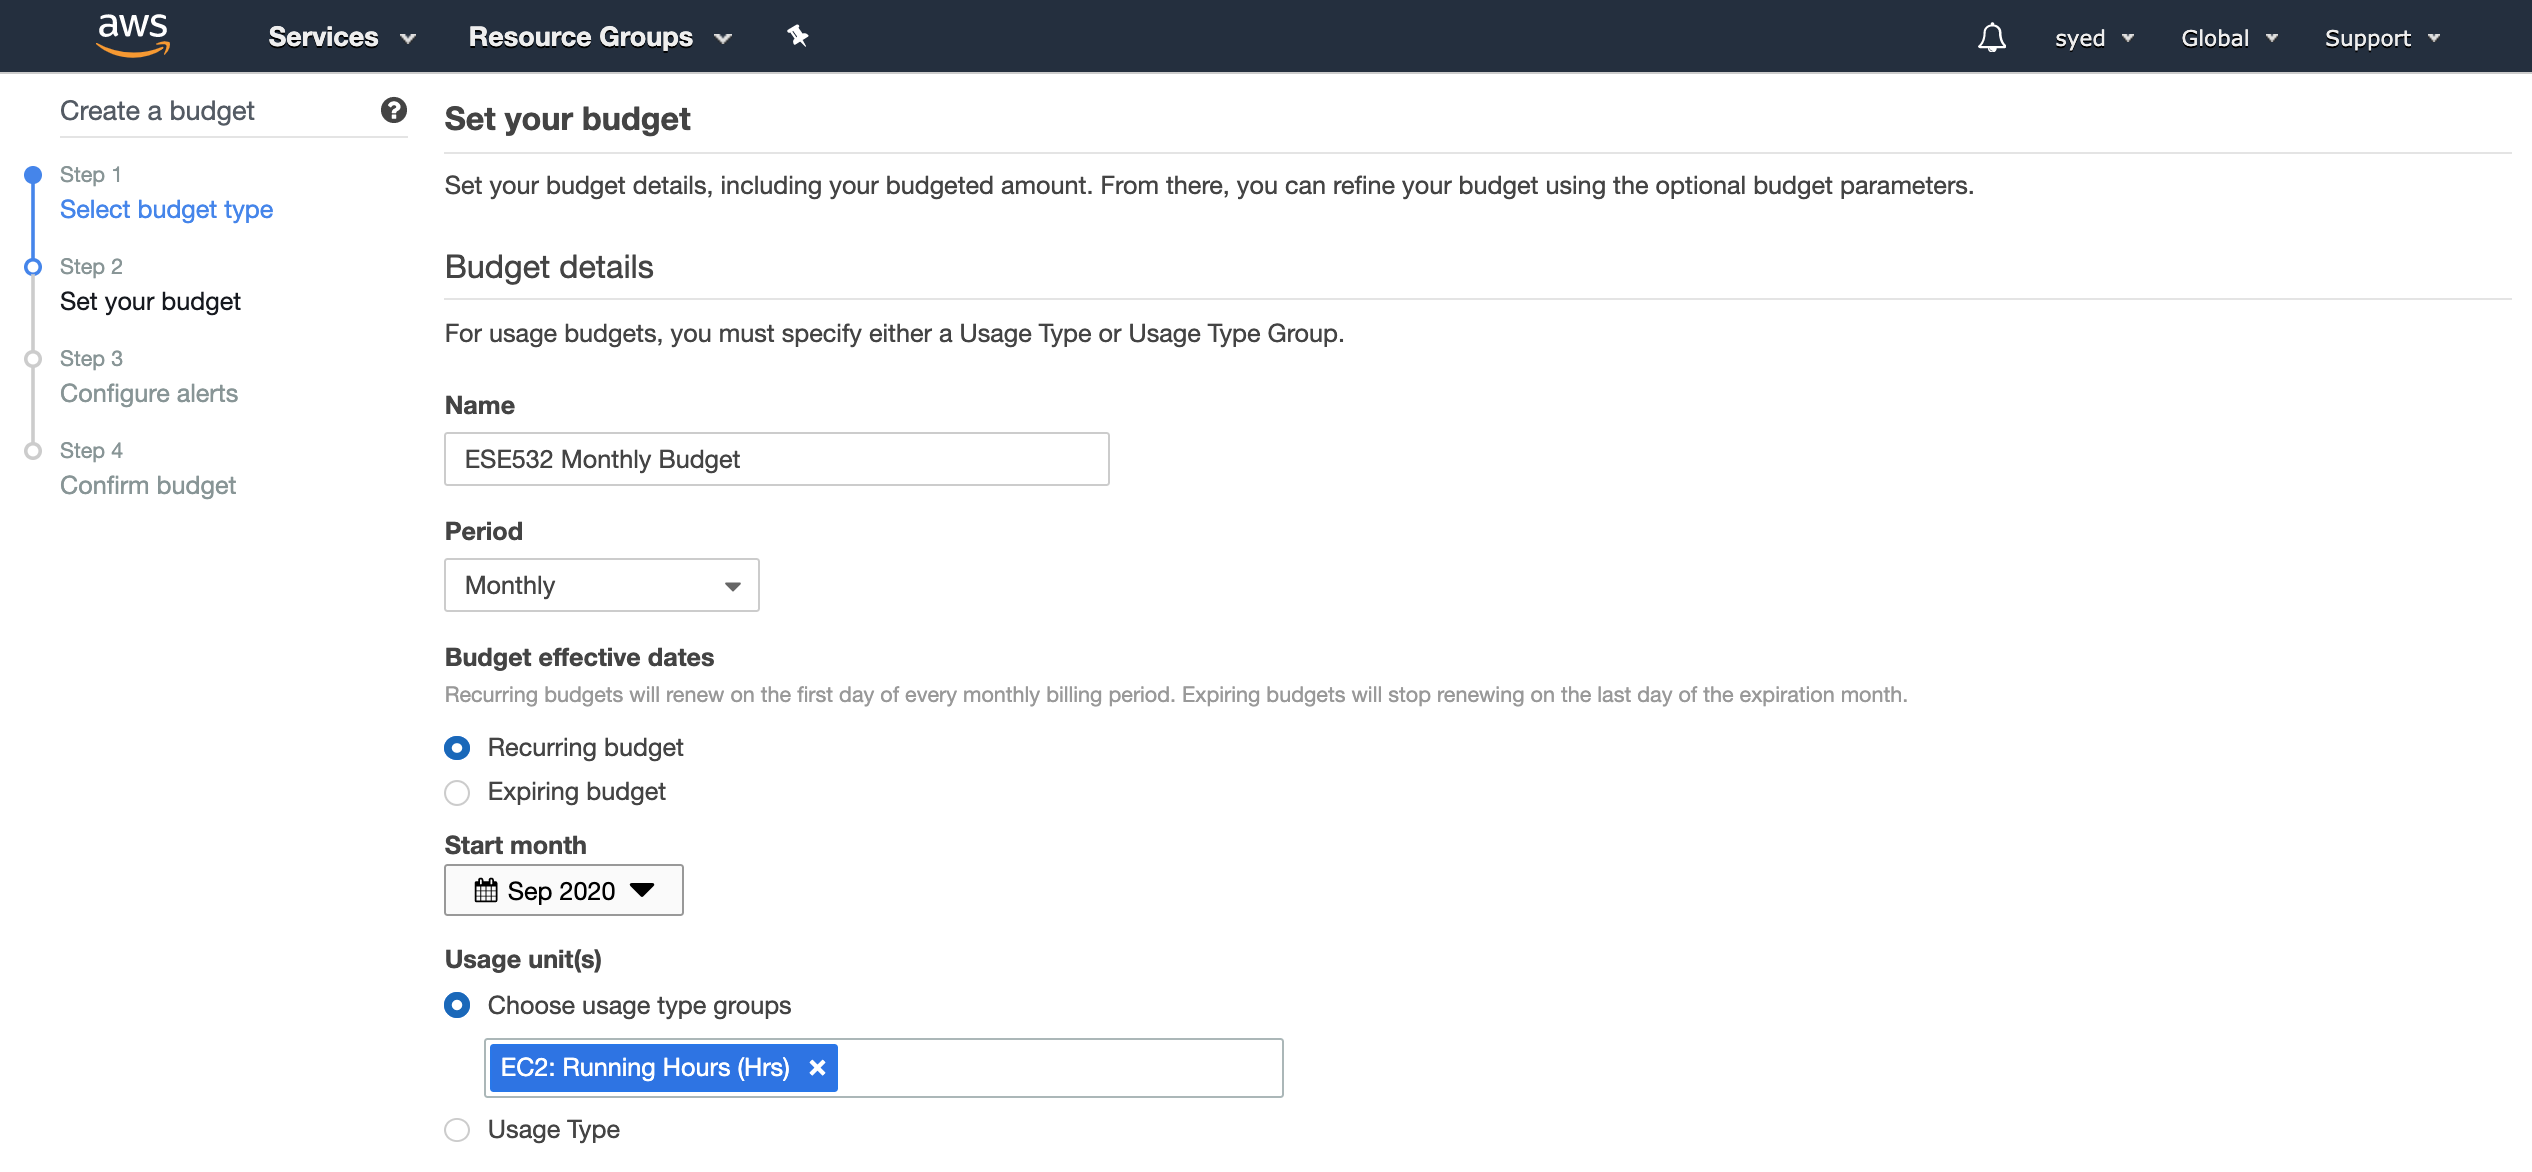
Fill up the following screens as follows to set up an alert:
2.8. Transferring files between AWS and local machine
We highly encourage you to work in git repositories when you are editing source code. You can create a private repository in github with the starter code we provide you, and then you can git clone your repository in your AWS instance. Make sure to build a habit of frequently committing your work.
You can upload/download your work to/from AWS instance in several ways:
You could just commit your updated code and outputs/logs into your github repository and then access the github repository from anywhere.
You could use
scpas follows to transfer a single file or a folder between AWS and your local machine:# execute from your local machine # to upload a file scp -i /path/to/key_pair.pem FILENAME ec2-user@<ip address of your machine>:/home/ec2-user/FILENAME # to upload a folder scp -r -i /path/to/key_pair.pem FOLDER ec2-user@<ip address of your machine>:/home/ec2-user/ # to download a file scp -i /path/to/key_pair.pem ec2-user@<ip address of your machine>:/home/ec2-user/FILENAME FILENAME # to download a folder scp -r -i /path/to/key_pair.pem ec2-user@<ip address of your machine>:/home/ec2-user/FOLDER ./
Alternatively you can use
sshfsto mount your AWS instance directory to a local folder: https://www.digitalocean.com/community/tutorials/how-to-use-sshfs-to-mount-remote-file-systems-over-sshLastly, you can execute
python -m SimpleHTTPServer 8000in your AWS instance, and then go to http://localhost:8000/ in your web browser to view/download your file. Remember, you need to have the AWS port open/tunnelled for it to work (tunnelling with ssh:ssh -L 8000:localhost:8000or opening the port from AWS console).
You are now ready to do homeworks 1-4!
Warning
Make sure to stop your Amazon instances! We only have $150 of credits and we need it to last through Homework 7. You may need to take a long break during a homework, or you might take longer to read about something on google/stackoverflow; remember to stop your instance and restart it when you are ready to continue.