
6.2. Setup and Walk-through
6.2.1. Obtaining and Running the Code
In this homework, we will first run a matrix multiplication function on the cpu and then run the same matrix multiplication function on the FPGA.
Pull in the latest changes using:
cd ese532_code/
git pull origin master
The code you will use for this section
is in the hw6 directory. The directory structure looks like this:
hw6/
    apps/
        mmult/
            cpu/
                Host.cpp
            fpga/
                hls/
                    MMult.cpp
                    MMult.h
                    testbench.cpp
                Host.cpp
                xrt.ini
            sourceMe.sh
    common/
        ...
6.2.2. Useful Resources
Following the previous HW, we will create Vitis project using Vitis IDE. Note that Makefiles are automatically generated when we build the project in GUI mode, and you are welcome to use Makefiles later in the project. In fact, many of Vitis tutorials on the web are using Makefile, which we highly recommend you to browse around while you are doing this lab.
In this HW, we will analyze how the processor core communicates with an accelerator. We tell you some specific things to experiment with, but you should do some reading from:
This HW is highly related to Xilinx Runtime (XRT) and Vitis System Optimization Tutorials
Chapter 6, 7, 19, 20 of UG1393
The following resources can be helpful for programming HLS and OpenCL host code:
Note that we are running on Linux. If you want to gain a deeper understanding of what’s going on under the hood and how the zocl driver supplied by Xilinx Runtime (XRT) manages DMA, refer to the following resources:
6.2.3. Creating Vitis Project
Like we did in HW5,
source sourceMe.shfirst. Note that you need to adjust thesourceMe.shif you are running on your local machine.We will create the CPU version’s project.
Launch
vitisand create application project as we did before. All the steps are identical, but when selecting Templates, select SW Development templates \(\rightarrow\) Empty Applications (C++).Import following files to
src:common/*apps/mmult/cpu/Host.cppapps/mmult/fpga/hls/MMult.h
Right click the project and select C/C++ Build Settings. Click ARM v8 Linux g++ linker \(\rightarrow\) Libraries. Add
xilinxopenclas shown below.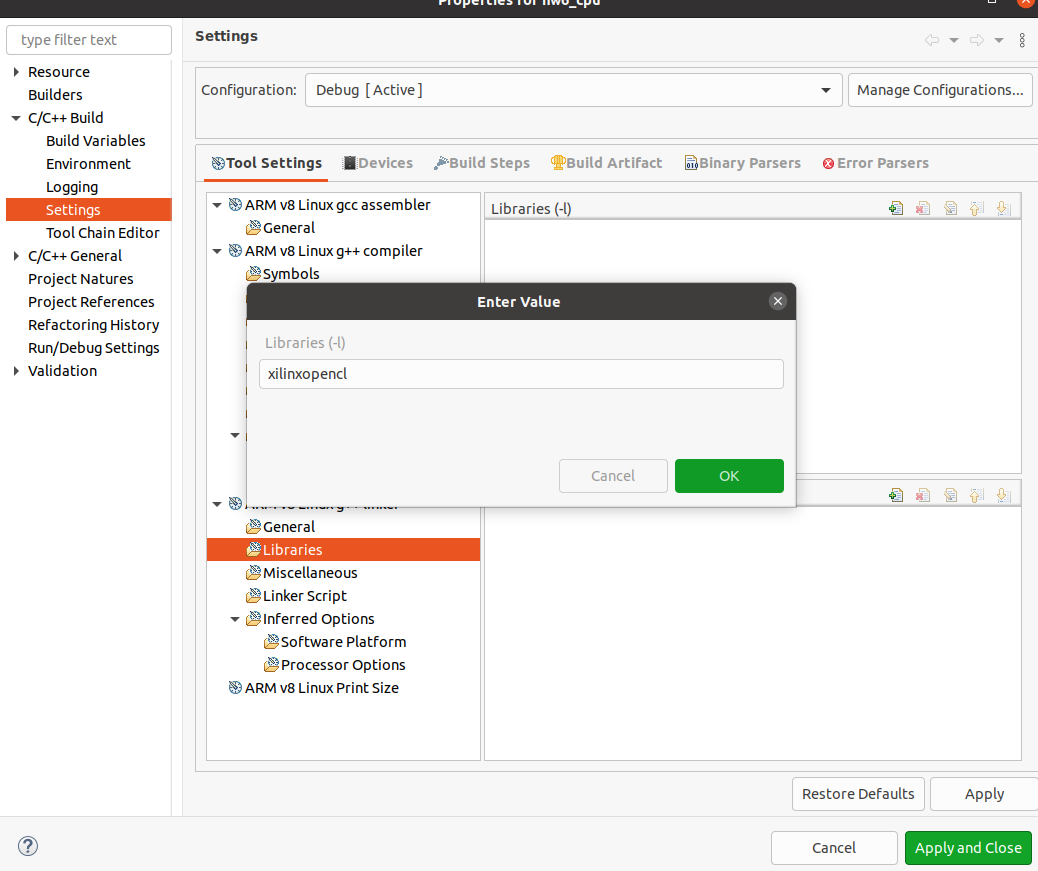
Fig. 6.1 Add linker flag
Right click the project and select C/C++ Build Settings. Click ARM v8 Linux g++ compiler \(\rightarrow\) Optimization. Set to O3.
Build the project. You will see
.elfcreated in Debug folder.
Next, we will create FPGA version’s project.
Right click the white space in the Project Explorer view, then New \(\rightarrow\) Application Project. Set the name of the project as hw6_fpga. When selecting Templates, select SW acceleration templates \(\rightarrow\) Empty Application.
For the kernel
src, import following files:apps/mmult/fpga/hls/MMult.happs/mmult/fpga/hls/MMult.cpp
For the host
src, import following files:common/*apps/mmult/fpga/Host.cppapps/mmult/fpga/hls/MMult.h
In kernel project, add
mmult_fpgato the Hardware Functions.Select Hardware in Active build configuration on the upper right corner. Your project should look something like below.

Fig. 6.2 Add hardware function and set the build configuration to Hardware
In the Assistant view on the lower left corner, you will see Hardware is bolded as shown in Fig. 6.2. Right click it and build the project. It will take about 30 minutes. If you are run out of disk space, we recommend you to remove sd card image generated in HW5.
Like we did in HW5, copy the related files in
package/sd_carddirectory to Ultra96’s/mnt/sd-mmcblk0p1/and typereboot. Enable the ethernet connection usingifconfig. Next,scpthe.elffile generated from CPU version.